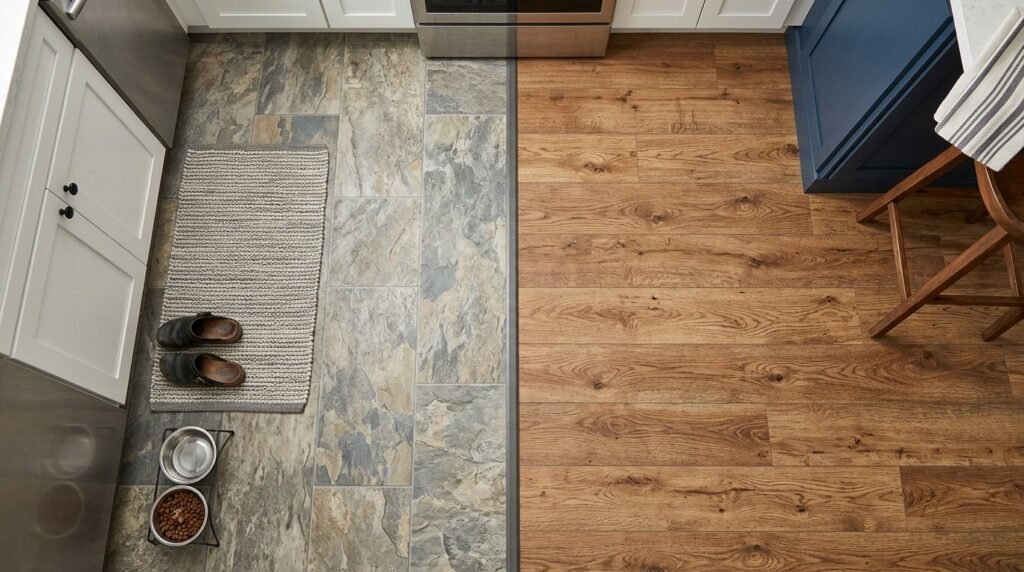
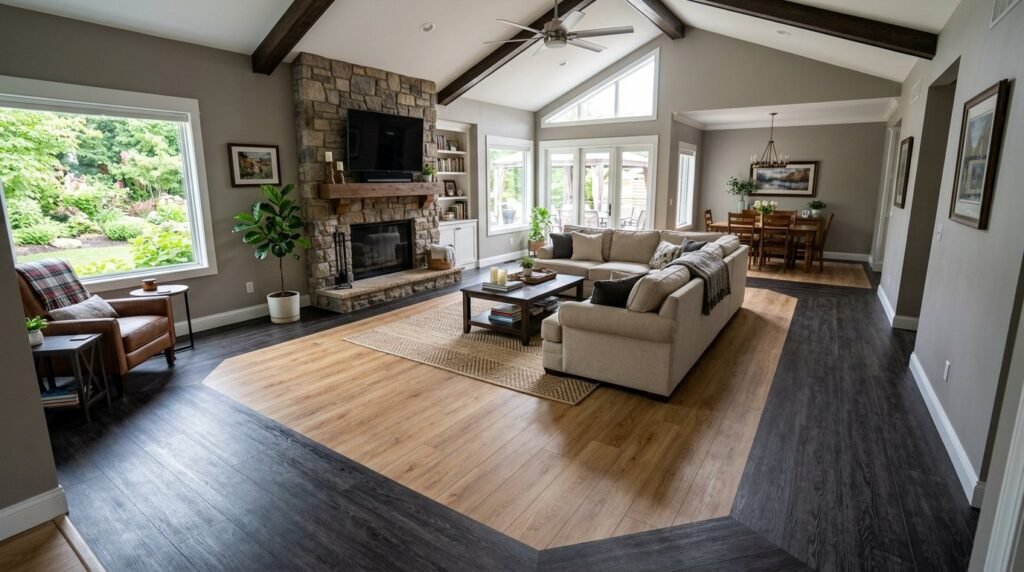
Ripping up carpet often reveals a subfloor that looks like a crime scene, and the $5,000 quote for professional hardwood can feel like a punch to the gut. I remember staring at my own stained concrete two years ago, wondering if I could actually pull off a DIY 22 Vinyl Flooring Hacks for a Cheap Home Makeover without it looking like a cheap motel. Most people assume high-end looks require high-end bank accounts, but the reality is that vinyl is the ultimate equalizer for budget renovators. In my experience, the difference between a floor that looks plastic and one that looks premium comes down to the installation strategy rather than the price per square foot. This guide provides the exact roadmap to transform your space for a fraction of the cost of traditional materials.
Executive Summary
This guide delivers 22 actionable strategies to overhaul your home flooring while keeping costs under $2 per square foot. You will discover how to navigate subfloor challenges, master advanced layout patterns like herringbone on a budget, and use overlooked tools to ensure a professional finish. We cover everything from apartment-friendly temporary fixes to permanent waterproof solutions for high-traffic kitchens. While we intentionally exclude high-cost professional leveling services, we provide DIY workarounds that save hundreds. By the end of this article, you will have a clear timeline and budget for a flooring project that looks like a custom installation.
1. Peel and Stick
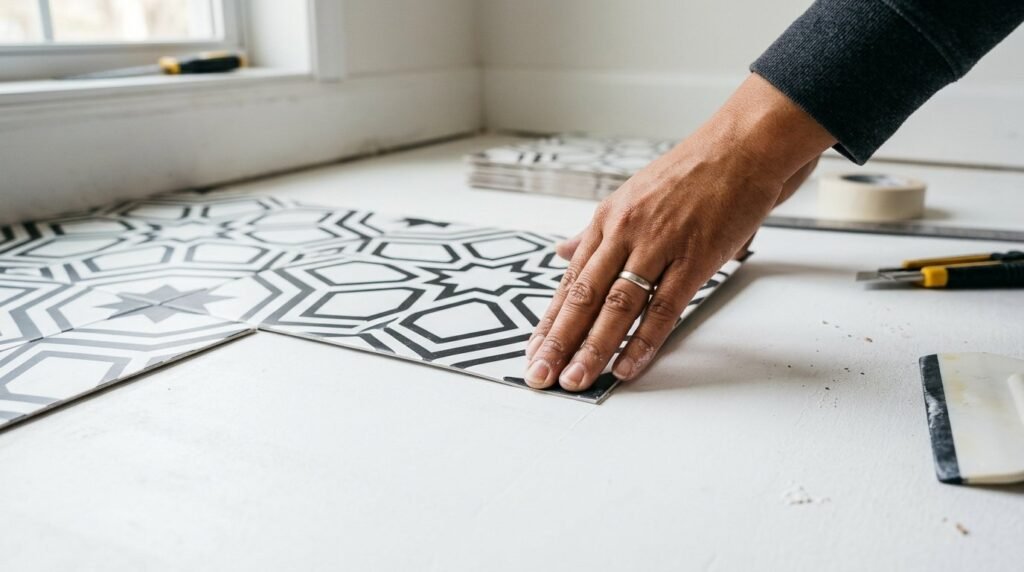
Peel and stick tiles are the fastest way to hide a dated bathroom floor without removing the original surface. I’ve seen homeowners use FloorPops in the “Enzo” pattern to completely refresh a 50 square foot powder room for less than $60 in under two hours.
To make this work:
- Ensure your existing tile is scrubbed with TSP (trisodium phosphate) to remove every trace of grease.
- Don’t skip the extra adhesive: Even “self-adhesive” tiles often need a thin coat of Henry 440 to stay put long-term.
2. Proper Subfloor Prep
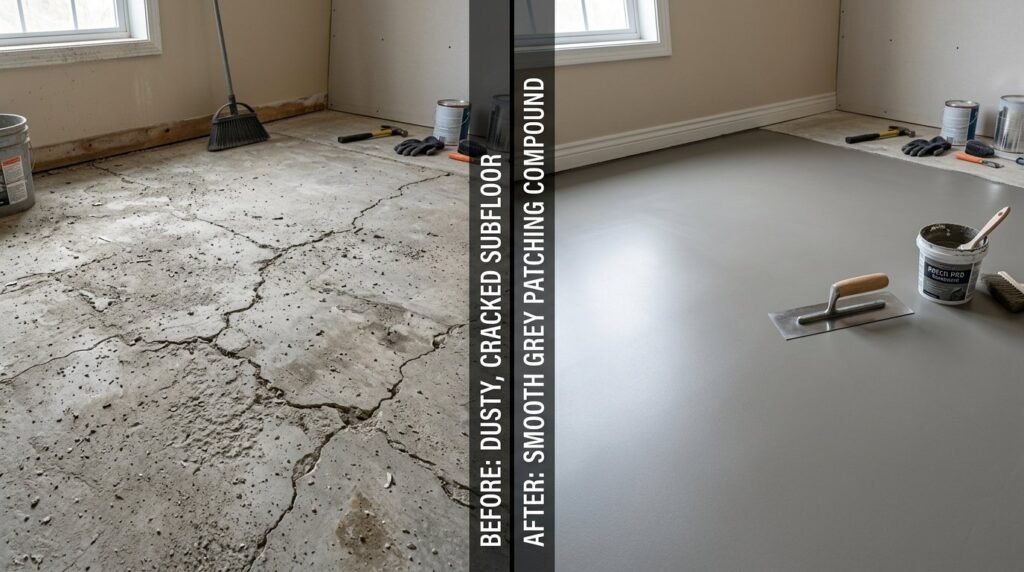
Your new floor is only as good as what lies beneath it. Any tiny pebble or debris will eventually “telegraph” through thin vinyl, creating visible bumps.
- Use a shop vac to clear every speck of dust.
- Run your hand across the surface to feel for protrusions.
- For concrete floors, use Henry 547 Patch to smooth out dips or cracks wider than 1/4 inch.
Pro Tip: Many beginners ignore small bumps, which leads to “bubbles” in the vinyl within six months. This extra $20 in prep prevents the vinyl from cracking under furniture weight.
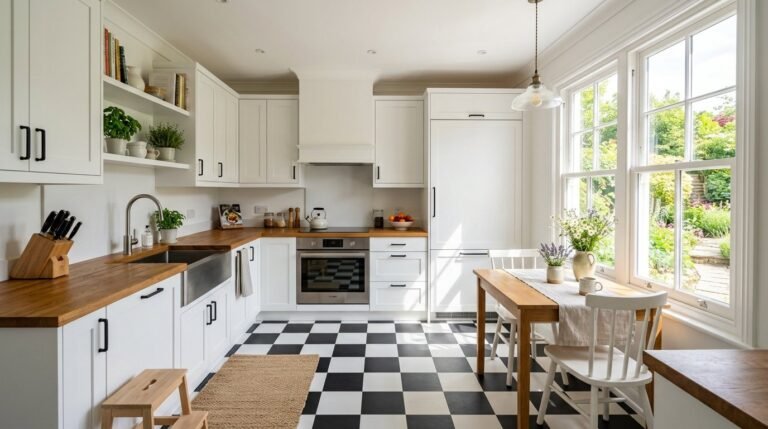
3. Layout Direction
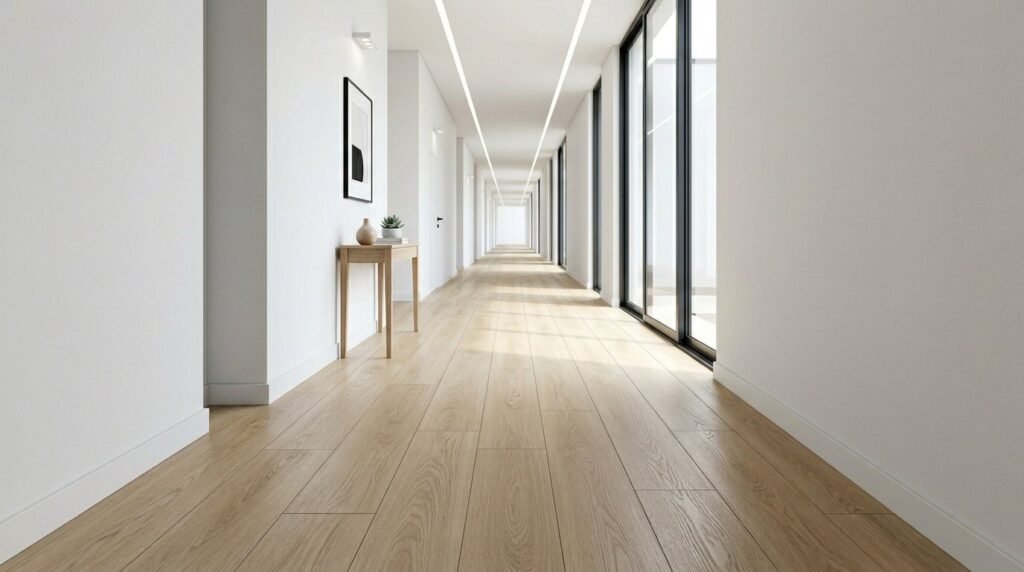
Running planks parallel to the longest wall makes a small space feel significantly larger and reduces the number of cuts needed. In a narrow hallway, laying the vinyl lengthwise creates a seamless flow that guides the eye toward the light source.
Avoid laying planks perpendicular to the main doorway, as this creates a “choppy” visual effect that screams DIY. A professional trick is to dry-lay three rows first to see how the light hits the seams before committing to the adhesive.
4. Staggered Seams
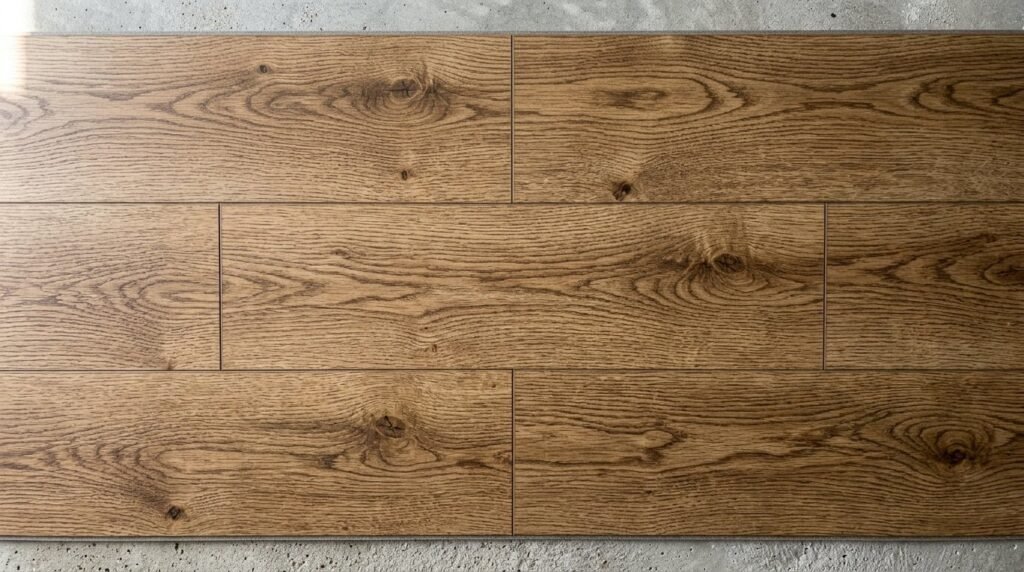
To avoid a grid-like pattern that looks artificial, always stagger your plank ends by at least six inches.
- The “Three-Tier” Stagger: Start rows with a full plank, a two-thirds plank, and a one-third plank.
- This mimics the random growth of real wood and hides slight alignment errors.
- Never align the end joints of adjacent rows; this creates a structural weak point in the flooring.
5. Cutting Techniques
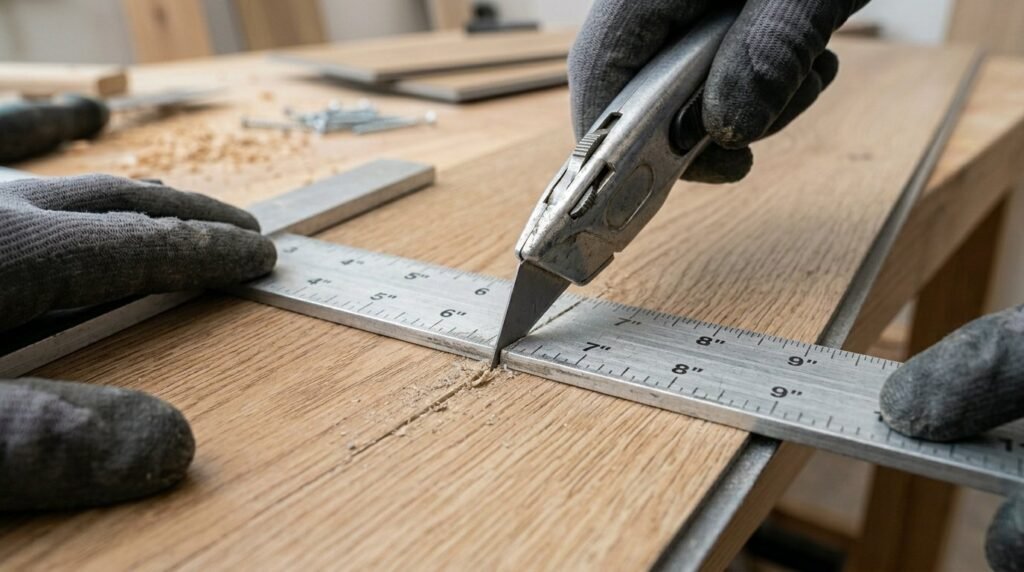
You do not need a powered saw to install luxury vinyl plank. A heavy-duty utility knife and a T-square are your best friends.
- Score the top wear layer twice with a fresh blade.
- Bend the plank backward until it snaps cleanly along the line.
- For complex cuts (like door jambs), use a contour gauge.
Avoid using dull blades, which can shred the decorative film layer and leave white, jagged edges.
6. Plank Wall Accents

Vinyl planks are not just for walking; they make incredible, lightweight accent walls. Use a construction adhesive like Liquid Nails FuzeIt to secure planks to drywall for a rustic headboard.
- Cost: Usually less than $40 for a queen-sized area using leftovers.
- Method: Start from the ceiling and work down so partial planks end up hidden behind furniture.
- Note: Look for the thinnest, lightest planks available to reduce the load on your wall.
7. Vinyl Stair Treads
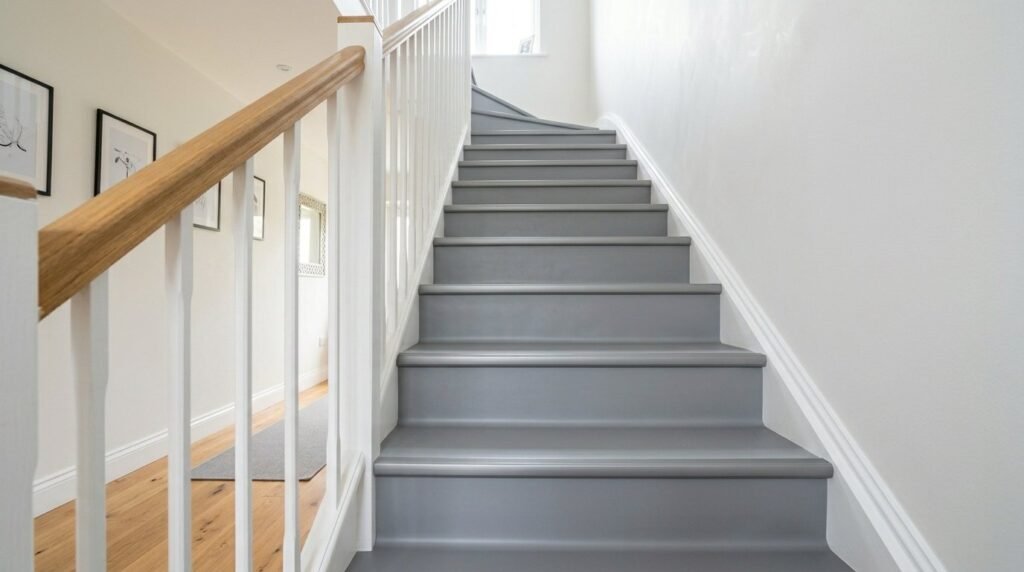
Replacing carpeted stairs with vinyl is a high-impact upgrade. You can buy matching “stair nose” pieces from brands like LifeProof to create a finished edge.
- Budget: Expect to spend about $25 per step.
- Tool Tip: Use a miter box for the nose pieces to ensure the corners are perfectly square.
- Warning: A common failure point is not using enough adhesive on the overhang, which creates a tripping hazard if the trim becomes loose.
8. Pattern Layering
Creating a “rug” effect with contrasting vinyl patterns can define a dining area in an open-concept space. Use a dark oak plank for the main floor and a light grey stone-look tile for the area under the table.
- Use a metal transition strip at the seam to ensure the different thicknesses don’t create a lip.
- Avoid using more than two patterns in one room to keep the space from feeling cluttered.
Vinyl Product Comparison
| Product Type | Average Cost/Sq Ft | Best Use Case | Durability Rating |
| Peel & Stick Tiles | $1.20 | Bathrooms/Rentals | Moderate |
| Loose Lay Sheet | $0.90 | Laundry Rooms | High |
| Glue-Down Plank | $1.50 | High Traffic Areas | Very High |
| Click-Lock LVP | $2.20 | Full Home Renovation | Professional Grade |
| Luxury Vinyl Tile | $3.00 | Kitchens/Mudrooms | Highest |
9. Transition Strips
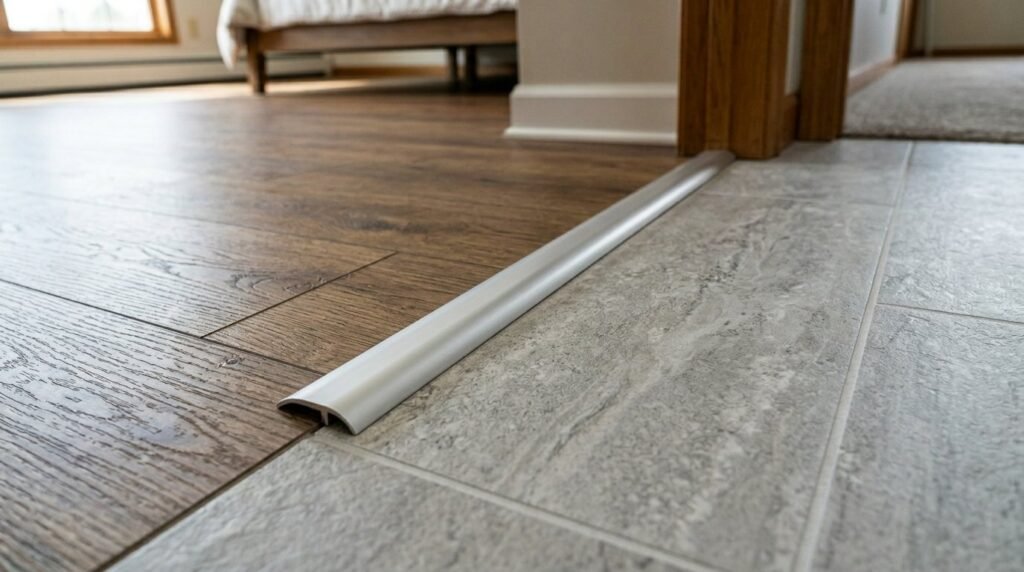
Transitions between rooms are where most DIY projects look unfinished. Investing in a T-molding is essential. Choose a strip that matches your flooring color exactly to create a seamless visual transition.
- These strips usually snap into a track screwed into the subfloor.
- Gap Rule: Don’t butt planks up against each other; they need a 1/4 inch gap for expansion that the strip will cover.
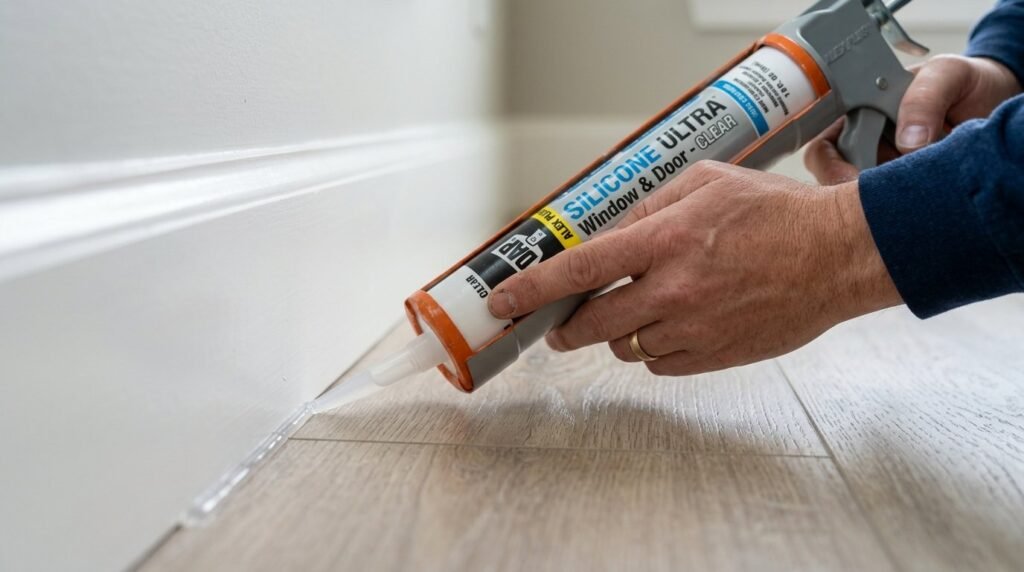
10. Waterproof Sealing
In kitchens and bathrooms, apply a thin bead of 100% silicone caulk around the perimeter of the vinyl before installing baseboards.
- This creates a “bathtub-like” seal that prevents spills from seeping under the floor and causing mold.
- Product: Use GE Silicone II in clear so it remains invisible.
- Avoid: Never use acrylic caulk; it will crack and pull away as the floor shifts over time.
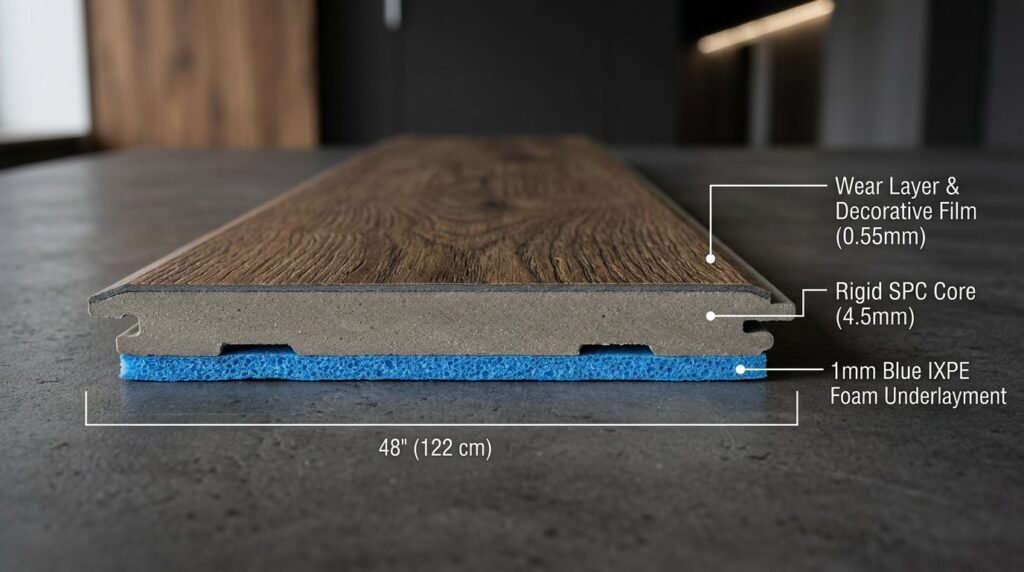
11. Underlayment Choice
If you are installing over a cold concrete basement floor, a 1mm foam underlayment (like QuietWalk) provides thermal insulation and sound dampening.
- Cost: Around $0.50 per square foot.
- Check First: Check if your vinyl has a pre-attached pad. Adding a second layer of foam can actually cause the locking mechanisms to break.
12. Heat Gun Molding
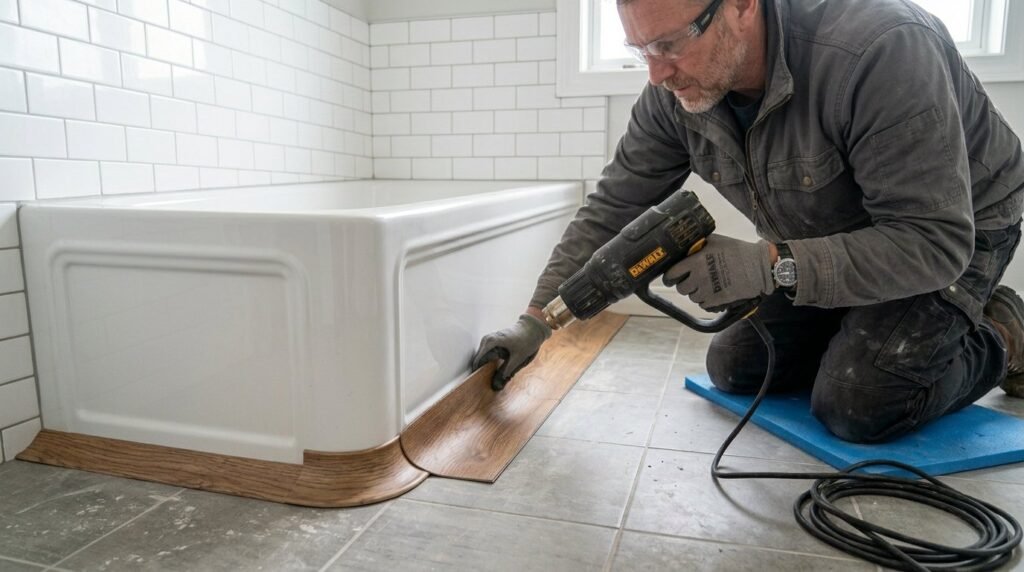
When dealing with curved walls or rounded bathtub bases, a cheap heat gun can soften vinyl planks enough to bend them.
- Warm the plank evenly for 60 seconds.
- Gently press it against the curve until it cools into shape.
- Be careful not to hold the heat in one spot too long, or you might melt the decorative layer.
13. Patchwork Aesthetics
For a bohemian look, mix three different shades of the same brand of vinyl plank. By buying “open box” or clearance planks of different colors, you can often cut material costs by 40%.
- Crucial: Ensure the locking systems are identical across all boxes.
- Note: This style is polarizing—avoid it if you plan to sell the house within the next year.
14. Custom Paint Overlay
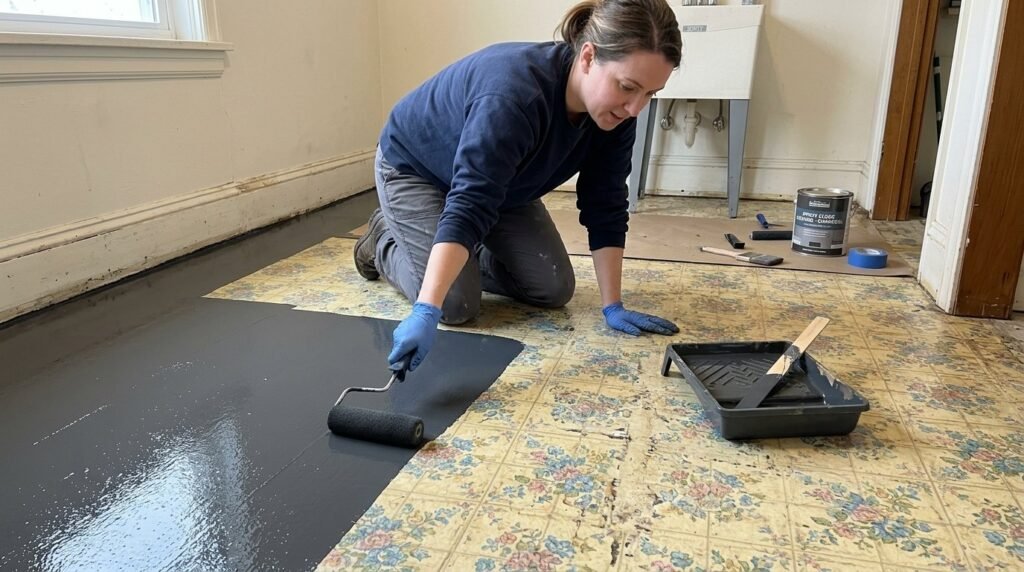
If you have existing sheet vinyl that is structurally sound but ugly, paint it using a specialized floor epoxy like Rust-Oleum RockSolid Home.
- Cost: Under $100 for a kitchen.
- Process: Requires thorough sanding, a specific primer, and a topcoat.
- Cure Time: It takes about 48 hours to fully cure before you can walk on it.
15. Grout Mimicry
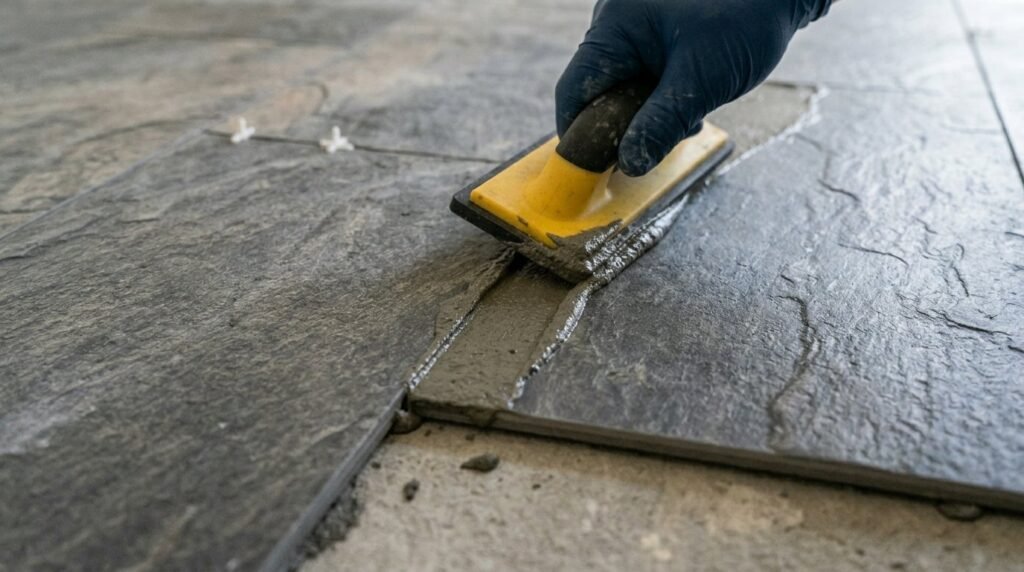
Some luxury vinyl tiles (LVT) are designed to be installed with actual grout. Use a pre-mixed acrylic grout like Mapei Flexcolor CQ, which won’t crack or stain like cement grout.
- This creates a high-end finish that is much warmer underfoot than real ceramic tile.
- Use plastic spacers to keep your lines perfectly straight.
16. Border Framing
Install a “border” row of planks around the perimeter of the room before filling in the center for a custom-built, rug-like appearance.
- You will need a miter saw to get the 45-degree angles perfect at the corners.
- Buy an extra box of material, as this technique requires about 10% more waste.
17. Furniture Leg Protection
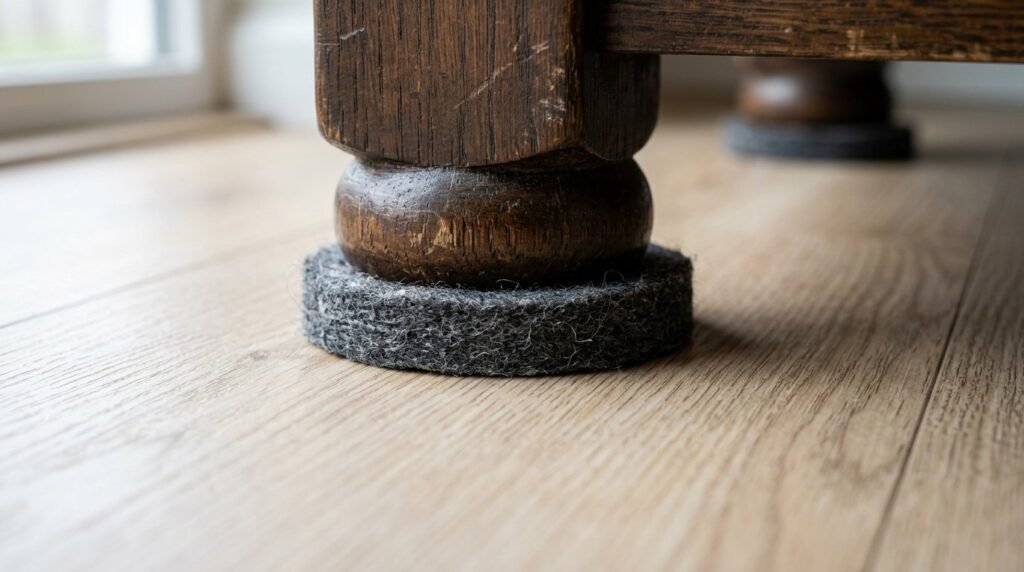
Vinyl is durable, but heavy furniture can leave permanent indentations.
- Spend $15 on heavy-duty felt pads (like GorillaGrit) for every piece of furniture.
- For rolling office chairs, a polycarbonate mat is essential to prevent the wheels from grinding down the wear layer.
18. Scuff Removal
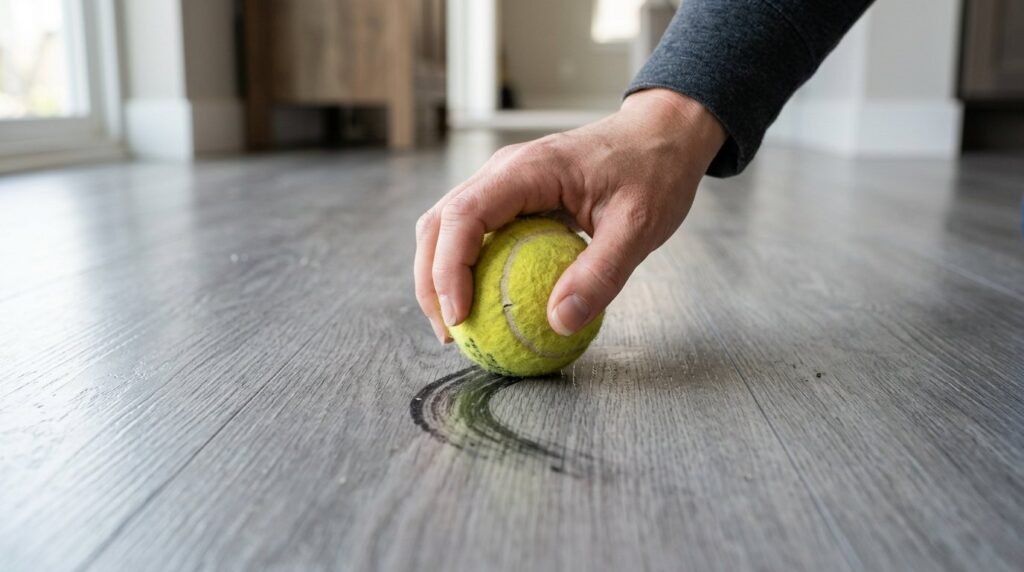
Black rubber scuffs can usually be removed with a tennis ball or a melamine sponge (Magic Eraser).
- Daily Cleaner: A mixture of one cup of white vinegar to a gallon of warm water is best for maintaining shine.
- Avoid: “Mop and glow” products build up a waxy film that eventually turns yellow and attracts dirt.
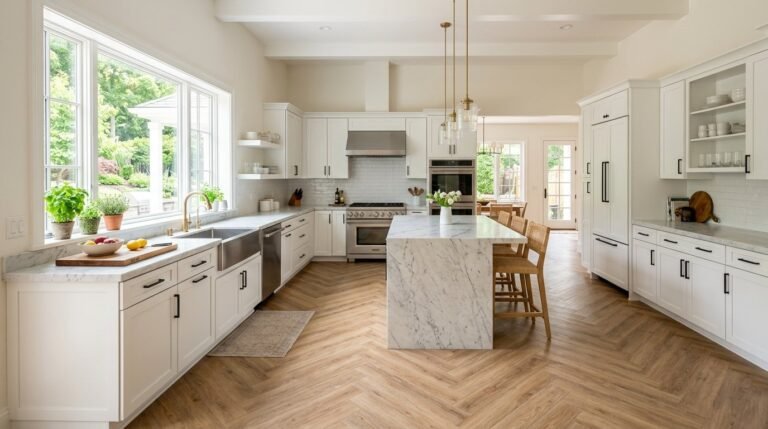
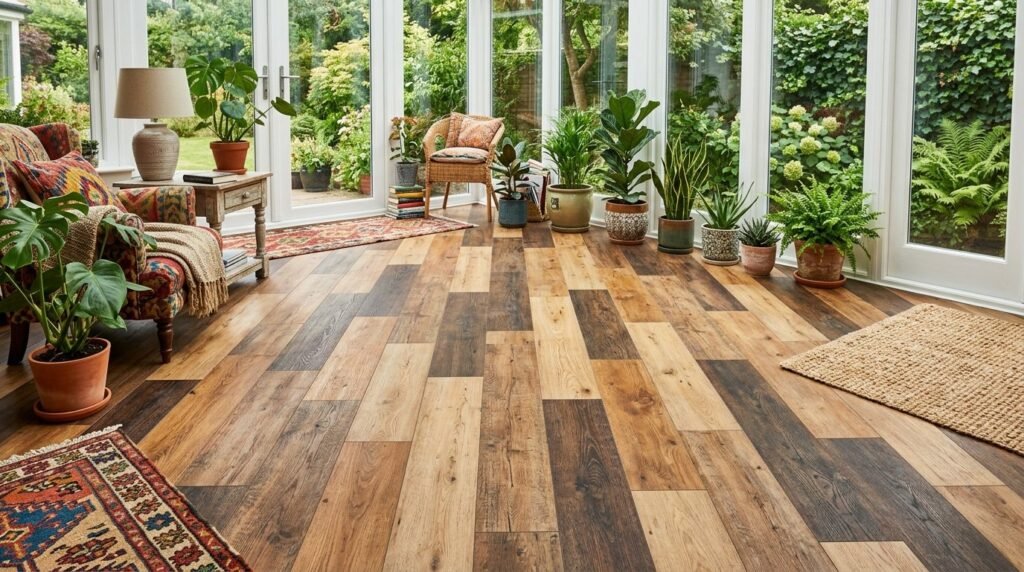
19. Plank Orientation

In rooms with lots of natural light, lay the planks so the long seams run toward the windows. This prevents sunlight from catching the edges and highlighting slight height differences. This single decision can make a budget floor look like it was installed by a master carpenter.
20. Seasonal Acclimation
Vinyl planks expand and contract with temperature. They must sit in the room where they will be installed for 48 hours before you start.
- Leave the boxes open and flat.
- Skipping this can cause the floor to “buckle” or gaps to open up when the seasons change.
21. Maintenance Habits
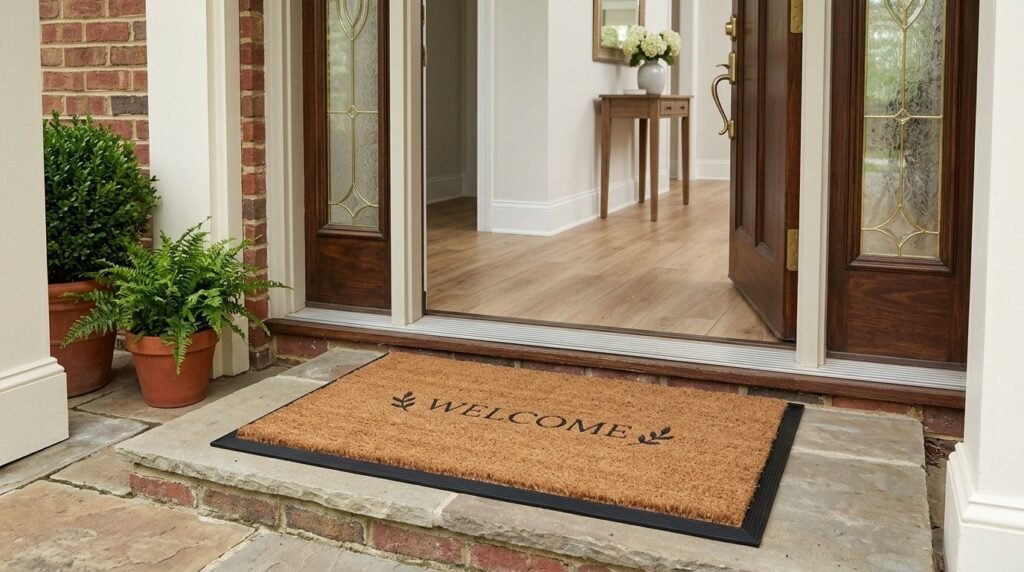
Place high-quality walk-off mats at every exterior door. Sand and dirt act like sandpaper on the clear wear layer of your floor.
- Pro Tip: Use a “double mat” system—a rough coir mat outside and a soft microfiber mat inside.
- Caution: Check the backing of your rugs; rubber-backed mats can chemically react with vinyl and cause permanent yellowing.
22. Mindful Reselling
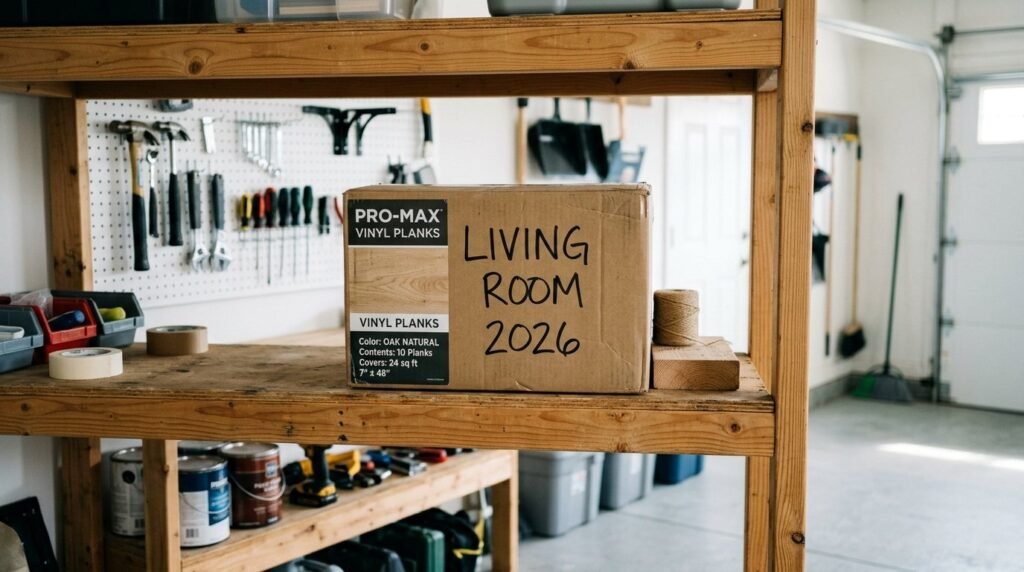
Keep one full box of leftover planks in your attic or garage. Since vinyl dye lots change frequently, you will likely never find a perfect match three years from now. Label the box with the brand, color name, and date of installation to add massive value for future repairs.
Frequently Asked Questions
Can I install vinyl flooring over carpet?
No, you cannot install vinyl over carpet. Vinyl needs a solid, flat surface to maintain its structural integrity. Carpet is too soft and will cause the locking mechanisms of the planks to flex and eventually snap. You must remove the carpet and the padding, then ensure the subfloor is clean and level before proceeding. Removing carpet is a dusty job, but it is the only way to ensure your new floor lasts more than a few months.
How do I fix a gap between vinyl planks?
If a gap opens up, you can often fix it without pulling up the whole floor. Clean the gap thoroughly with a vacuum, then apply a small piece of double-sided tape to a scrap piece of flooring. Use the scrap as a “pull block” by sticking it to the plank you want to move and tapping it gently with a mallet toward the gap. This slide-and-lock method is a lifesaver for small shifting issues.
Is vinyl flooring really waterproof?
Most modern luxury vinyl planks (LVP) are 100% waterproof, meaning the material itself won’t swell or rot if submerged. However, the seams are not always watertight. Water can still seep through the cracks and damage your wooden subfloor or cause mold growth underneath. In high-moisture areas like bathrooms, you should still use a perimeter sealant to prevent water from getting under the planks.
Do I need a professional to level my concrete floor?
For minor dips (less than 1/8 inch), you usually don’t need a professional. You can use a self-leveling underlayment or a patch compound yourself. However, if your floor has a major slope or a “hump” larger than 1/2 inch, a professional might be needed to avoid a bouncy floor. For most DIY vinyl hacks, a few bags of floor patch and a long straightedge are enough to get the job done.
How long does a vinyl home makeover last?
With proper care and a decent wear layer (at least 12mil), a vinyl makeover can easily last 15 to 20 years. High-end LVP can last even longer. The key is preventing scratches from dirt and furniture. If you choose a timeless wood-look pattern, the floor will likely stay in style much longer than the material itself lasts.
Can I put heavy appliances on vinyl?
Yes, but you must be careful. When moving a refrigerator or stove onto new vinyl, always use “air sleds” or lay down sheets of 1/4 inch plywood to roll the appliance over. Once in place, the weight is usually fine, but the act of sliding the heavy metal feet across the floor will almost certainly cause deep gouges.
Does vinyl flooring increase home value?
While not as much as solid hardwood, a clean and professional-looking vinyl floor increases home value significantly more than old, stained carpet. For entry-level and mid-range homes, vinyl is actually a preferred choice for many buyers because of its durability and ease of maintenance. It provides a high “visual ROI” for a very low initial investment.
Can I install vinyl over old ceramic tile?
Yes, as long as the tile is flat and firmly bonded to the floor. You should fill in the grout lines with a skim coat of floor patch so they don’t show through the vinyl over time. This process is much easier than ripping up old tile, which is a back-breaking and messy task.
What tools do I absolutely need?
At a minimum, you need a utility knife, a T-square or straightedge, a tape measure, and a rubber mallet. A tapping block and pull bar are also highly recommended to ensure the planks are fully locked together. You can buy a “flooring installation kit” with these items for about $20 at most hardware stores.
How do I clean vinyl without streaks?
Avoid using soapy detergents or “shine” enhancers. The best way to avoid streaks is to use a microfiber mop and a dedicated pH-neutral cleaner like Bona Stone, Tile & Laminate. If you prefer a DIY solution, a very small amount of white vinegar in distilled water works well. Always dry the floor afterward if you want a streak-free finish.
Conclusion
Transforming your home doesn’t have to mean draining your savings account. By using these 22 Vinyl Flooring Hacks for a Cheap Home Makeover, you can achieve a custom, high-end look while staying within a strict budget. I’ve seen how small changes like a fresh floor can completely shift the energy of a room and make it feel like a brand new home. Whether you are tackling a small bathroom or a full living room, the key is in the preparation and the attention to detail in the layout. Save this post on Pinterest so you can refer back to the cutting and sealing tips during your project, and try at least one of these ideas in your next renovation.

Sloane Whitaker is the Editor-in-Chief at Home Wall Trends, leading editorial direction with over a decade of experience in residential interior design and home styling. Her specialty is space planning and layout, the unglamorous fundamentals that make a beautiful room actually function. A graduate of the New York School of Interior Design, Sloane has styled over 200 client homes before turning her focus to digital publishing. Her editorial standard: “If a reader can’t picture themselves doing it on a Saturday afternoon, we haven’t explained it well enough.”