Your bathroom feels crowded. You step out of the shower and bump into bottles. The sink counter holds too much stuff. You need space right now. Walls offer empty real estate. You can mount beautiful wood or glass up high. I put three oak pieces in my guest bath last month. The room instantly felt twice as big. You want a space that feels calm. Bare walls make a room feel unfinished. We will fix that visual gap today. You will spend between $20 and $150 to complete these weekend projects. Most setups take less than an hour to hang.
You will get exact costs and required tools for 22 specific setups. We cover rustic wood, clear glass, and heavy marble choices. You will read exactly how to seal wood against heavy shower steam. I share exact steps to drill through tile safely. I share my worst mistakes so you never repeat them. You will find out which brackets hold heavy bottles without bending. I detail exactly how to wash glass without leaving scratches. You get everything needed to upgrade your bare walls before the weekend ends. Grab your measuring tape and let us get started.
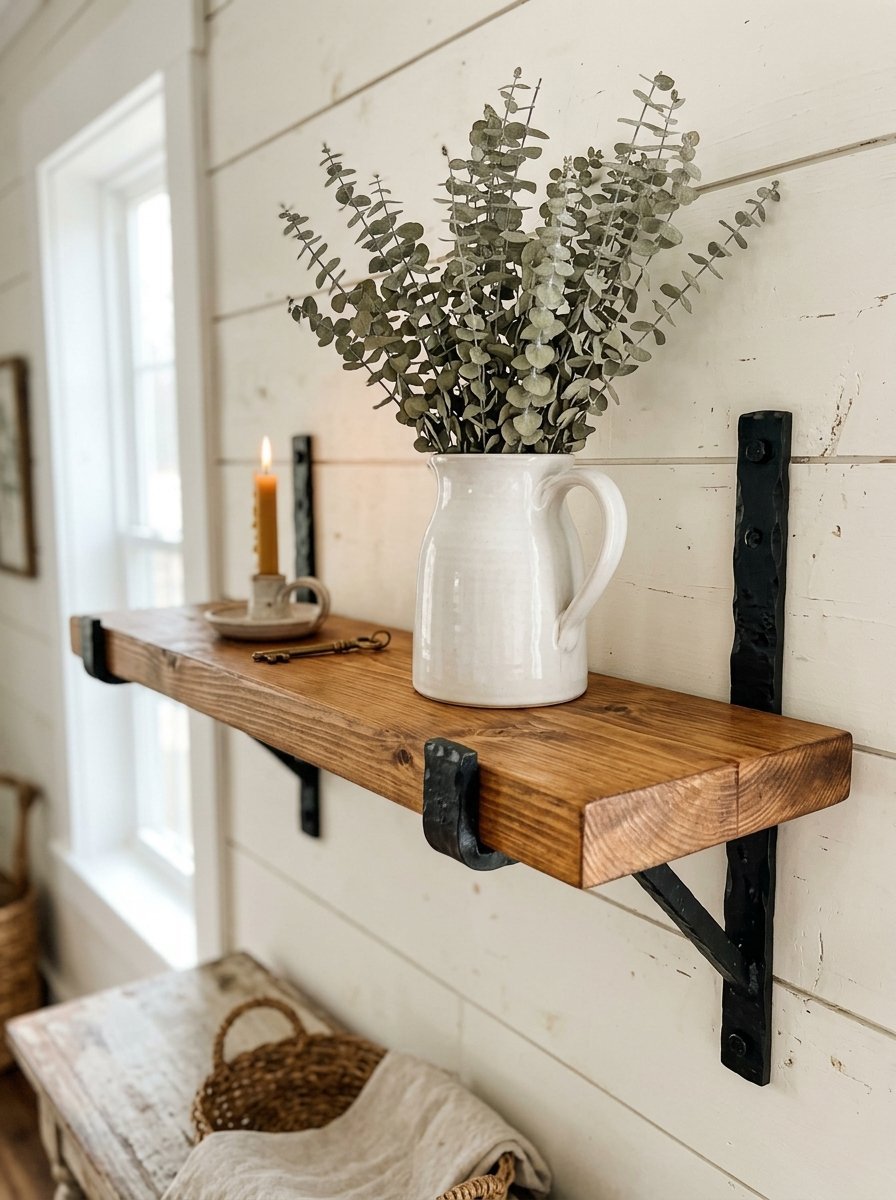
1. Reclaimed Wood Above The Toilet
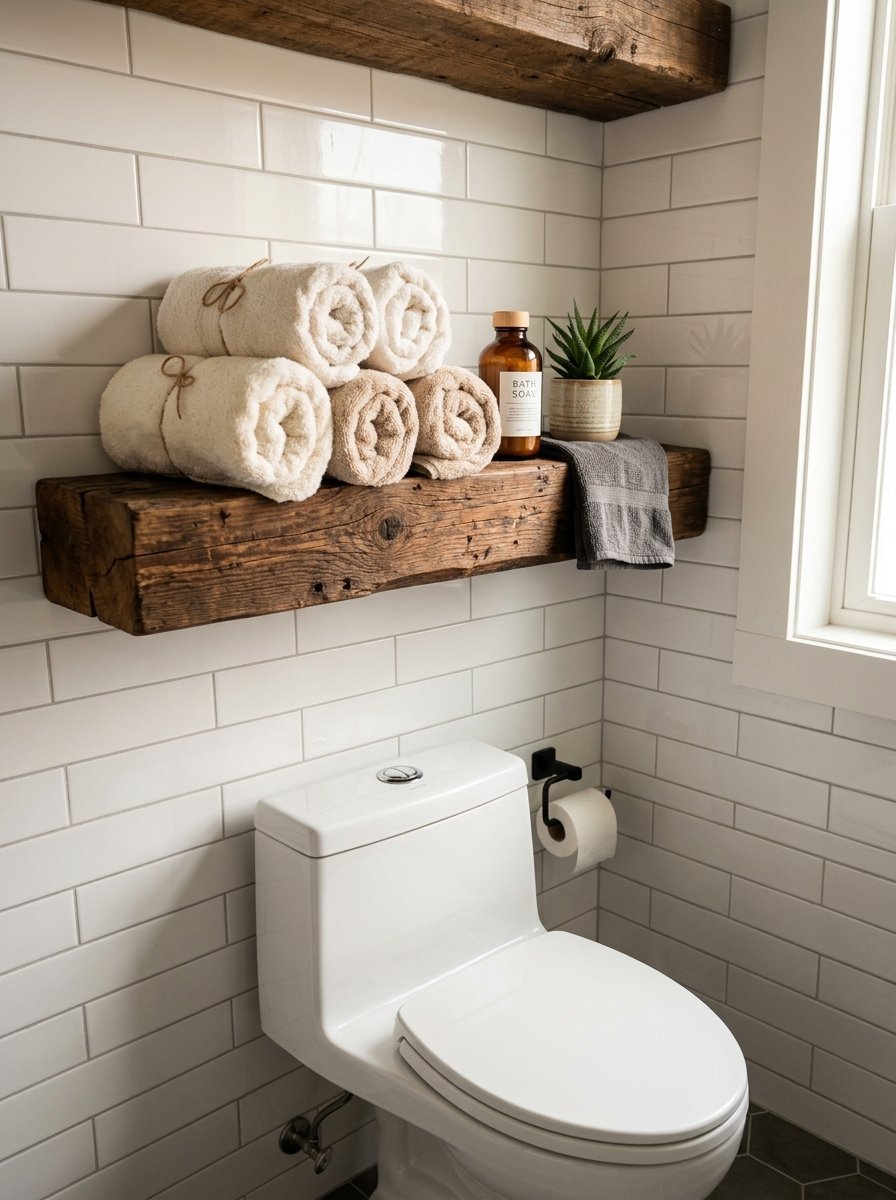
Cold tile spaces need warmth. Reclaimed wood gives rich texture to plain walls. I put two thick reclaimed planks exactly 24 inches above the toilet tank. You get a place for toilet paper and rolled towels. You must seal the wood. I saw moisture destroy a beautiful wood piece in my hallway three years ago. Bathrooms trap heavy humidity from hot showers. Buy a matte polyurethane sealer. Coat the wood three times. Let it dry for 48 hours before hanging. You will spend around $60 for the wood and $15 for the sealer. Use heavy drywall anchors holding 50 pounds each. Find the wall studs if possible. Studs keep the heavy wood from ripping through your drywall.
- Cost is $75 total
- Time to install is two hours
- Tools are a drill and stud finder
2. Clear Glass Next To Sinks
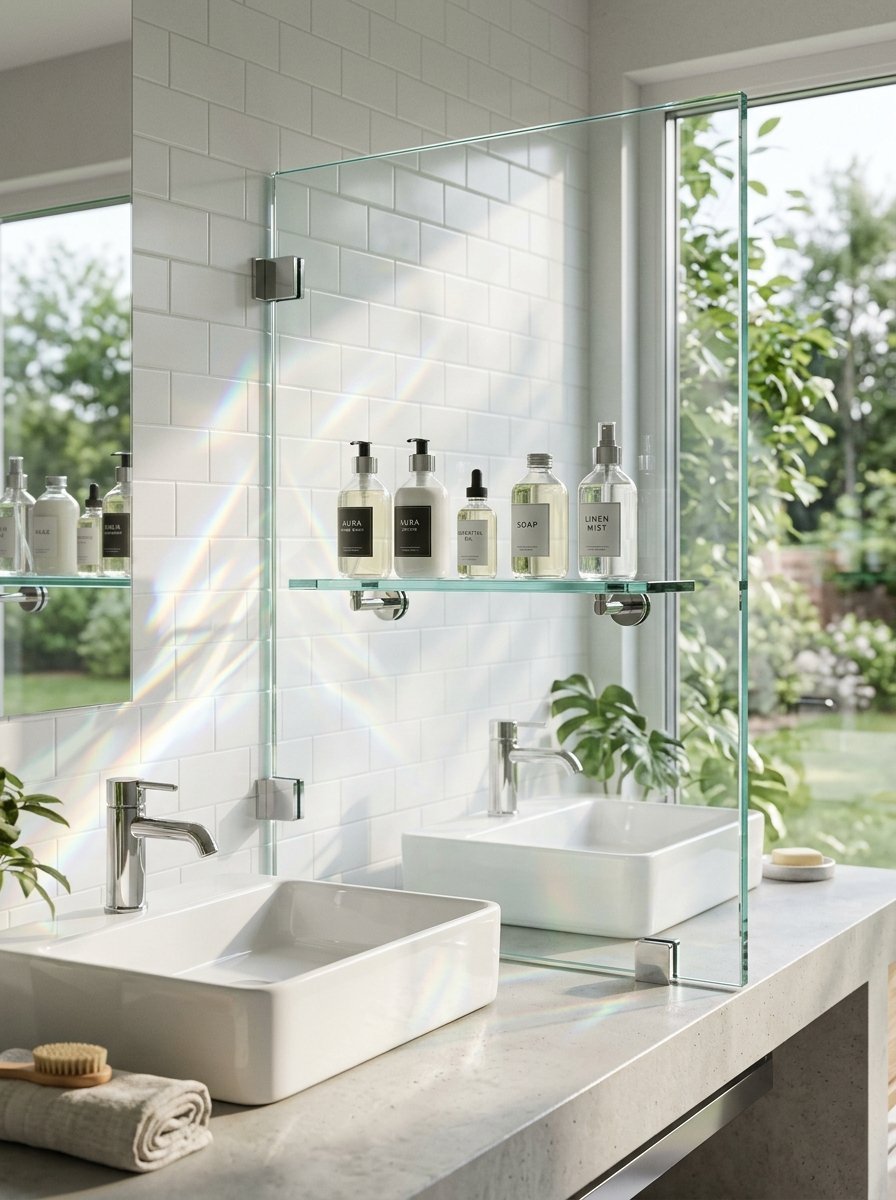
Tight spaces need clear materials. Glass reflects light and makes your room look bigger. I put chrome brackets and thick tempered glass near my sink. Tempered glass shatters into safe cubes if dropped. Never use regular window glass. I have noticed you must keep the glass extremely clean. In 2025 my mistakes left fine scratches and ugly lint behind on my mirrors. I wiped them with dry paper towels. Paper towels ruin glass over time. Wash glass pieces with a microfiber cloth and a gentle spray. Wipe in straight lines. Buy glass pieces that are three eighths of an inch thick. Thin glass bends under the weight of heavy shampoo bottles.
- Hardware costs $30
- Glass costs $40 per piece
- Weight limit is usually 20 pounds
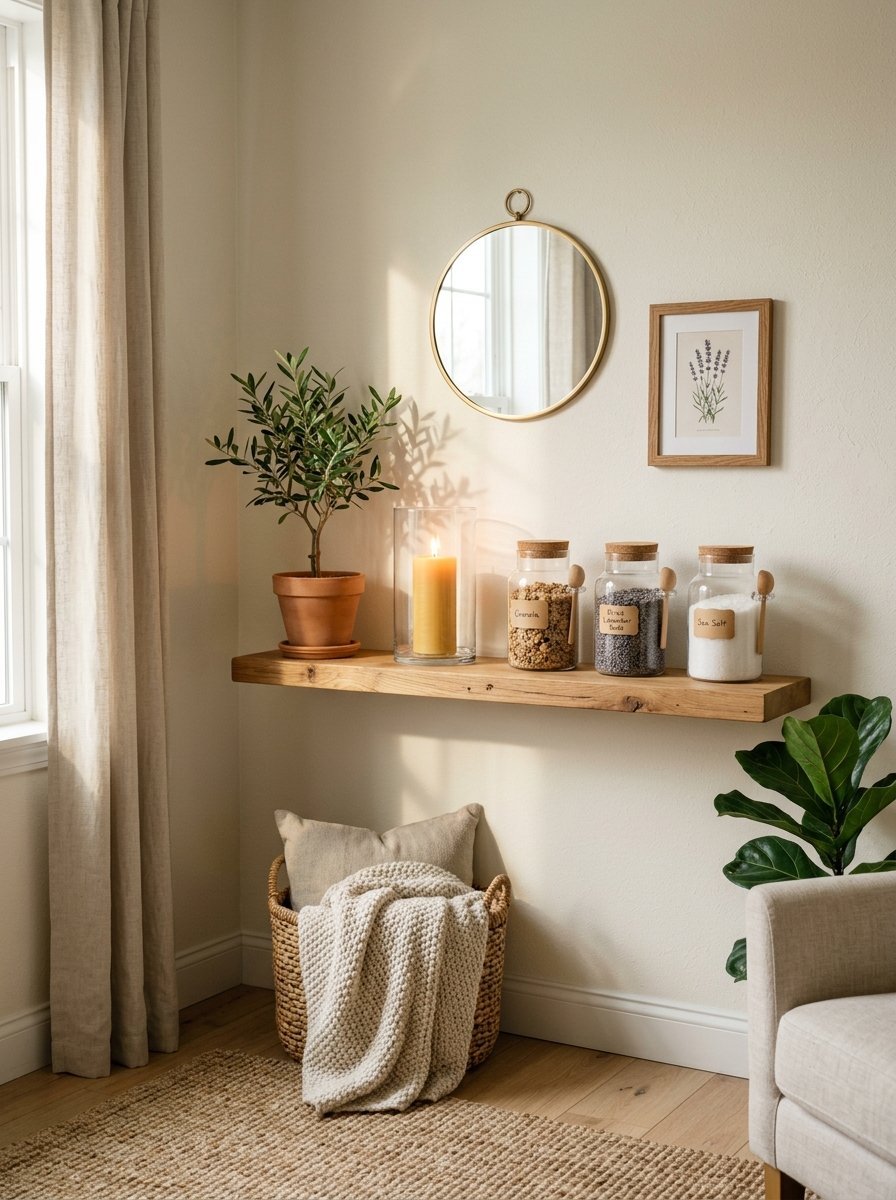
3. Picture Ledges For Art
A picture ledge features a raised front edge. This edge stops items from falling off. I rest art on these shallow pieces. You can display small oil paintings or family photos. Be careful when cleaning the frames near your sink. I once ruined a vintage gold painted frame with a vinegar spray. The acid peeled the gold paint right off the wood. Wash art frames with just water and a soft cloth. Keep the ledge low enough to see the art clearly. Mount it exactly at eye level. A four inch deep ledge holds most standard picture frames perfectly. You can change out the art every single season.
- Ledge costs $20
- Installation takes 20 minutes
- Requires small wall anchors
4. Farmhouse Pine Options
Pine offers a classic farmhouse style. It takes stain beautifully and costs very little. In my experience you must prepare it right. Early this year I threw a fresh piece of pine right into the trash. I tried to craft a farmhouse welcome sign. The wood warped because I skipped the wood conditioner. Pine absorbs stain unevenly without conditioner. Buy a cheap can of pre stain wood conditioner. Brush it on 15 minutes before your stain. The color goes on perfectly smooth. Use matte black iron brackets to hold the pine. The black metal looks great against warm wood tones. You can buy cheap pine boards at any local lumber yard.
- Pine board costs $15
- Brackets cost $25 a pair
- Stain and sealer cost $20
5. Solid Marble Thresholds
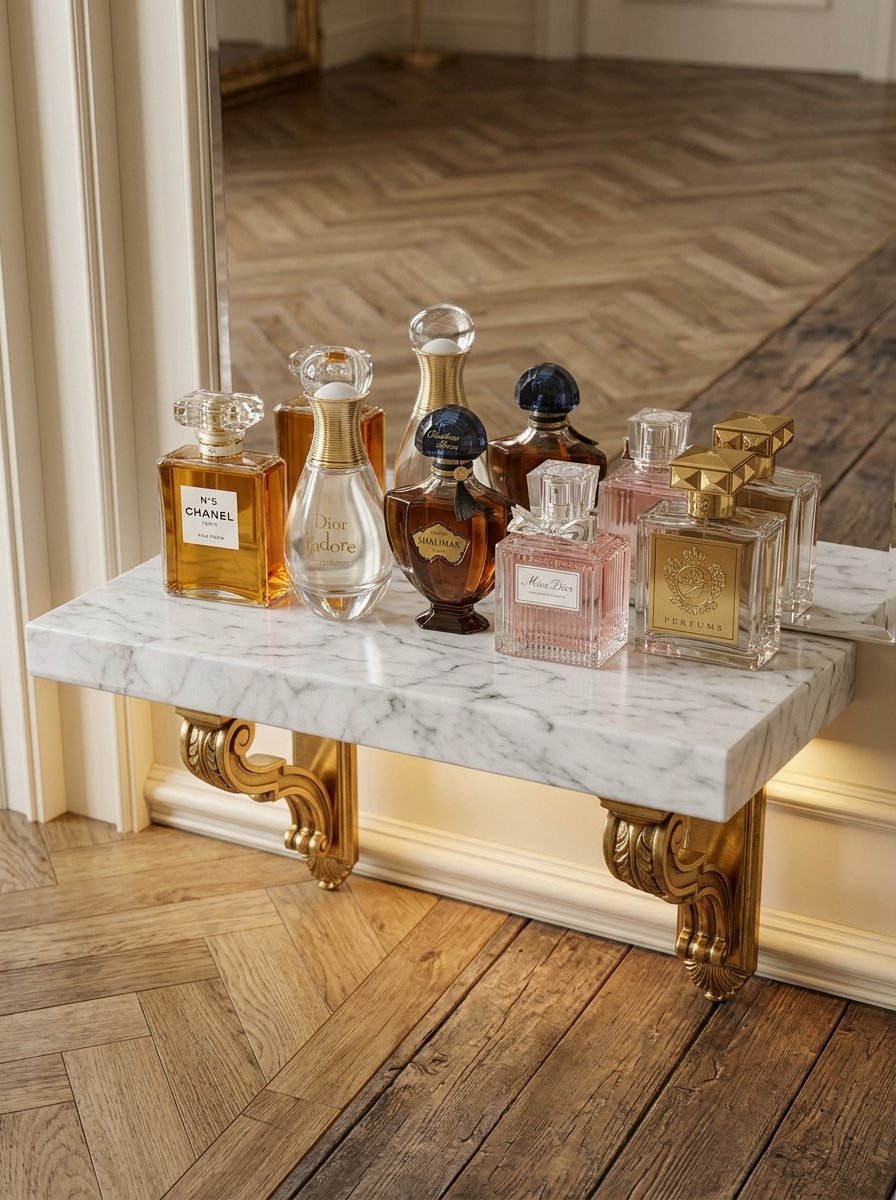
Real marble looks incredibly wealthy. I have tried many materials but marble stays unmatched. I prefer tools that keep my space looking like a true Vida De Luxo home. Marble gives you that exact feeling. The stone stays cool to the touch. It handles moisture better than any wood. You must buy solid brass or heavy steel brackets. Marble weighs a lot. A standard two foot piece weighs over 15 pounds before you put anything on it. Drill directly into your wall studs. Never use basic drywall anchors for stone. Buy pre cut marble thresholds from the tile store. They cost less than custom cut slabs and work perfectly.
- Marble threshold costs $35
- Heavy duty brackets cost $40
- Requires a masonry drill bit
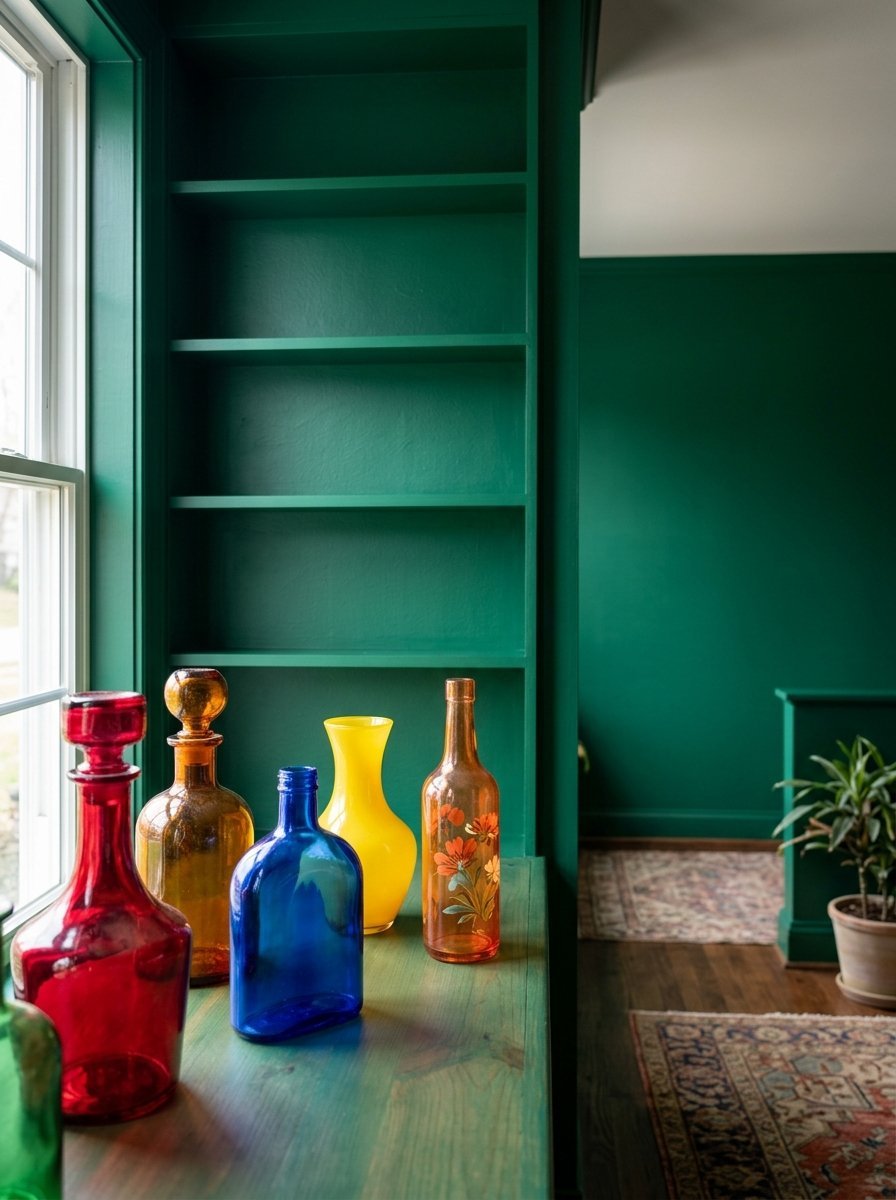
6. Transparent Acrylic
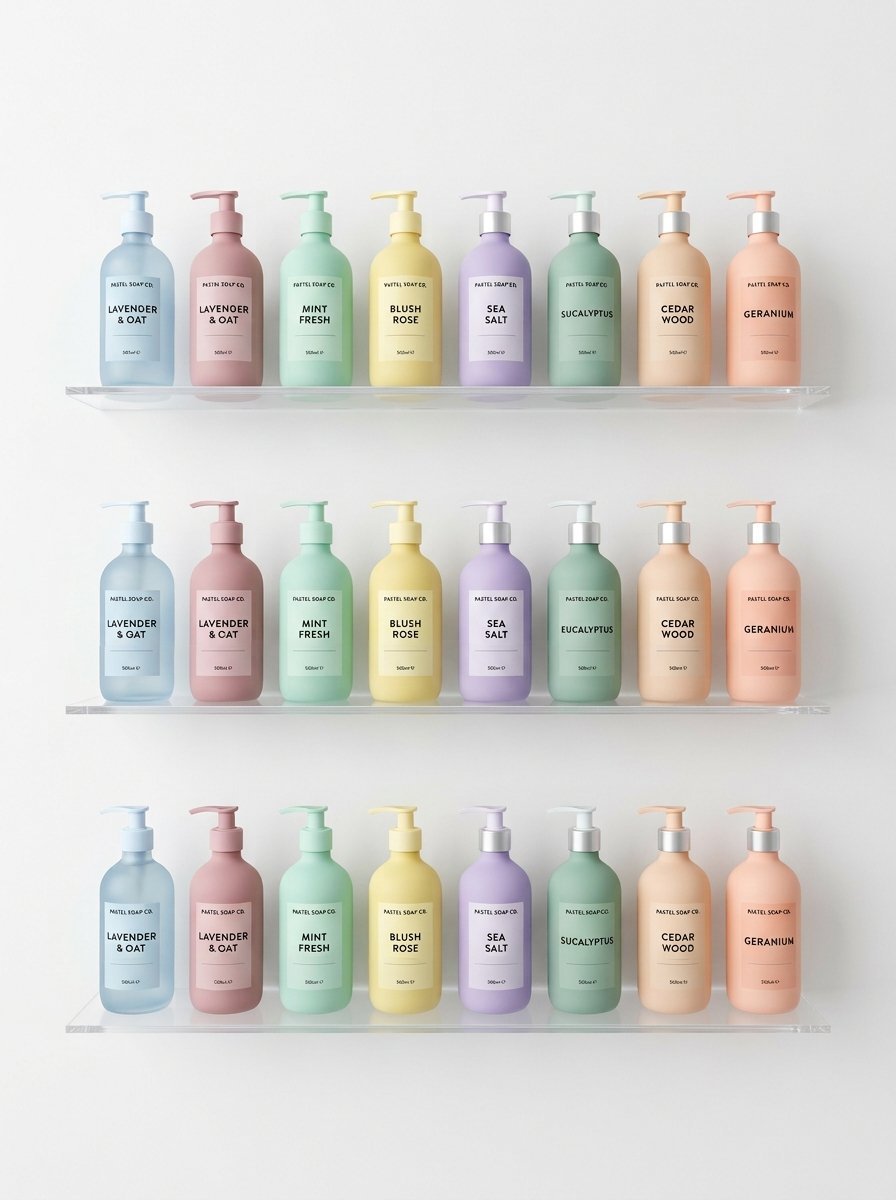
Acrylic gives you the ultimate modern feel. The plastic looks like frozen water floating on your wall. They visually disappear. Your eye only sees the items sitting on them. You see less clutter when the piece vanishes. Buy acrylic that is at least a quarter inch thick. Thin plastic sags in the middle. Clean them gently. Rough sponges scratch the soft plastic surface permanently. Mount them with clear or silver screws. The hardware should match the invisible look. Keep them away from direct sunlight. The sun turns cheap plastic yellow over a few years. Buy UV resistant pieces.
- Acrylic piece costs $25
- Takes 10 minutes to hang
- Wipe with a wet soft cloth only
7. Thick Raw Oak

Oak is a dense hardwood that lasts forever. It resists dents and handles heavy items easily. I buy rough sawn oak lumber for a natural look. You want pieces that are at least two inches thick. Thick wood looks intentional and grounded. Hide the metal hardware inside the wood. You drill deep holes into the back edge of the oak. Steel rods stick out from the wall and slide into the holes. You need a drill press to make the holes straight. Crooked holes make the piece sit at a bad angle. Buy a floating hardware kit online for the easiest setup.
- Oak lumber costs $50
- Hardware kit costs $30
- Tools needed are a drill press and level
8. Triangle Corner Cuts
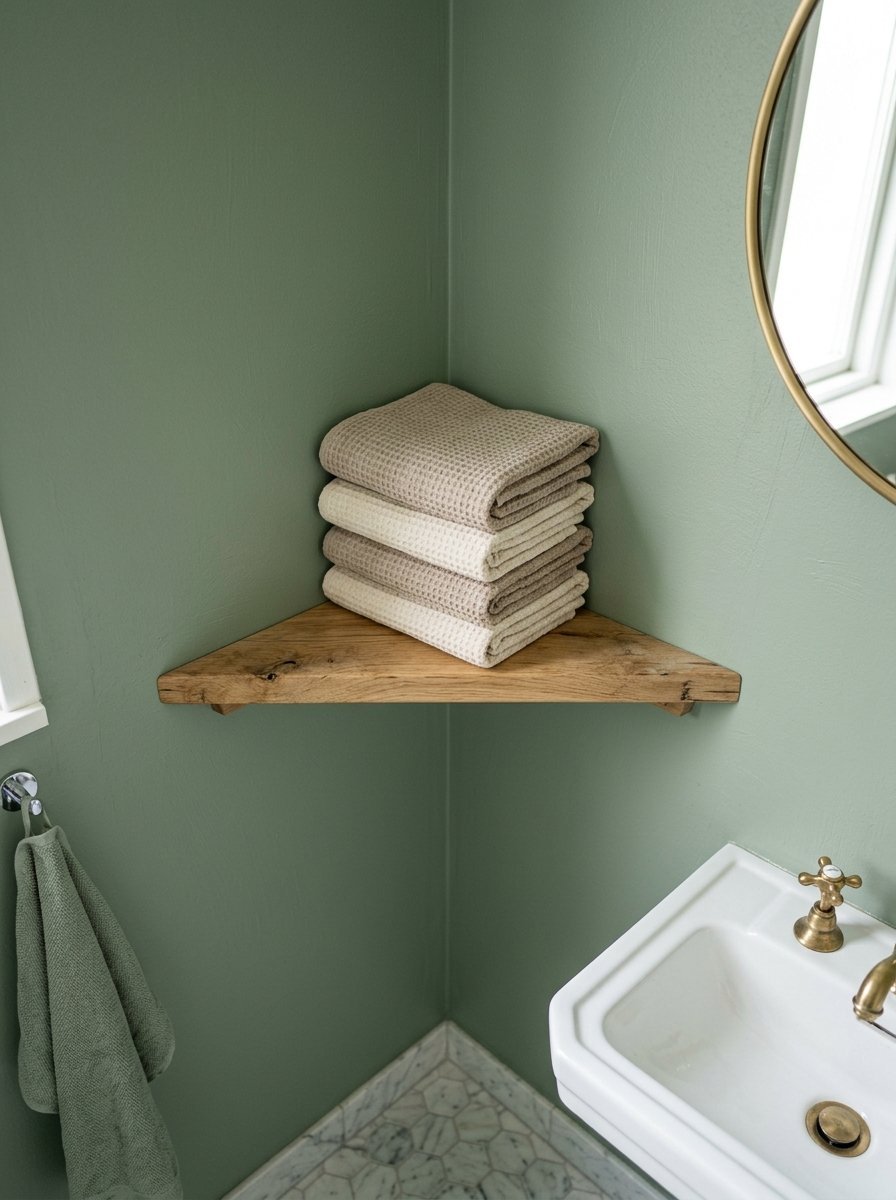
Corners often go completely empty. You turn dead space into perfect storage. Cut a piece of wood into a perfect triangle. Rest it on two small wooden cleats attached to the walls. The cleats hide right under the piece. You can stack three or four triangle cuts in one corner. This creates a tall open cabinet look. Keep the depth small. A 12 inch depth works perfectly for rolled face towels and small glass jars. Big corner pieces make the room feel cramped. Paint the cleats the exact same color as your wall.
- Wood costs $20
- Paint costs $10
- Cuts easily with a hand saw
9. Brass Front Rails
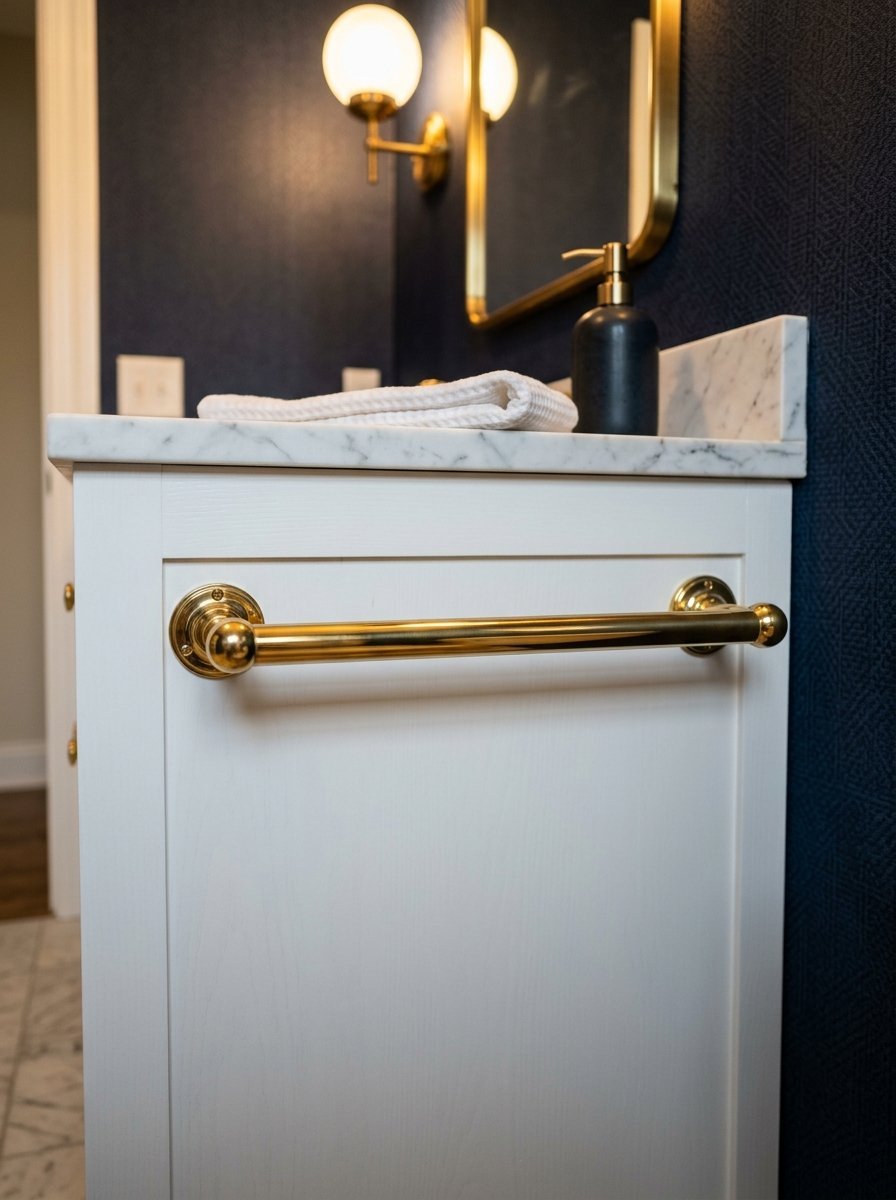
Brass hardware warms up cold tile. A simple wood piece looks totally different with a brass front rail. The metal rail stops glass jars from sliding off. I buy plain white wood and attach a brass rod to the front. You can buy brass cabinet pulls and screw them directly into the wood edge. It takes ten minutes. The brass will age over time. Bathrooms are wet places. The metal turns a slightly darker color. I love the aged look. If you hate aged metal buy lacquered brass. The clear lacquer stops the metal from changing color in the damp air.
- Plain wood costs $20
- Brass hardware costs $15
- Installation is very fast
10. Minimalist White Stacks
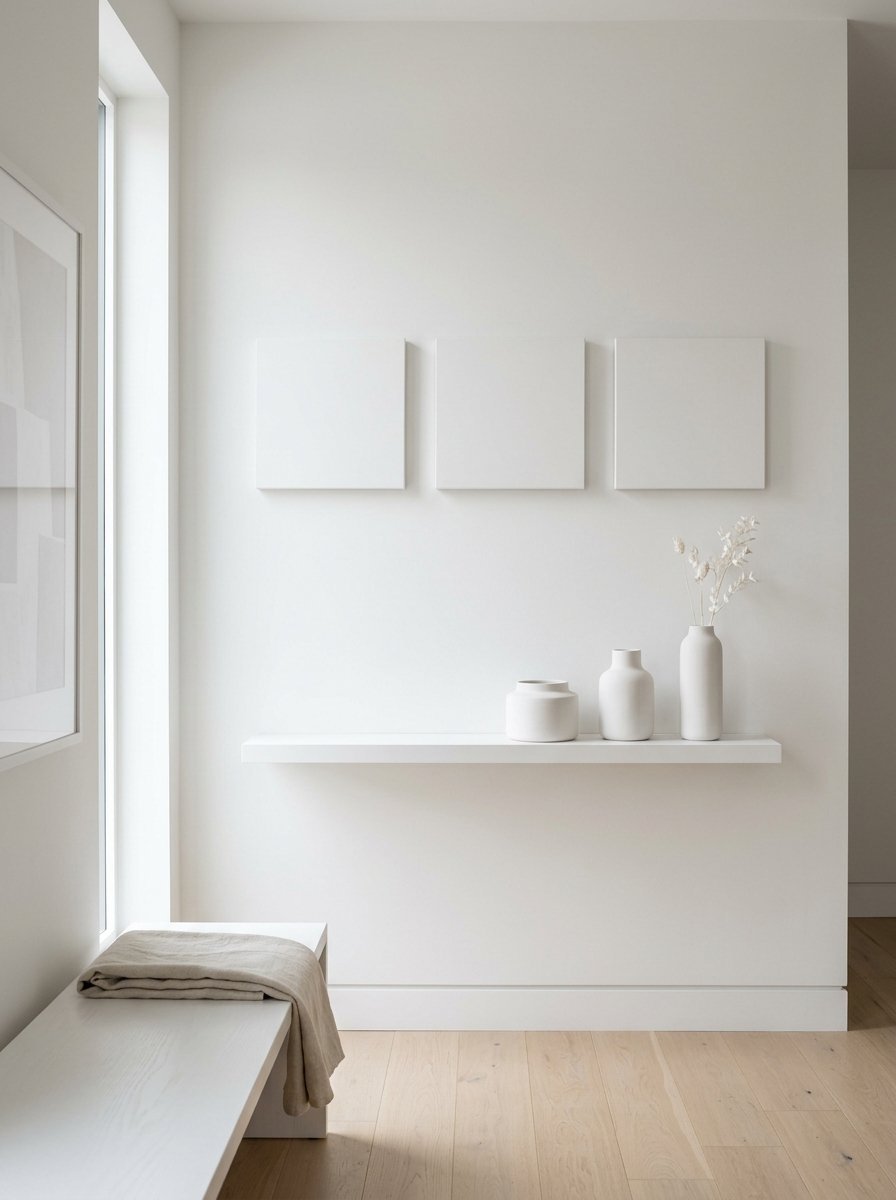
White pieces blend perfectly into white walls. This is my favorite trick for clean toilet room design. The pieces disappear and the room feels calm. I mount three identical white pieces above the toilet. I space them exactly 12 inches apart. This height fits standard folded bath towels perfectly. Buy pieces made of MDF wood. MDF stays perfectly flat and never warps in humidity. Paint them with a semi gloss trim paint. The shiny paint wipes clean instantly. Dust sticks to flat paint very badly. Use a laser level to mark your wall holes. A slight tilt looks terrible when sitting next to straight tile lines.
- MDF board costs $20
- Paint costs $15
- Spacing must be exact
11. Staggered Asymmetrical Layouts

Perfect straight lines look boring sometimes. You can mount your pieces in a staggered pattern. Place one low on the left. Place the next one higher on the right. This creates a stair step visual. It forces your eyes to move around the room. I love this for large blank walls next to the bathtub. You can mix lengths too. Put a 36 inch piece below a 24 inch piece. The uneven look feels relaxed and custom. Keep the wood finishes exactly the same. Different colors make the staggered layout look messy instead of planned. Buy brackets that match your sink faucet for a connected look.
- Use varying lengths of wood
- Keep spacing equal vertically
- Costs depend on how many you hang
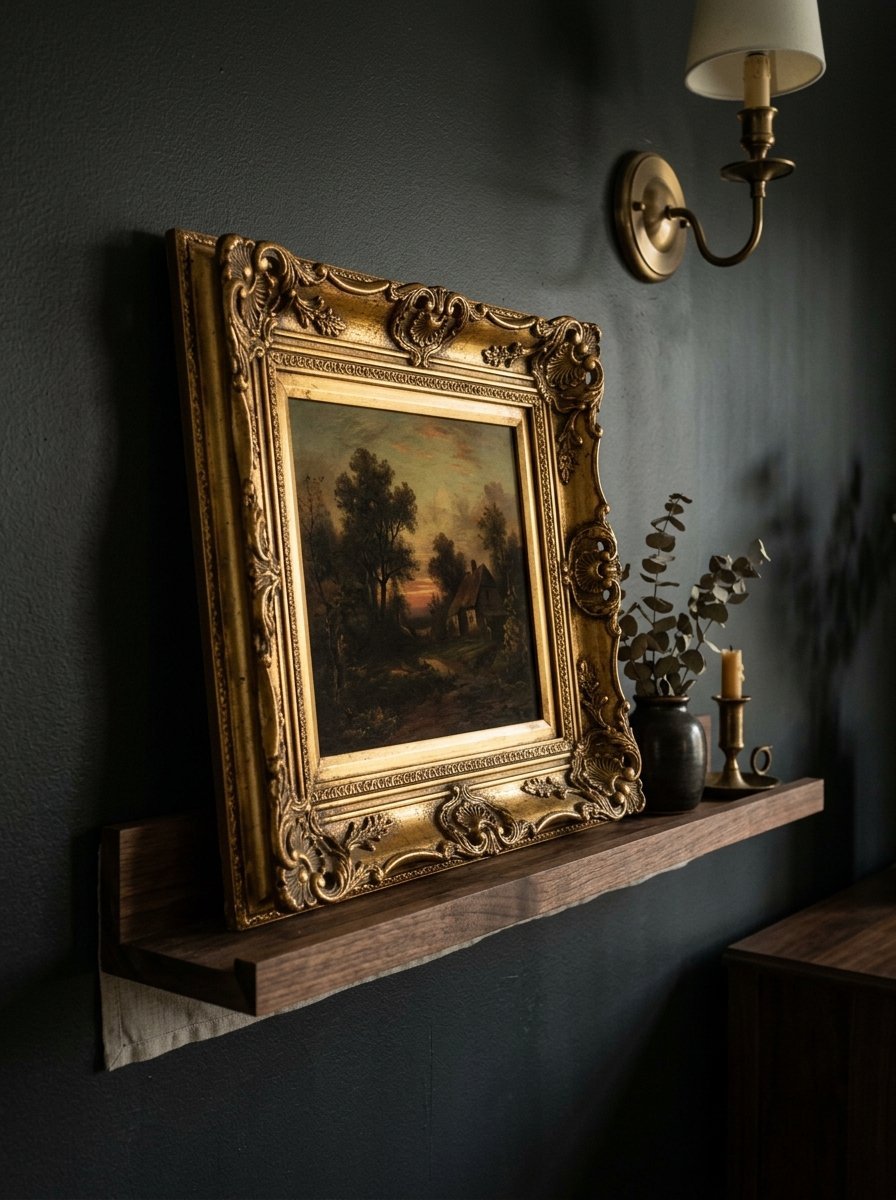
12. Dark Walnut Oil Finish
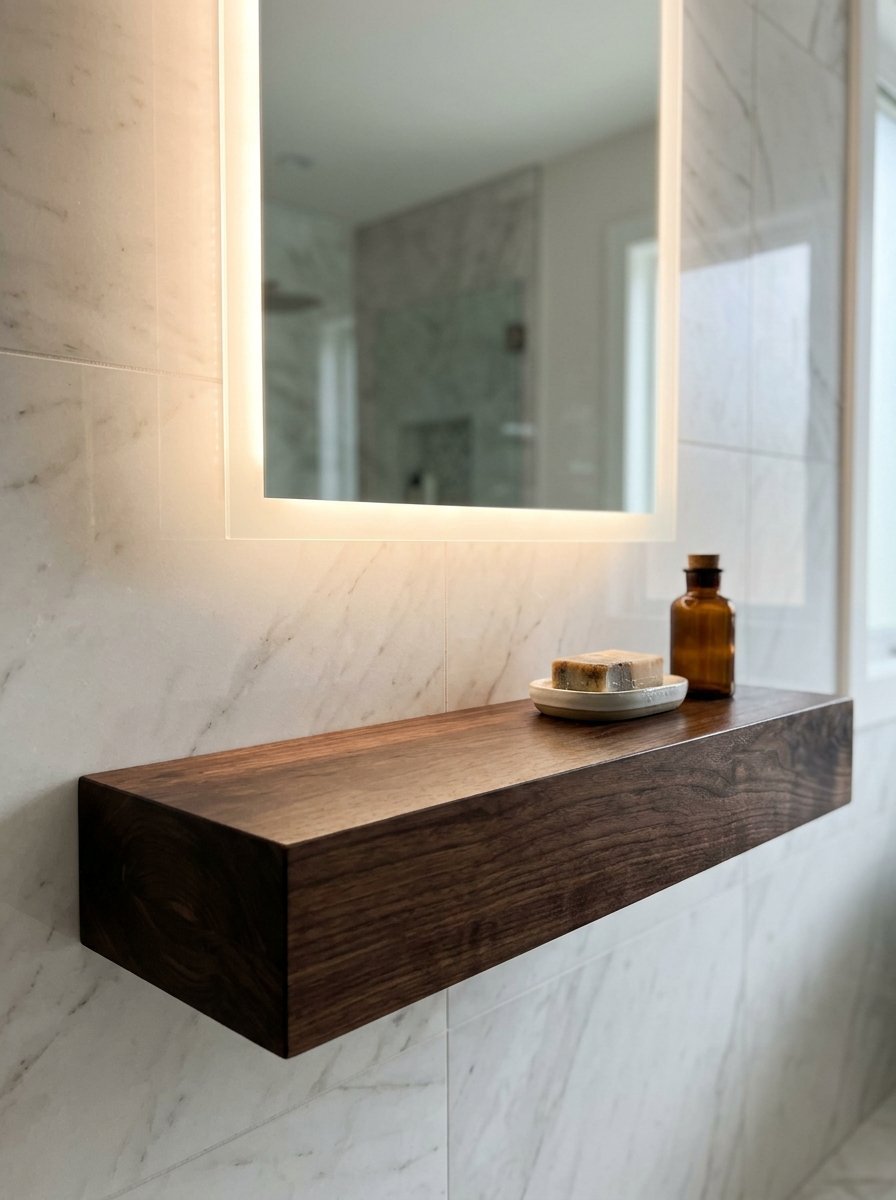
Walnut has a naturally dark and rich color. You do not need to stain walnut. Just rub raw walnut with a natural oil finish. The oil darkens the wood and shows off the grain. I put a dark walnut piece under a brightly lit mirror. The dark wood creates a sharp visual break. It grounds the space. Walnut costs more than pine or oak. You will pay a premium at the lumber yard. Buy a thin piece of walnut and attach a front lip. The front lip makes the thin wood look like a thick heavy block. You save money and still get the walnut look.
- Walnut board costs $75
- Oil finish costs $15
- Never use stain on real walnut
13. Heavy Iron Pipes

Iron plumbing pipes make fantastic holding brackets. You buy heavy iron floor flanges and screw them to the wall. Then screw a short iron pipe into the flange. The wood sits right on top of the pipes. The look fits modern and vintage rooms perfectly. You must wash the iron pipes first. The hardware store covers them in a black grease to stop rust. Wash them with dish soap and dry them completely. Spray the clean iron with a clear matte sealer. The clear spray stops the iron from rusting in your wet air. You can buy pipe parts at any local hardware store.
- Iron pipe costs $25
- Sealer spray costs $8
- Creates a very strong support
14. Color Matched Paint
Color matching your wood to your walls is a clever design trick. You paint the wood the exact same shade as your wall. The wood melts into the background. Your decorative items take center stage. I take a paint chip from my wall to the hardware store. They mix a perfect match in highly durable cabinet paint. You must use cabinet grade paint. Wall paint scratches off wood immediately. Brush the paint on in thin layers. Thick paint drips and looks cheap. Sand the wood lightly between every single paint layer for a perfect finish. You will love how clean the room feels.
- Cabinet paint costs $30
- Sandpaper costs $5
- Takes three days to cure completely
15. High Clearance For Plants
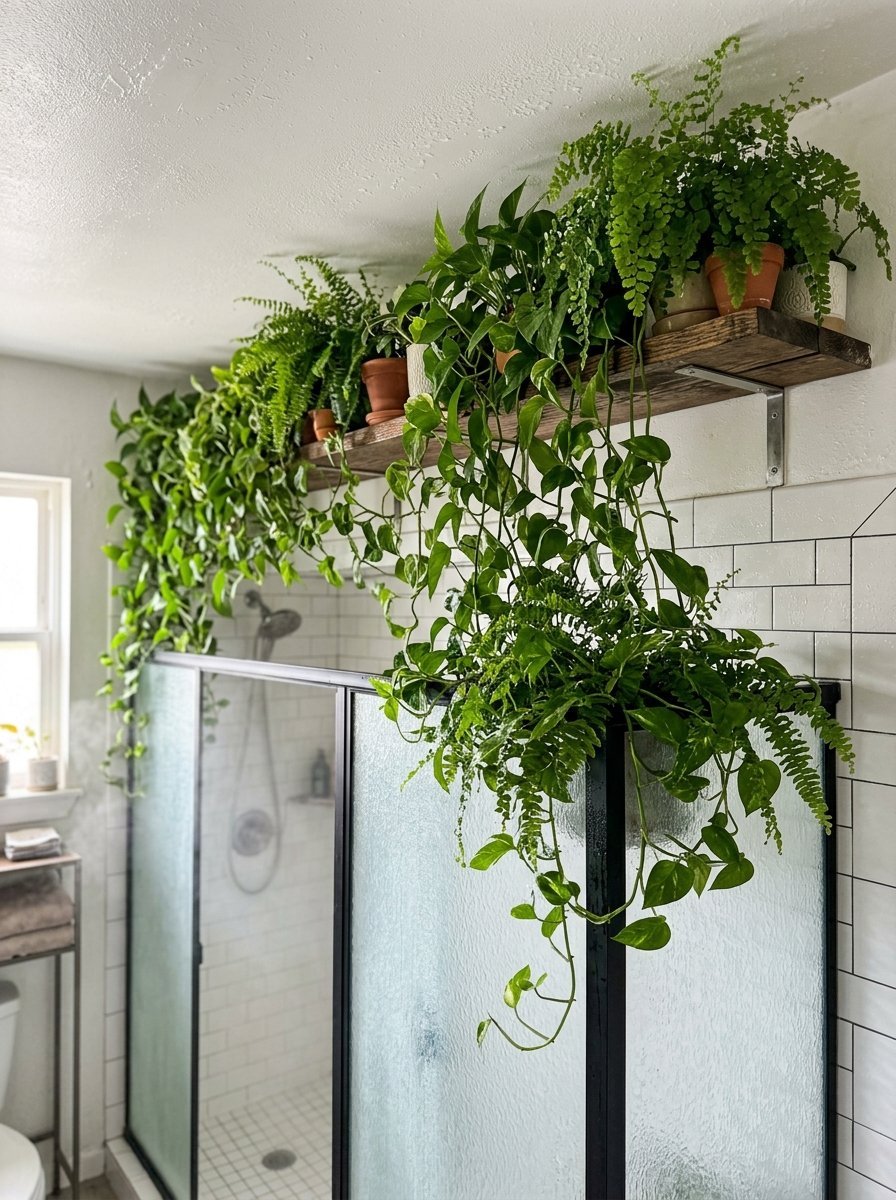
Plants love humidity. Ferns and pothos thrive near a hot shower. Small space organization usually ignores the area near the ceiling. I mount a long piece just 18 inches below the ceiling. You put trailing plants up there. The green leaves hang down and make the room feel like a spa. Keep the wood narrow. An eight inch depth holds most plastic plant pots perfectly. Make sure the space gets sunlight. Plants still need sunlight even in a wet room. You will need a small step stool to water them every week. Buy plastic drip trays to stop muddy water from ruining the wood.
- Wood and bracket cost $40
- Use waterproof plastic drip trays
- Keep away from direct shower spray
16. Woven Basket Fits

Open spaces show off all your messy items. Baskets hide the mess instantly. I measure my vertical height and buy square woven baskets that fit perfectly. You slide the basket onto the wood like a drawer. Keep extra toilet paper and ugly plastic bottles inside the baskets. The woven texture looks warm and natural. Do not buy cheap wicker. Cheap wicker splinters and leaves sharp pieces behind. Buy high quality seagrass or water hyacinth baskets. They smell like fresh hay and feel soft to the touch. The natural fibers look amazing sitting on crisp white painted wood.
- Basket costs $20 each
- Wood needs to be 12 inches deep
- Hide all your daily clutter instantly
17. Macrame Cotton Backdrops

Macrame brings a soft bohemian feeling to hard tile surfaces. I hang a wide macrame wall piece directly behind my floating wood. The cotton strings fall down behind the wood. You place your brackets right through the hanging strings. The wood presses the fabric flat against the wall. The texture contrast looks incredible. Cotton absorbs water in a damp room. You must have a good exhaust fan running during showers. Wash the macrame in a machine every few months to remove dust. The soft white rope looks perfect next to light pine wood and green plants.
- Macrame hanging costs $35
- Wood sits directly over the fabric
- Creates a relaxed bohemian vibe
18. Waterproof Aluminum Trays

Wood works great but metal trays offer something different. Thin metal bends upward at the edges to form a tray. The sides keep wet soap bottles from dripping onto the floor. I mount matte black metal trays next to the sink. The metal wipes clean with zero effort. You never worry about water damage. Buy trays made of rust proof aluminum. Steel rusts quickly if the paint chips. Aluminum stays perfect forever. The thin profile looks very sharp and modern. You can overlap two metal trays on a small wall for a cool geometric look.
- Metal tray costs $45
- Aluminum will never rust
- Edges contain water spills
19. Drywall Cut Nooks
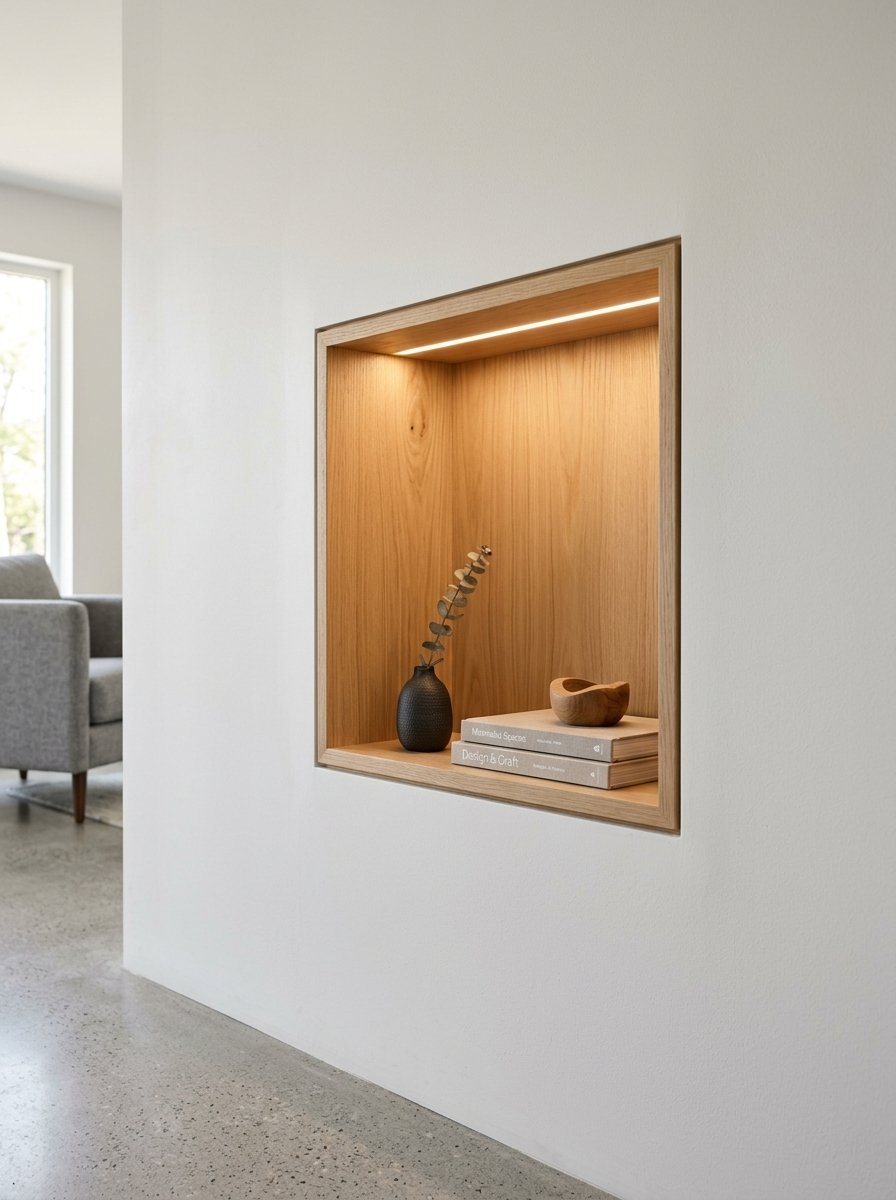
You can cut a hole in your drywall and construct boxes inside the wall. The box sits flush with the wall surface. You lose zero walking space. You must find an empty space between two wall studs. Cut the drywall out carefully. Construct a small wooden box and slide it into the hole. Nail the box to the side studs. I frame the edge with small wood trim to hide the cut drywall. This takes basic carpentry skills. Do not cut into walls that hold plumbing pipes or thick electrical wires. Always look inside with a flashlight first. You get permanent storage.
- Materials cost $30
- Takes a full weekend to finish
- Saves massive amounts of floor space
20. Above Door Placements
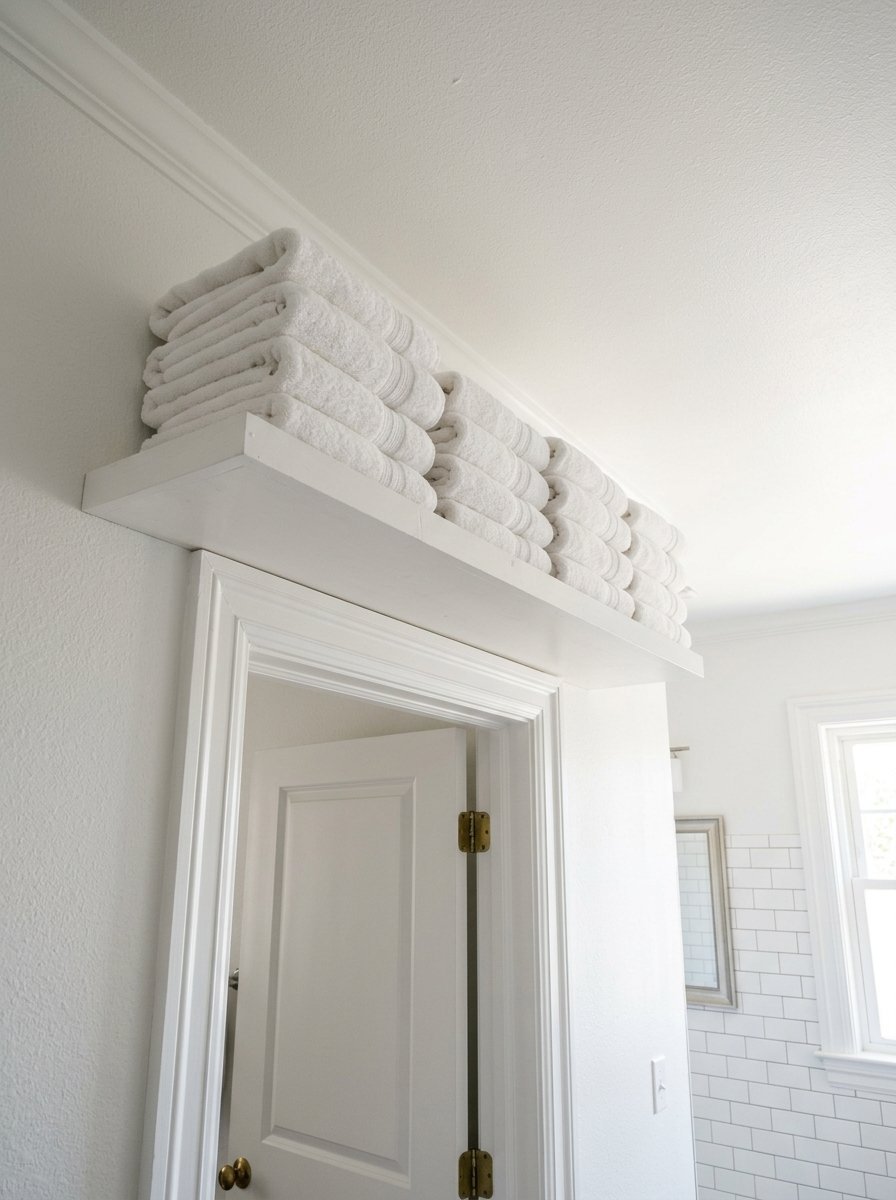
The space directly above your door is completely wasted. I mount a long piece right above the door frame. You can store extra towels or bulk toilet paper up there. It sits out of your normal sight line. The room feels completely uncluttered. Rest the wood right on top of the wooden door trim for extra support. Put two metal brackets on the ends. Paint the wood the exact same color as your wall. The wood practically disappears. You will need a stool to grab the items. Keep only long term storage up there. This is my favorite trick for tiny apartments.
- Wood costs $25
- Takes 30 minutes to install
- Hides bulk items out of sight
21. Slatted Teak Woods
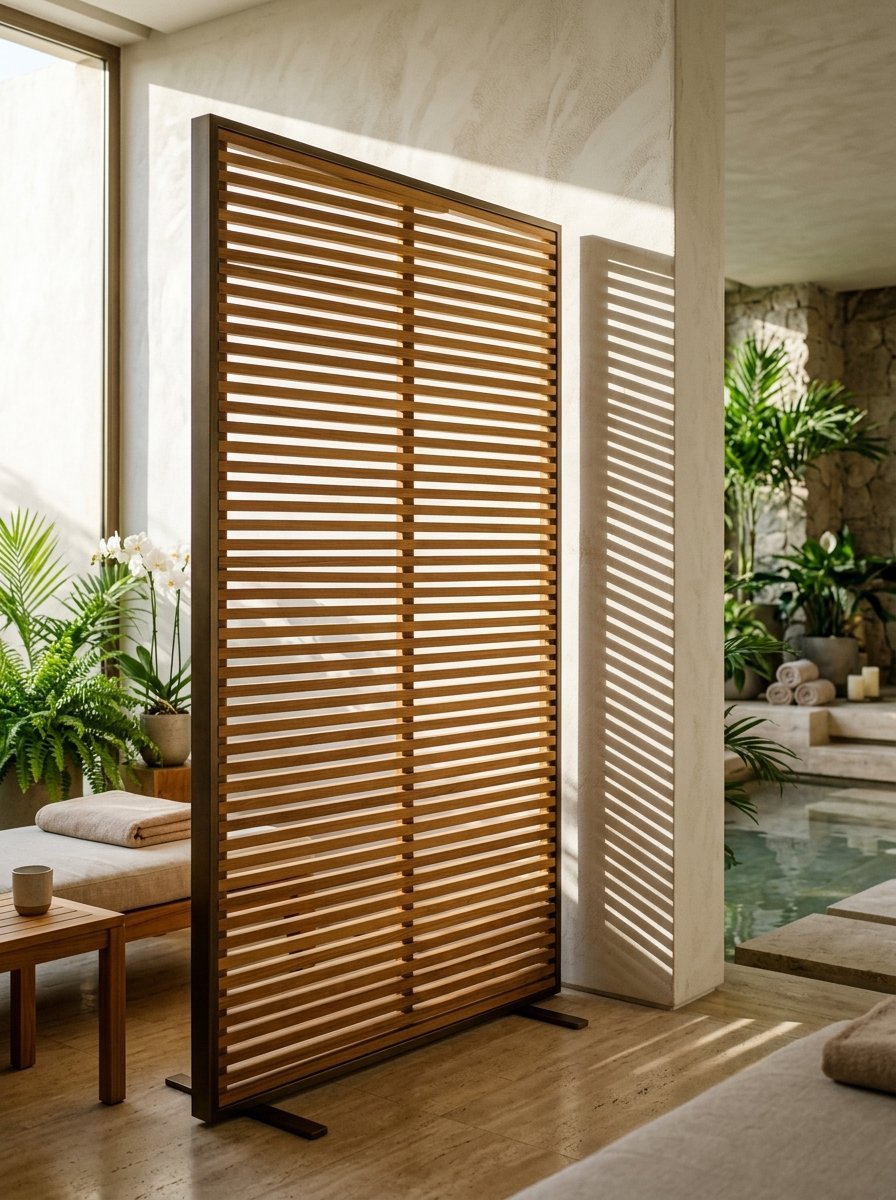
Solid slabs of wood look heavy. Slatted designs look light and airy. You nail thin strips of wood together with small gaps in between. The gaps let wet towels breathe and dry faster. Water drips right through instead of pooling on top. I construct these out of teak wood. Teak is highly resistant to water. Ship builders use teak for boat decks. It costs a lot of money. You buy teak strips and screw them to a frame. Rub the teak with oil twice a year to keep it looking fresh. The warm wood looks incredible against white subway tile walls.
- Teak wood costs $90
- Small gaps let air circulate
- Perfect for wet washcloths
22. Tiered Vanity Sides
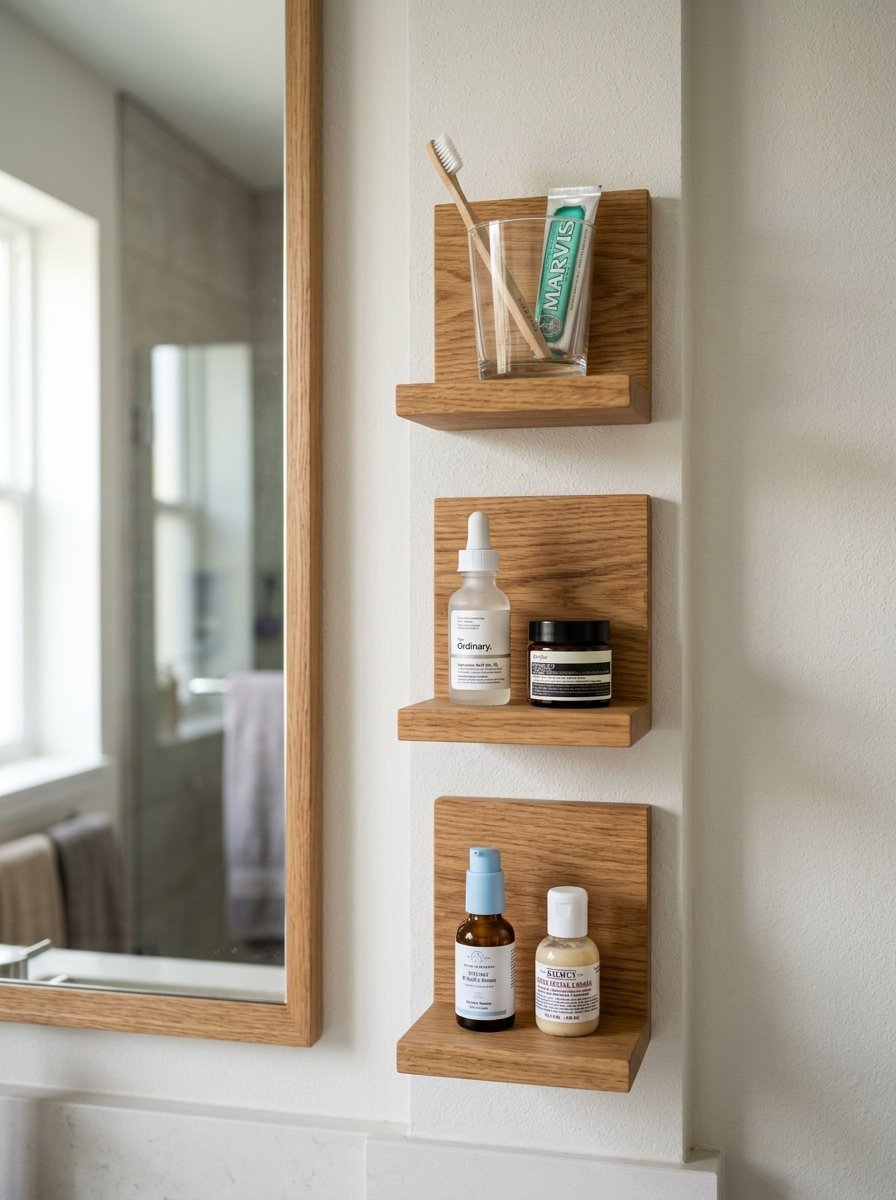
The narrow wall space right next to your vanity mirror is prime real estate. I mount three tiny pieces right next to the glass. You keep your daily toothbrush and face wash right at eye level. The counter stays totally clear. Make the pieces just four inches deep. Deep cuts block your elbow room when you wash your face. I match the material exactly to the vanity cabinet. If the vanity is oak the wood is oak. This ties the whole room together. Use hidden brackets so the tiny pieces look clean and sharp. You will never lose small bottles in dark drawers again.
- Small wood pieces cost $10
- Clear your sink counter instantly
- Keep items at eye level
Frequently Asked Questions
How high should I hang wood over a toilet?
You should hang the first piece 24 inches above the top of the toilet tank. This gives you plenty of room to remove the tank lid for plumbing repairs. Space multiple pieces 12 to 15 inches apart vertically. This gap fits rolled towels and tall glass jars perfectly. Always measure twice before you drill any holes.
Do I need to drill into wall studs?
Yes drilling into studs is the safest choice. Bathroom items get heavy quickly. Glass jars and wet towels weigh a lot. This weight can rip basic plastic drywall anchors out of the wall. If you miss a stud buy heavy duty toggle bolts that hold at least 50 pounds each. Always use a stud finder.
What wood holds up best against moisture?
Teak and cedar hold up incredibly well against high moisture. They naturally resist rot. If you use cheap pine or oak you must seal every side of the wood. Three coats of matte polyurethane will block the water from entering the wood grain. Pay close attention to the end grain cuts. End grain absorbs water the fastest.
How deep should bathroom storage be?
A depth of 6 to 8 inches works best for most items. This holds toilet paper rolls and small baskets perfectly. Depths larger than 10 inches can make a small room feel tight. Keep narrow pieces near the sink to save your elbow room. Always measure your largest items before you make your final cuts.
Can I hang items over ceramic tile?
Yes you can drill directly through ceramic tile. Buy a diamond tipped drill bit. Put a piece of masking tape over the tile before you drill. The tape stops the drill bit from sliding across the slippery glass surface. Drill very slowly and spray the bit with water to keep it cool. A hot drill bit will crack the tile instantly.
Final Thoughts
Your walls are totally blank canvases. Floating units fix your clutter problems and make the room look styled. You do not need a huge budget or a contractor to get this done. Grab a stud finder and a drill and some beautiful wood. You can change your space in a single weekend. Pick a style that fits your daily routine. Clean glass if you love modern looks. Seal thick pine if you want a warm farmhouse feel. Make sure you measure twice and use a good level.

Amelia Hart is the Senior Design Editor at Vellora Interiors, where she curates small-space and apartment content. With a background in color theory and years spent designing under-500-square-foot rentals, she’s the editor who’ll tell you exactly which paint sheen, curtain length, and lamp height to choose, no guessing. A former design lead at a boutique studio, her work has been featured in several home and lifestyle publications. Her guiding belief: “Good design isn’t about more, it’s about choosing better.”