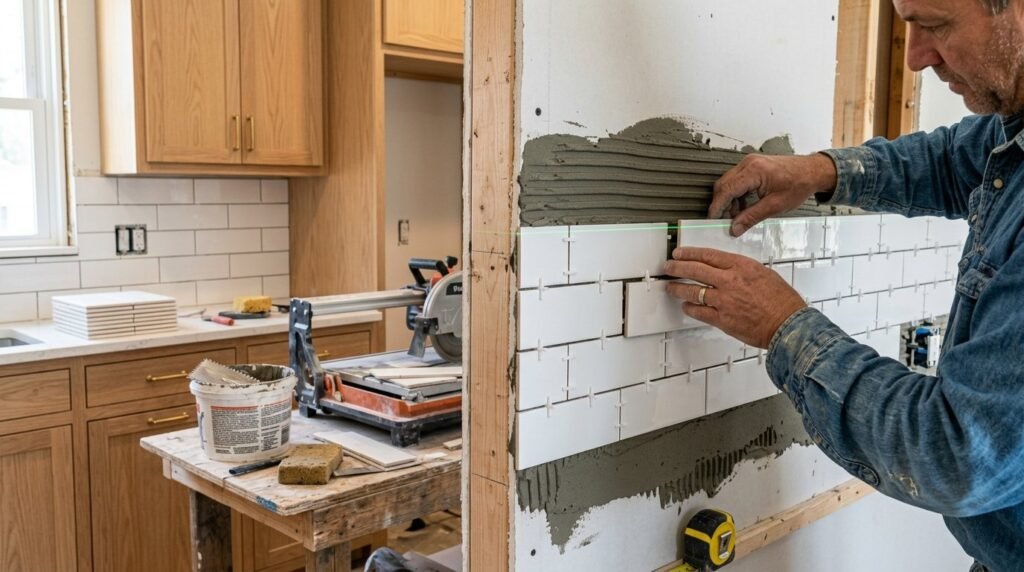
You stand in your kitchen. The cabinets look fine. The stove works well. But the wall behind the sink feels flat. It is tired. You want a change. You look at tile prices. You see the cost of a professional. Your heart sinks. I know this feeling well. Last year my sister wanted a new look for her small condo. She had a tiny budget. She did not want to deal with wet saws or heavy mortar. We spent a weekend finding ways to get that high end look without the high end mess.
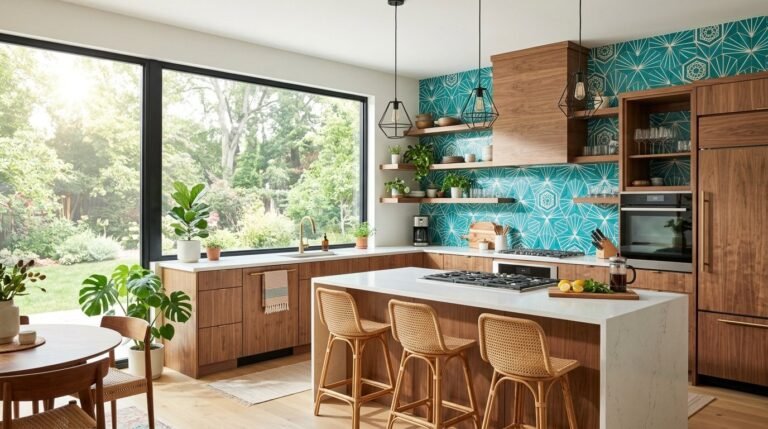
The kitchen is the heart of your home. A backsplash is the jewelry of that room. It catches the eye. It protects your walls from grease. But a traditional remodel takes days. It creates dust. It costs thousands. In my experience you do not need a contractor to get a beautiful wall. You just need the right hacks. I have seen homes go from boring to beautiful in just four hours. This guide shows you exactly how to do it.
Executive Summary
You will get 25 clear hacks for your kitchen. These focus on speed and low costs. I cover the best peel and stick backsplash ideas. I talk about budget kitchen remodel backsplash ideas that anyone can do. You will see how to use stick on tiles kitchen backsplash ideas to save time. We look at real tools like Smart Tiles and Art3d. I share stories of what worked for me and what failed.
You can expect to learn about easy to install kitchen backsplash options. We will talk about vinyl. We will talk about metal. We will even talk about paint. By the end of this page you will have a plan. You will know which materials last. You will know which ones to avoid. This is about making your space look expensive for very little money.
1. Double Sided Adhesive Sheets
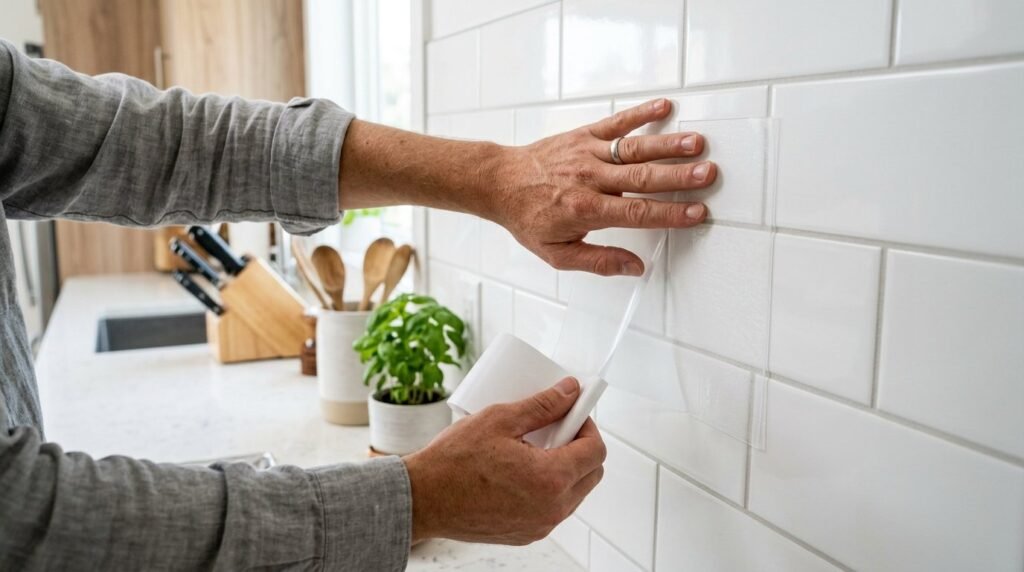
I first saw this work in a rental apartment in New York. The owner could not use mortar. They used adhesive sheets instead. These sheets act like a giant sticker for your wall. You peel one side and stick it to the drywall. Then you peel the other side. You press your real tiles right onto it.
There is no waiting for thinset to dry. You can grout the same day. I used a brand called Musselbound for a small coffee bar project. It held heavy glass tiles without any slipping. It is a game changer for beginners. You skip the bucket and the trowel. It makes the job clean. Your kitchen stays open for cooking while you work.
2. Vinyl Tile Decals
Vinyl decals are the ultimate backsplash makeover diy. These are thin stickers. They go right over your old ugly tiles. My friend Sarah had yellowed tiles from the 1980s. She did not want to rip them out. We found some Moroccan style decals on Etsy.
We cleaned her old tiles with rubbing alcohol. This step is huge. If the tile is greasy the sticker will fail. We applied the decals one by one. It took two hours. The kitchen looked brand new. In my experience these are perfect for renters. You can peel them off when you move. They handle heat from the stove well if you buy high quality vinyl.
3. Smart Tiles Peel and Stick
When people ask for the best peel and stick backsplash I point to Smart Tiles. I tried a cheaper brand once and the edges curled after a month. Smart Tiles use a special gel. It looks like real glass or ceramic. They are thick. They have a 3D texture.
You only need a utility knife and a ruler. I’ve noticed that these work best on smooth walls. If your wall has a heavy texture they might struggle to stay flat. I used the subway tile design in a laundry room three years ago. It still looks perfect today. It handles the humidity without peeling. It is a solid choice for a fast fix.
4. Mirror Tiles for Small Spaces
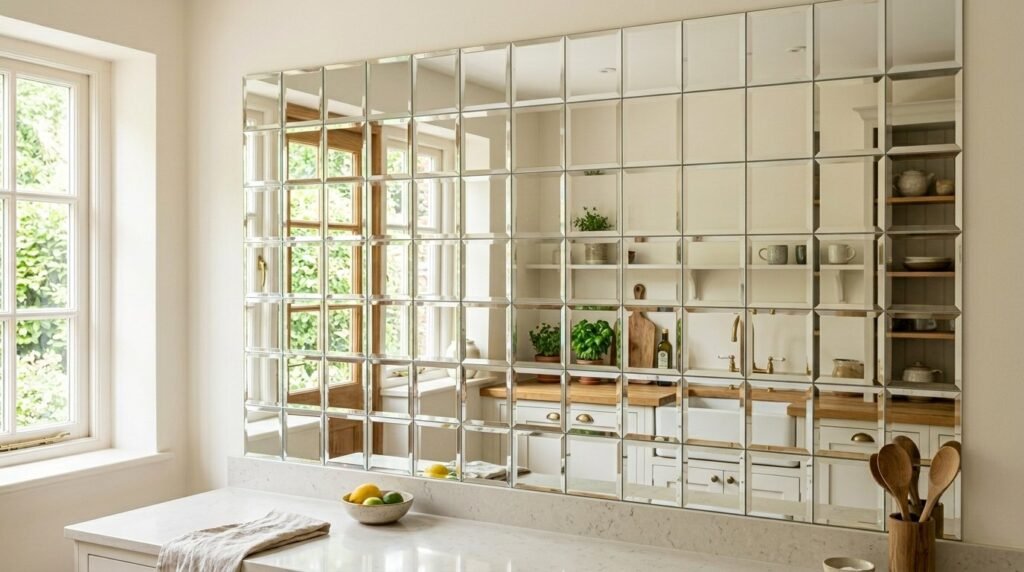
A dark kitchen feels small. Mirror tiles fix this. They reflect light back into the room. I worked on a galley kitchen that felt like a cave. We used beveled mirror tiles with a peel and stick back.
The light from the window doubled. The room felt twice as big. You must use a glass cleaner to keep them shiny. One thing I learned is to avoid mirror tiles directly behind the stove. Grease shows up fast on mirrors. Put them behind the sink or along a prep counter instead. It gives a glam look for a low price.
5. Beadboard Panels
Not every backsplash needs to be tile. Beadboard gives a cozy cottage feel. You can buy large sheets of it at Home Depot. I’ve seen this work in farmhouses. You cut the panels to fit between the counter and the cabinets.
Use construction adhesive to hold them up. Paint them with a high gloss paint. This makes them easy to wipe down. I once saw a DIY fail where the person used flat paint. The tomato sauce stained it forever. Always go for a semi gloss or gloss finish. It looks classic and saves you money.
6. Tin Ceiling Tiles

Tin tiles offer a vintage look. They are great for hiding bumpy walls. Real tin can be pricey but faux tin panels are cheap. They come in large squares. I used these in a basement bar project.
The pattern hides the seams between panels. You can get them in copper or silver or white. Use a heavy duty adhesive like Gorilla Glue construction foam. In my experience these panels are very durable. They do not dent easily. They give your kitchen a custom look that people will notice.
7. Stick On Glass Mosaics
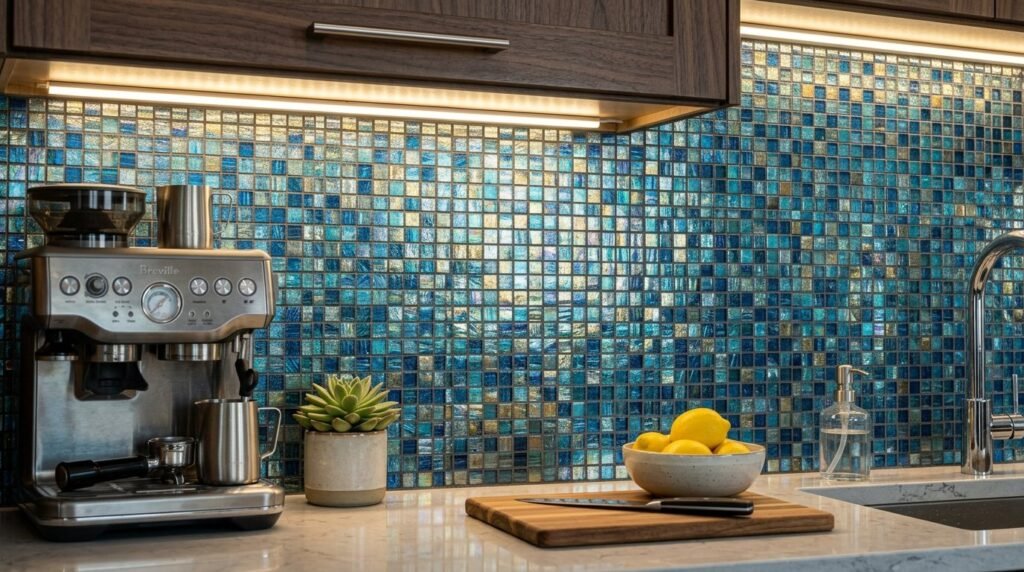
These are different from vinyl. They are real glass pieces on an adhesive backing. Brands like Art3d sell these. They have a weight to them. They feel like a real kitchen remodel backsplash ideas success.
The light hits the glass and sparkles. I noticed that cutting glass peel and stick is harder than vinyl. You might need a small tile nipper. I used these in a bathroom and they stood up to water for years. They are a bit more expensive than plastic but the look is much better.
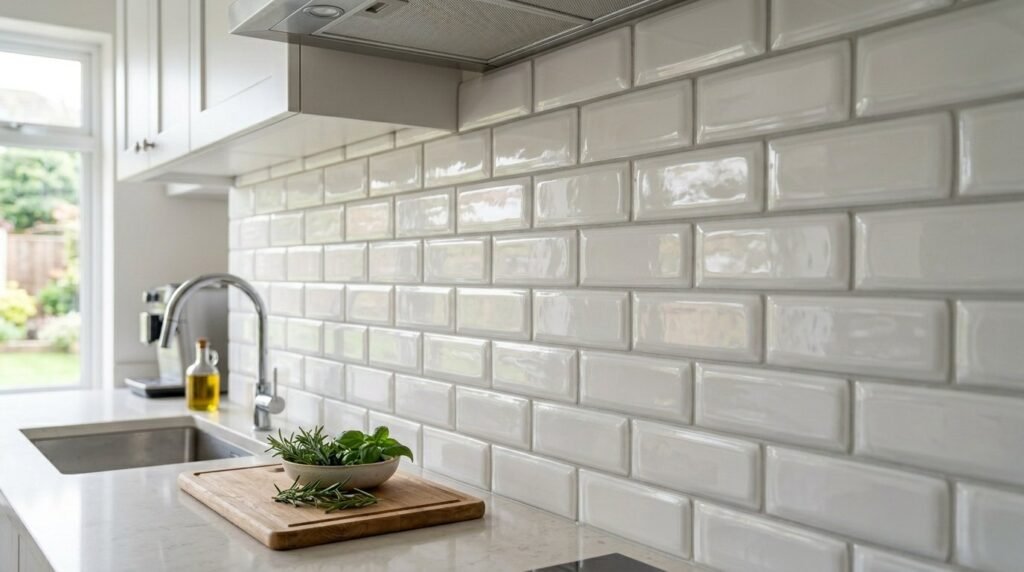
8. Subway Tile Peel and Stick
Subway tile is a classic kitchen tile designs staple. It never goes out of style. You can find these in long strips. Each strip has three or four tiles on it. This makes the install very fast.
I helped a neighbor put these up in her kitchen. We finished the whole wall in ninety minutes. The white tiles made her dark granite counters look fresh. One tip I have is to start in the center of the wall. This ensures your cuts at the corners are equal. It looks professional when the ends match.
9. Herringbone Pattern with Decals
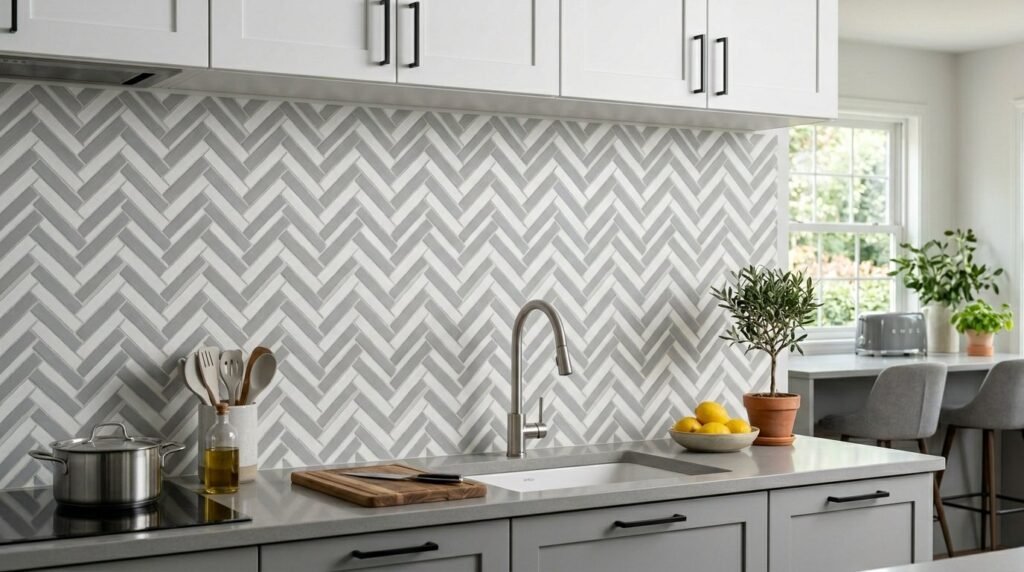
A herringbone pattern is hard to do with real tile. It takes a lot of measuring and cutting. Decals make it easy. You can buy decals already set in a herringbone layout.
I’ve seen this work as a focal point. You do not have to do the whole kitchen. Just put it behind the stove. It draws the eye. In my experience using a dark grout line on the decal makes it look more real. People will touch it to see if it is actual stone.
10. Chalkboard Paint Backsplash
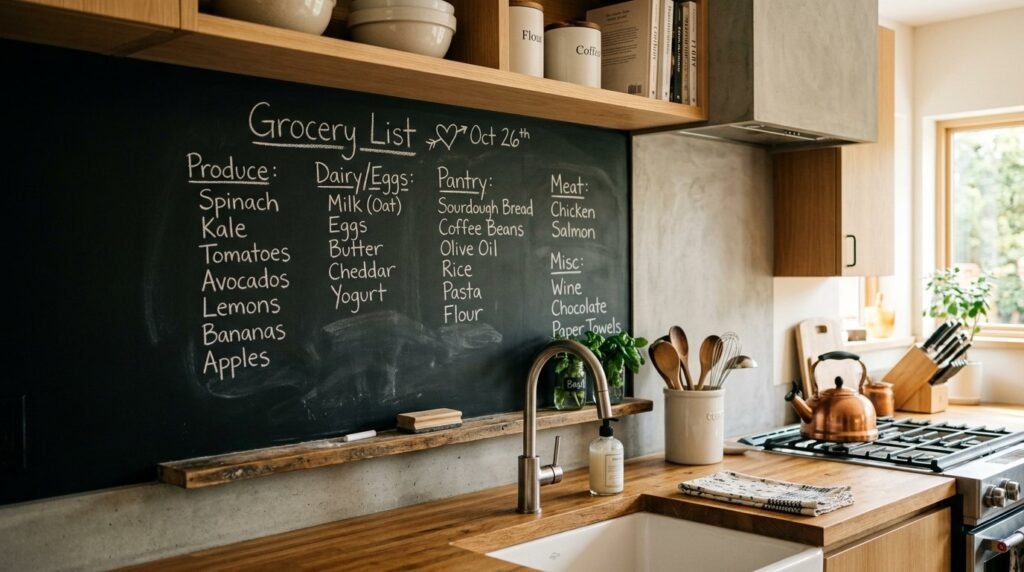
This is a fun kitchen backsplash on a budget idea. You paint the wall with chalkboard paint. It creates a matte black look. I did this in my first apartment.
I wrote my grocery lists on the wall. It looked modern and cool. You must use a primer first. If you don’t the paint might peel. I noticed that it can get dusty from the chalk. If you don’t like dust use liquid chalk markers. It is the cheapest hack on this list. It costs less than twenty dollars.
11. Removable Wallpaper
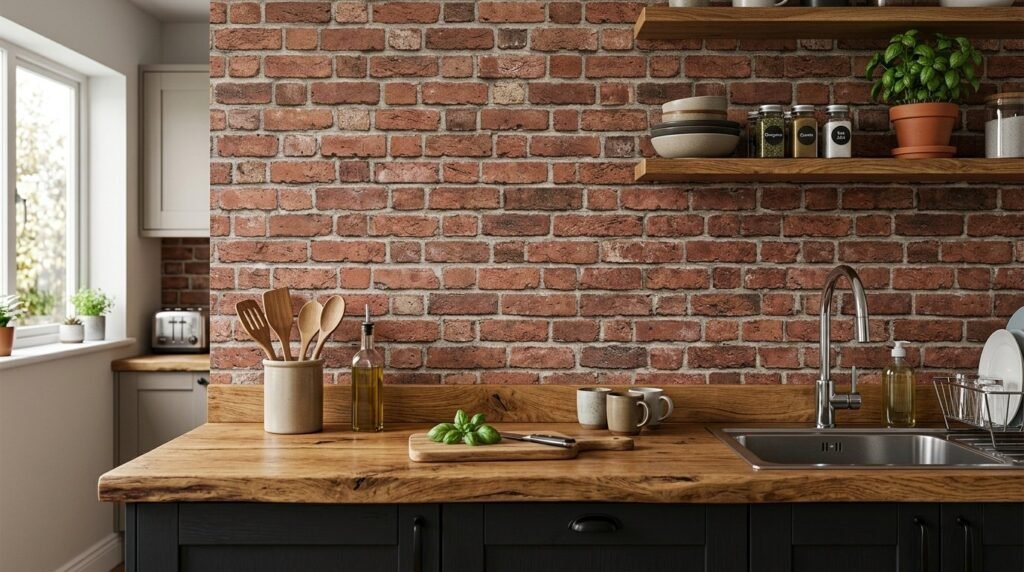
High quality peel and stick wallpaper works for backsplashes too. Look for vinyl wallpaper. It is water resistant. I used a brick pattern wallpaper for a friend.
It gave her kitchen an industrial loft vibe. The best part is the variety. You can find wood patterns or floral looks. If you get bored you just peel it off. I saw one case where the wallpaper bubbled near a boiling pot. Keep it a few inches away from high heat sources to be safe.
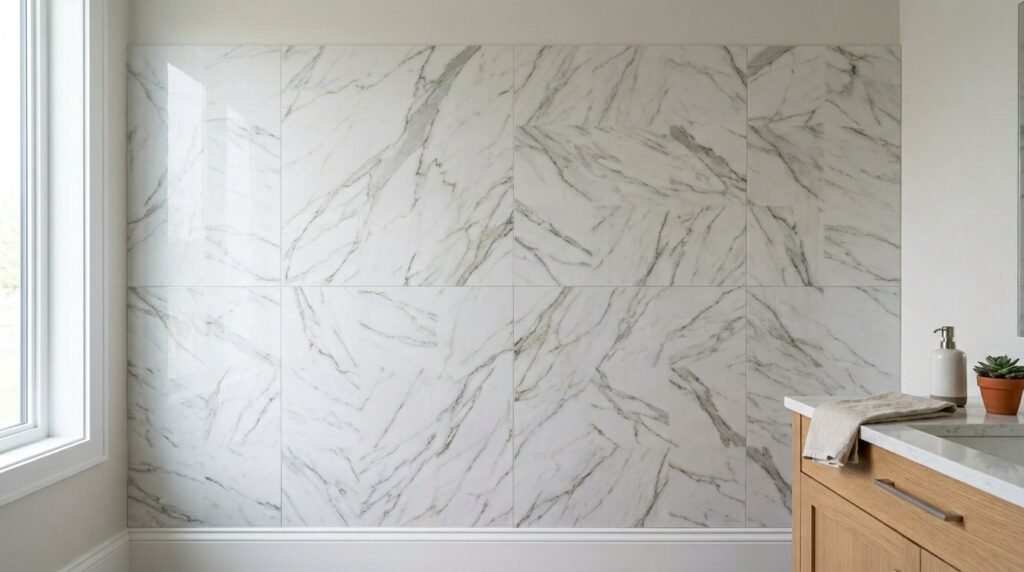
12. Large Format Adhesive Tiles
Small tiles have many seams. Large format tiles look sleek. You can find 12 by 12 inch adhesive tiles. They cover more ground fast.
I’ve seen these in marble patterns. They have fewer lines so they look like one solid piece of stone. I tried this in a small rental. It made the counters look like expensive Carrara marble. Use a level to make sure your first row is straight. If the first row is crooked the whole wall will look off.
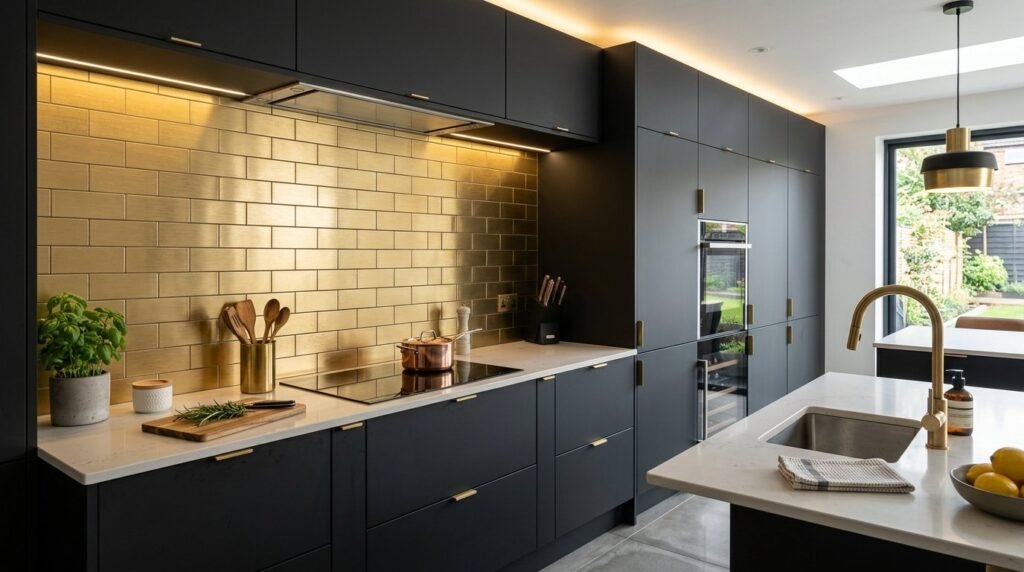
13. Metallic Stick On Tiles
If you want a modern kitchen look for metal. Brushed steel or copper tiles are popular. They come in small squares or long planks.
I used brushed brass tiles in a kitchen with navy cabinets. The mix of blue and gold was stunning. These tiles are very easy to clean. A damp cloth removes most spots. I’ve seen some cheap metal tiles that have sharp edges. Watch your fingers during the install. Wear gloves if you are cutting them.
14. Hexagon Peel and Stick
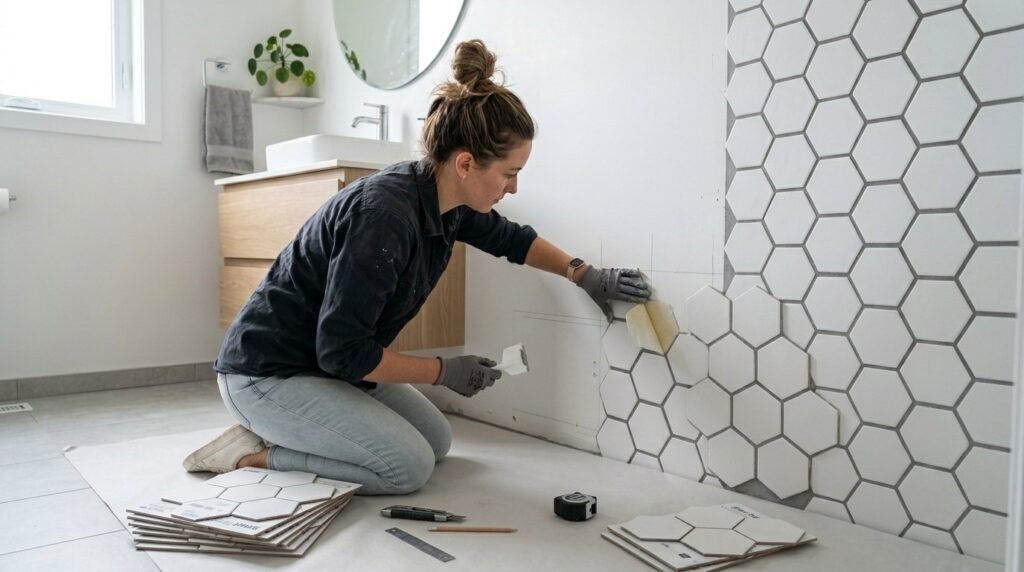
Hexagon shapes are very popular right now. They look high end. Real hex tile is a pain to grout because of all the angles. Peel and stick hex tiles solve this.
I used a white hex tile with grey grout lines. It looked like a professional did it. I noticed that the interlocking pieces can be tricky. Take your time to line them up perfectly. If you leave a gap it will show the wall behind it. Paint your wall a similar color to the tile first. This hides any tiny mistakes.
15. Faux Brick Panels
Brick adds texture. Real brick is too heavy for most walls. Faux brick panels are light. They are made of a foam or thin plastic.
I saw a kitchen where they used these and then painted them white. It looked like an old white washed brick wall. It was beautiful. You can use a bit of caulk to fill the gaps between panels. It makes the wall look like one solid piece. In my experience this is the best way to get a rustic look fast.
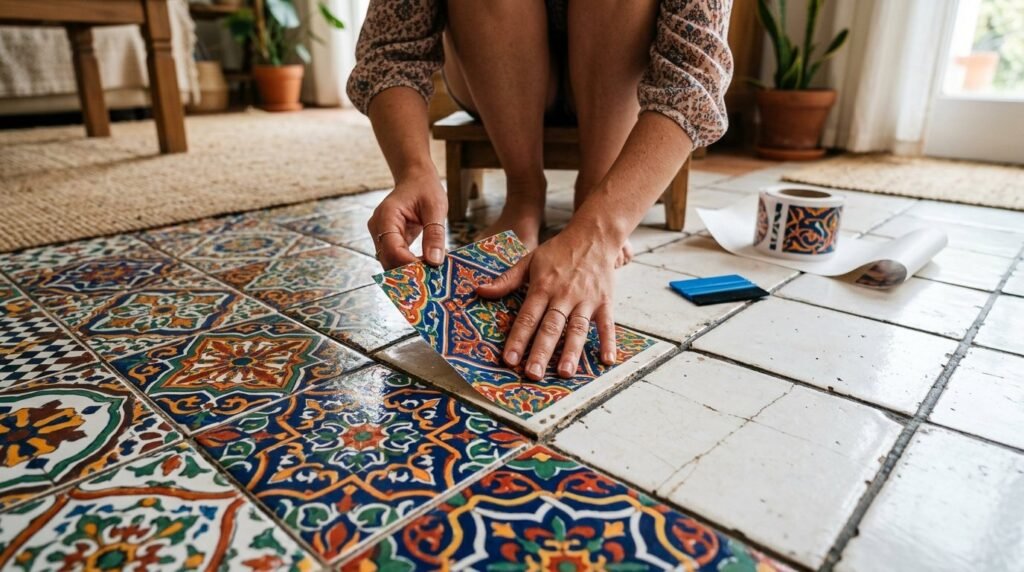
16. Moroccan Fish Scale Decals

These are also called scallop tiles. The shape is unique and curvy. Doing this with real tile is an expert level job. With stickers it is a beginner job.
I’ve seen these in sea green and blue colors. They look great in a coastal style home. I helped a client use these as an accent above her sink. We only used three packs. It cost forty dollars and changed the whole room. They are very popular on Pinterest for a reason.
17. Marble Look Vinyl

Everyone loves marble. No one loves the price or the maintenance. Vinyl sheets that look like marble are a great hack. You can buy them in rolls or tiles.
I used a marble vinyl wrap on a backsplash for a photo shoot. It looked so real in pictures. For a home use the tiles because they are thicker. I’ve noticed that the matte finish looks more like real stone than the glossy one. Glossy vinyl can look a bit like plastic if the light hits it wrong.
18. Stenciled Tile Patterns
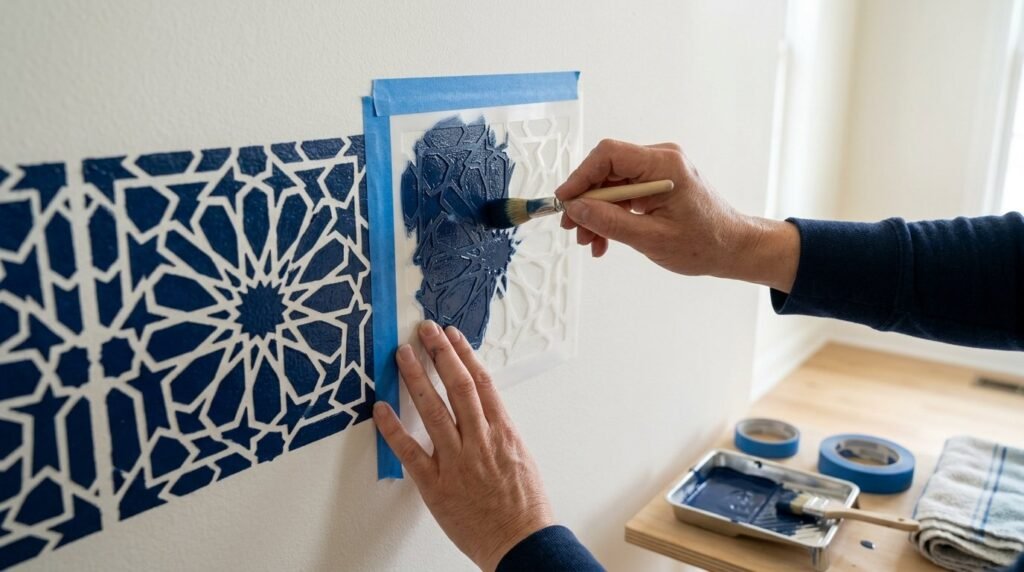
If you have a plain backsplash you can paint it. Use a stencil. I did this on a floor once and it worked so well I tried it on a wall.
You need a steady hand and very little paint on your brush. If the brush is too wet the paint bleeds under the stencil. Use a stencil adhesive spray to keep it flat. I saw a lady do this with navy paint on a white tile wall. It looked like expensive hand painted tiles from Italy. It takes time but the cost is almost zero.
19. Grout Pens for Refresh
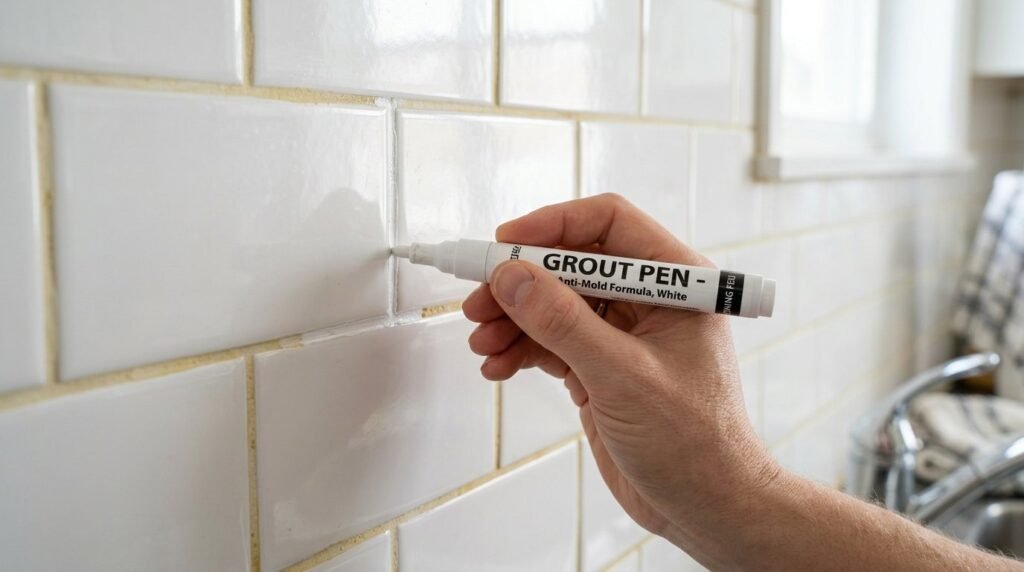
Sometimes your tiles are fine but the grout is gross. A grout pen is a cheap way to fix this. It is like a marker for your grout lines.
I used a black grout pen on old white subway tiles. It gave the kitchen a bold modern look. It took me one hour. You just trace the lines. I’ve seen this work to hide stains too. If your grout is yellowed or brown just paint it white. It looks like a new install. It is a very satisfying project.
20. Tempered Glass Sheets
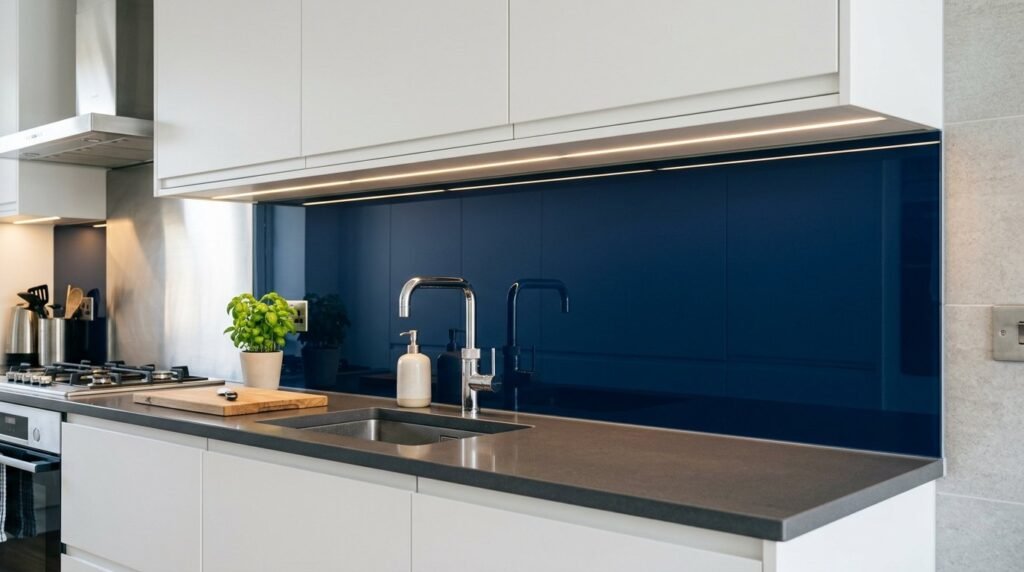
For a ultra modern look use a single sheet of glass. You can buy these pre cut. Some people paint the back of the glass before they hang it.
This gives you a solid block of color with no grout lines at all. I saw a kitchen with a lime green glass backsplash. it was very bold. You attach it with special glass standoffs or strong adhesive. It is the easiest surface to clean. Just use Windex. It never stains and never fades.
21. Plywood Planks
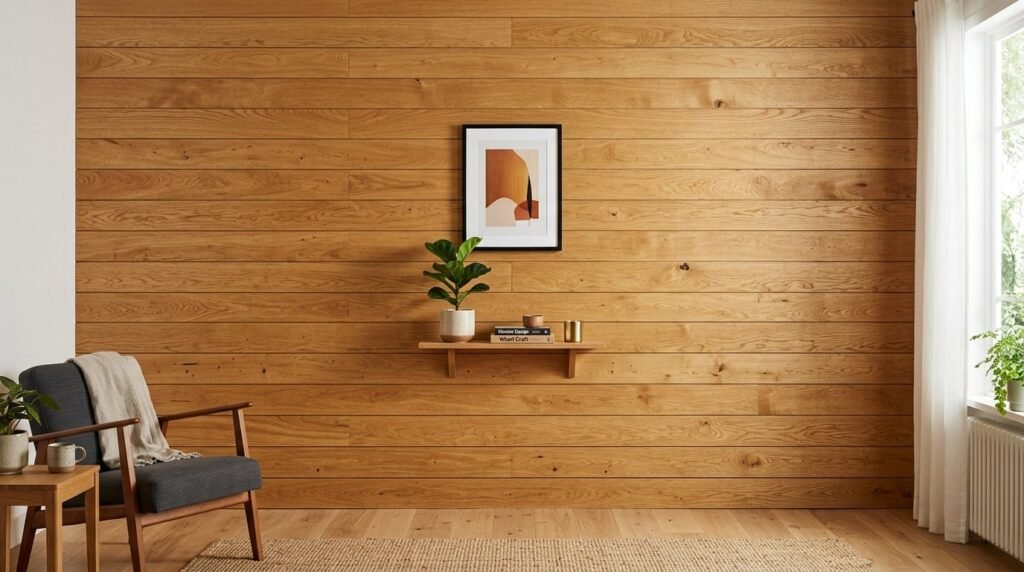
This is a great easy kitchen backsplash ideas choice for a DIY person. You cut thin plywood into strips. You sand them and stain them.
I’ve seen this used to create a wood slat look. It looks very warm and natural. You must seal the wood with a clear coat. If you don’t the water from the sink will rot the wood. I used a water based poly on a wood backsplash two years ago. It still looks great. It gives a high end custom feel for the price of one wood sheet.
22. Stainless Steel Peel and Stick
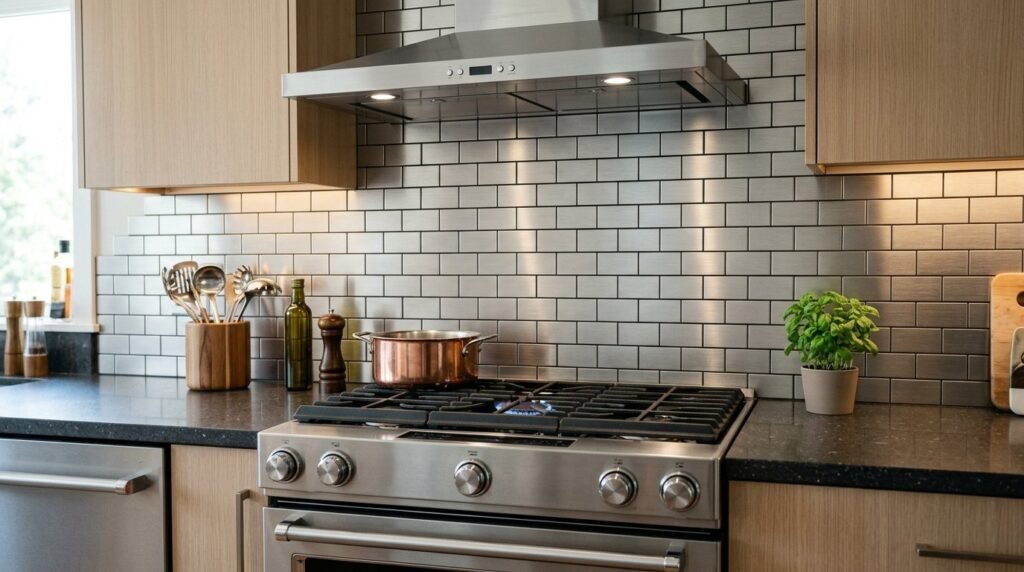
If you have stainless appliances this look is for you. These tiles are actual thin metal. They have a sticky back that is very strong.
I’ve seen these used behind a pro style range. It looks like a commercial kitchen. I noticed that these can show fingerprints. Just use a bit of olive oil or stainless cleaner to keep them bright. They are heat proof so they are very safe behind the stove.
23. Cork Tile Accents
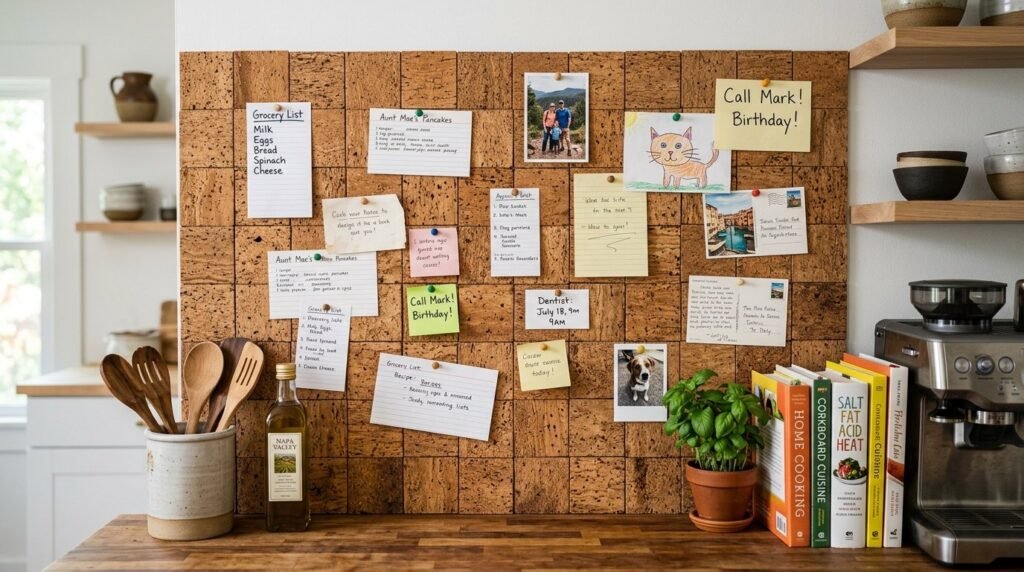
Cork is an odd choice but it works. It is soft and warm. I saw a small kitchen in a studio where they used cork tiles.
They pinned recipes and notes right to the backsplash. It was very useful. Cork is naturally resistant to mold. You should still seal it if it is near the sink. I’ve seen some dark stained cork that looks like stone from a distance. It is a very quiet material too. It kills echoes in the kitchen.
24. Copper Flashing Backsplash
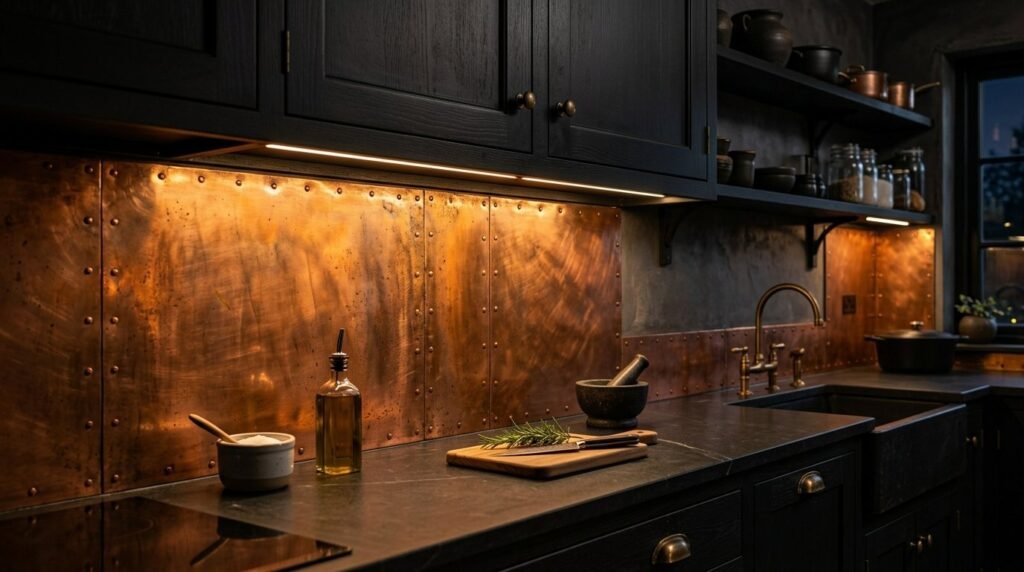
You can buy rolls of copper flashing at the hardware store. It is meant for roofs but it makes a cool backsplash. I used this in a kitchen with dark wood cabinets.
The copper glowed. It develops a patina over time which looks even better. Or you can polish it to keep it bright. Use a pair of tin snips to cut it. Be careful because the edges are like razors. I used small copper nails to hold it in place. It looked like a million dollars but cost fifty.
25. Adhesive Ledger Stone
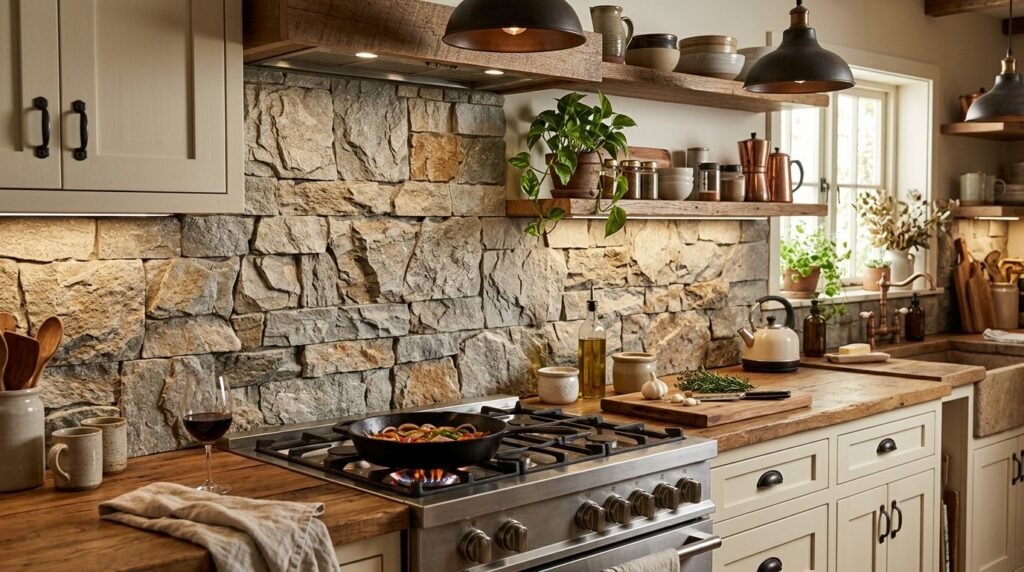
If you want a heavy stone look try adhesive ledger panels. These are made of thin slices of real stone. They are grouped together on a sticky back.
I used these in a mountain cabin. It made the kitchen feel very cozy. The stone has a lot of texture. One thing to know is that stone is hard to wipe. Use a vacuum brush to clean the dust off. In my experience this is the best way to get a rustic look without the weight of full stones.
Kitchen Backsplash Comparison Table

| Material | Cost | Skill Level | Durability |
| Vinyl Decals | Very Low | Beginner | Low |
| Smart Tiles | Medium | Beginner | High |
| Glass Mosaic | High | Medium | Very High |
| Beadboard | Low | Medium | Medium |
| Tin Panels | Medium | Beginner | High |
| Plywood | Low | Medium | Medium |
| Stone Ledger | High | Medium | High |
Recommended Tools for Success
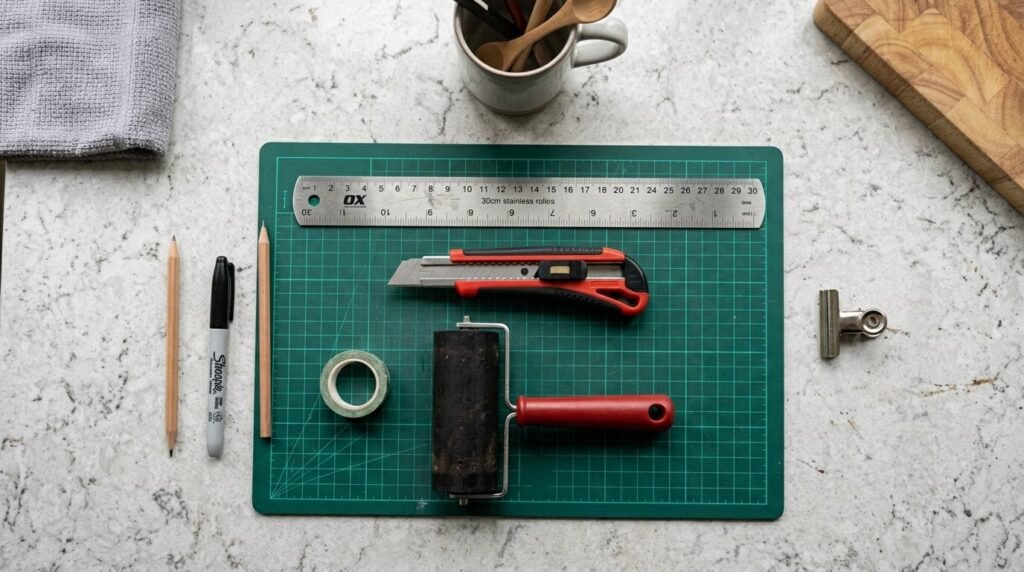
I have done many of these projects. I have a list of tools that make the job better. For any peel and stick job buy a good utility knife. Change the blades often. A dull blade rips the plastic. You need a long metal ruler. It helps you cut straight lines.
I also use a small rubber roller. After I stick a tile I roll over it. This pushes out air bubbles. It ensures the glue hits the wall everywhere. For vinyl decals a plastic squeegee is great. It smooths the sticker without scratching the print. Keep some rubbing alcohol handy. Cleaning the wall is the most vital step. If there is grease the tiles will fall off. I have seen it happen many times.
Pros and Cons of DIY Backsplash Hacks
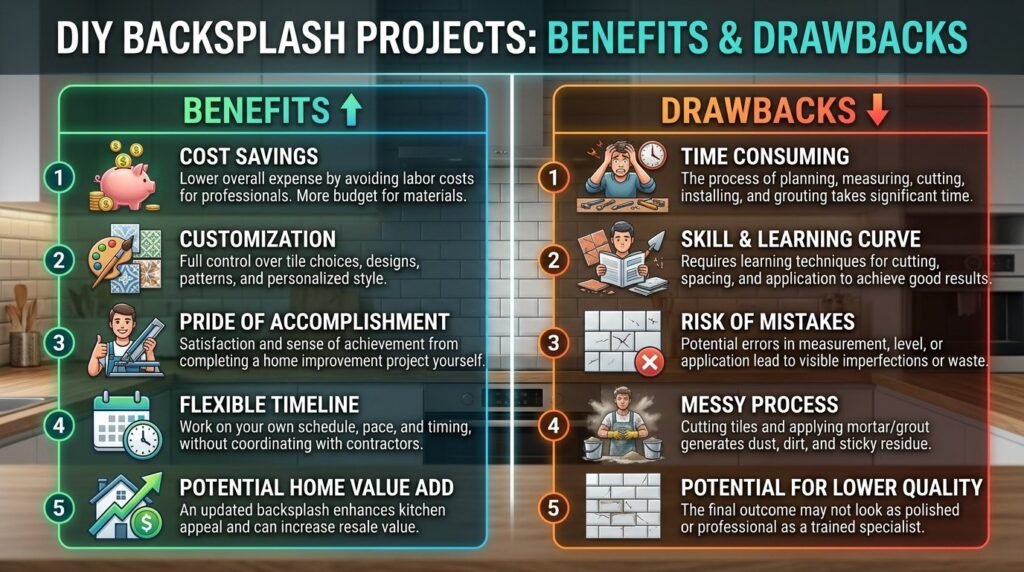
Pros
- You save a lot of money on labor.
- Most projects take less than a day.
- No heavy tools are needed.
- You can change the look easily later.
- It is great for rentals.
Cons
- Some materials don’t last as long as real tile.
- Cheap vinyl can look fake in bright light.
- Some adhesives are hard to remove from drywall.
- You must be very careful with heat near the stove.
FAQ
Is peel and stick backsplash a good idea for kitchens?
Yes it is a great idea for many people. It works well if you want a fast change. I’ve seen it last for over five years in some homes. It is much cheaper than real tile. It is perfect if you are on a budget or if you rent your home.
Can you put peel and stick tile over existing tile?
You can. This is one of my favorite hacks. The surface must be flat and very clean. If the old tile has a lot of texture the new tile might not stick well. I always use a degreaser first. Then I wipe it with alcohol. This makes the best bond.
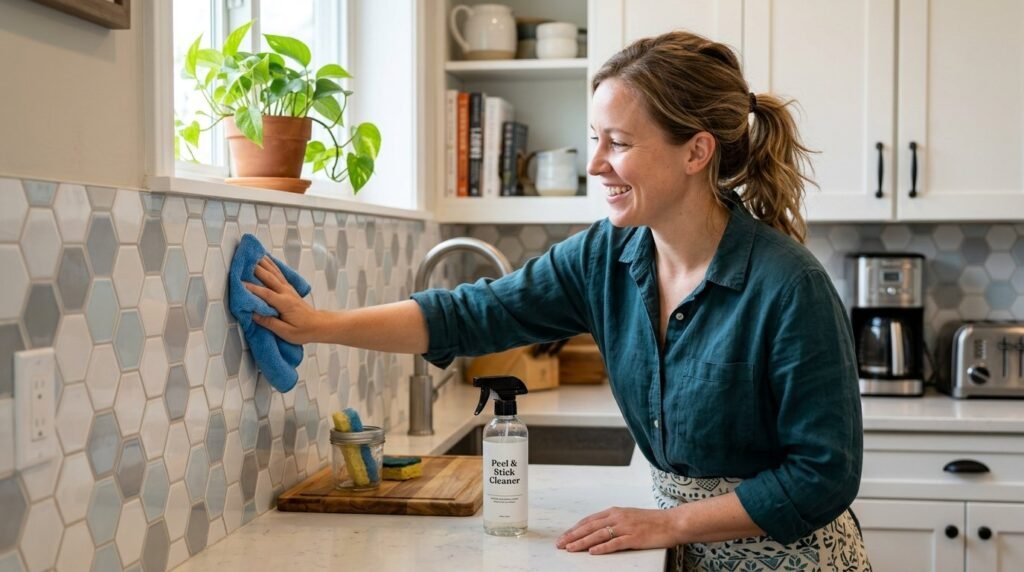
How do you clean a stick on backsplash?
Use a soft cloth and mild soap. Avoid harsh scrubbers. They can scratch the surface of vinyl or plastic tiles. For glass or metal you can use standard cleaners. I’ve noticed that microfiber cloths work best. They don’t leave streaks.
Does the heat from the stove melt peel and stick tiles?
Most high quality tiles are heat resistant. They are made for kitchens. But you should not let them touch the actual burner. I usually keep a few inches of space. Check the package for the heat rating. I have never had a tile melt in my experience.
How do I remove a peel and stick backsplash?
Use a hair dryer. The heat softens the glue. Start at a corner and pull slowly. If there is sticky residue left use a product like Goo Gone. It cleans the wall right up. I have done this in rentals and the wall stayed perfect.
Final Word
Making your kitchen look great does not have to be a big chore. You do not need a lot of money. These 25 hacks show that small changes make a big impact. I have seen these projects turn sad rooms into happy spaces. Whether you choose vinyl decals or real glass mosaics you can do this.
I remember when I finished my first peel and stick project. I stood back and could not believe I did it myself. It felt good. It made me want to cook more. It made me proud of my home. You can have that feeling too. Pick one hack and start this weekend. Your kitchen is waiting for its new look.

Meet Sloane Whitaker
Sloane Whitaker is the creative force and lead editor behind Vellora Interiors. With a background in architectural design and a passion for coastal-inspired living, Sloane specializes in bridging the gap between high-end luxury and everyday comfort.
After spending years curateing spaces in the Charleston market, she launched this platform to share her “elevated-yet-attainable” design philosophy. Whether she’s exploring the quiet simplicity of Japandi aesthetics or the storied charm of Craftsman architecture, Sloane’s goal is to help homeowners create spaces that feel both timeless and deeply personal.