Last week I stood in a client’s master bath where a $7,000 marble installation looked dated before the grout even dried. The homeowner felt crushed because the expensive stone felt heavy and dark rather than airy and modern. It reminded me how easily bathroom projects fail when we focus on the price of the material rather than the strategy of the layout. You do not need a massive budget to create a high end look. In my experience, the right placement of affordable porcelain often beats poorly planned luxury stone every single time. I have seen simple $2 tiles look like custom boutique installations just by changing the orientation. Are you tired of looking at stained grout and cracked ceramics? Do you want a space that feels like a luxury spa without the luxury price tag? This guide provides the exact blueprint for a successful flooring overhaul.
Executive Summary
This article outlines 24 specific strategies to modernize your space using various bathroom flooring options. You will find actionable advice on material selection, layout patterns, and cost saving measures that work for any size room. I cover everything from high performance wood look tile to eco friendly recycled glass tile. We look at realistic timelines where most projects take five to seven days from demolition to final sealing. You will see price breakdowns ranging from $3 per square foot for basic ceramics to $20 for specialty concrete tiles. We focus on moisture resistance and slip ratings to keep your family safe while looking stylish. This guide excludes structural subfloor repairs to focus purely on the aesthetic and functional tile layer.
1. Large Format Porcelain
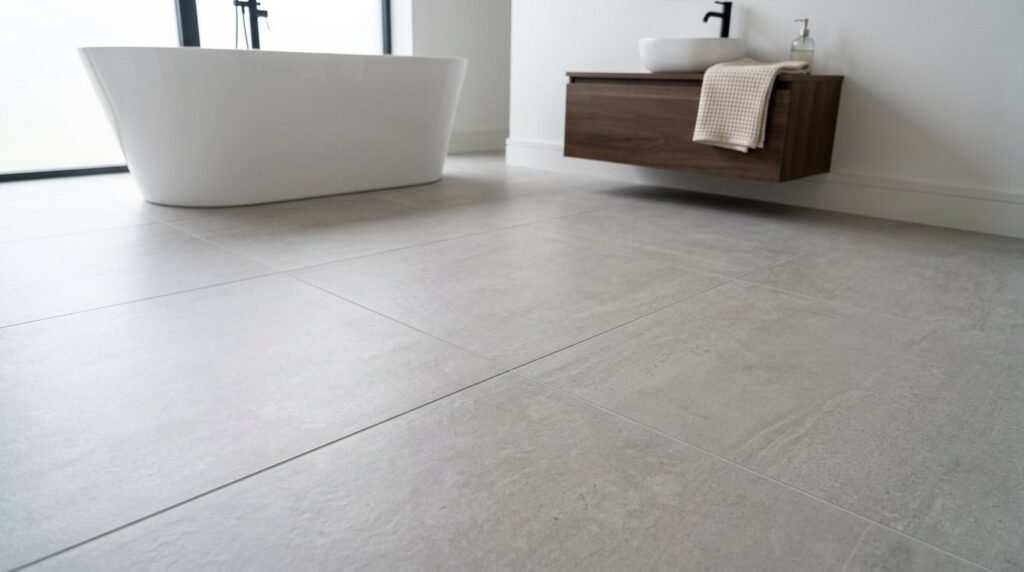
Installing 24 by 48 inch porcelain slabs creates a nearly seamless surface that mimics expensive stone slabs. I have noticed this specific hack makes tiny guest bathrooms feel significantly larger because there are fewer visual breaks. In my experience, brands like Daltile offer excellent rectified edges that allow for hairline grout lines. You should plan for a professional installer because these heavy pieces crack easily during the cutting process. Quality porcelain usually costs between $6 and $12 per square foot. One common mistake is skipping a floor leveling compound before installation. Without a perfectly flat subfloor, these large tiles will show “lippage” where one edge sits higher than the next.
2. Herringbone Marble Layout
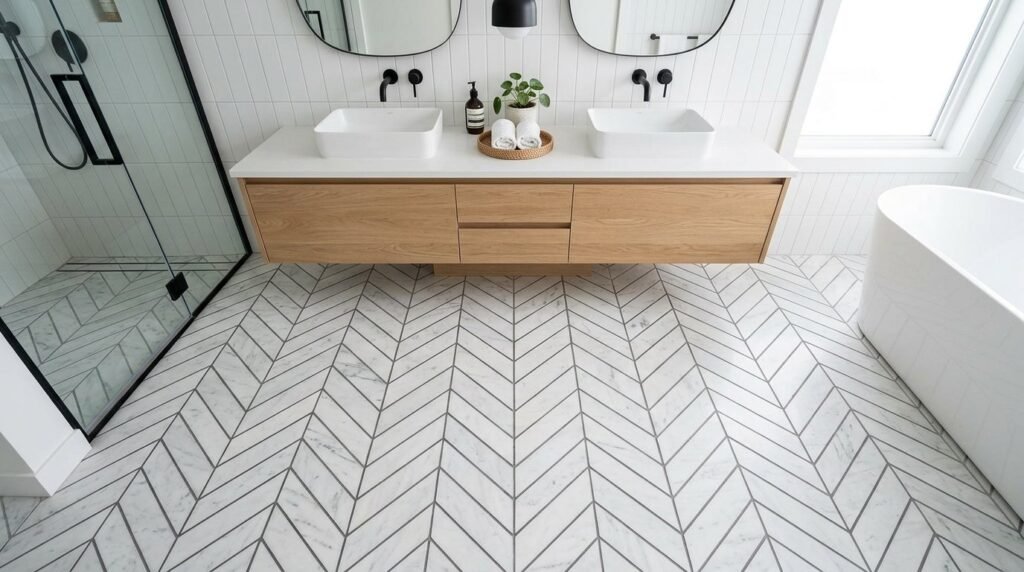
Classic white marble becomes instantly modern when you set it in a tight herringbone pattern rather than a standard grid. I often recommend 3 by 12 inch Carrara strips for this look to keep the scale balanced. You can find these at Floor and Decor for around $10 per square foot. To make this work, you must start the pattern from the center of the room to ensure symmetry. This layout takes about 30 percent longer to install due to the complex cuts at the walls. I have seen many DIY attempts fail because they didn’t use spacers on every single joint. A dark gray grout adds a crisp contemporary edge to the soft white stone.
3. Matte Black Hexagons
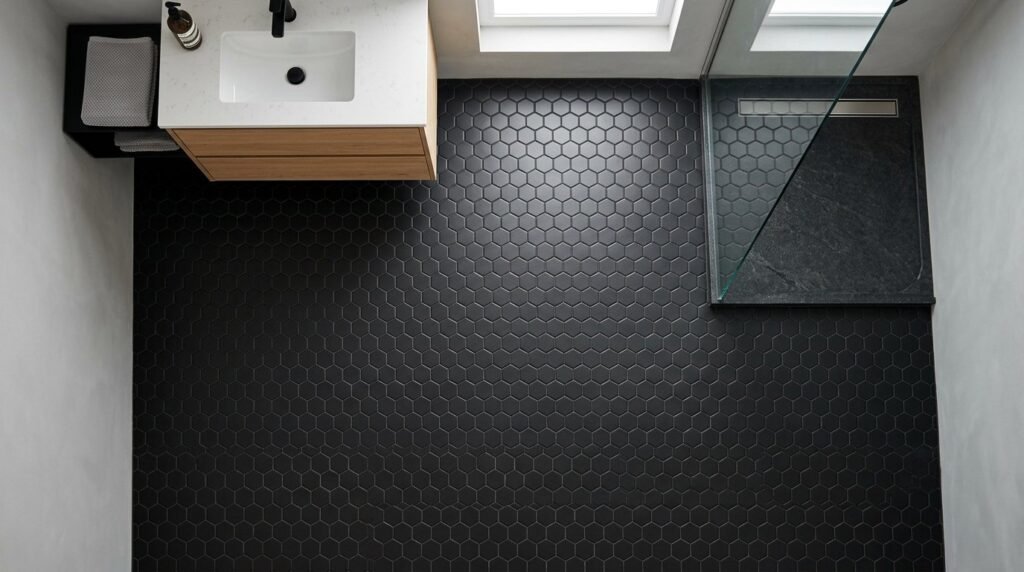
Small matte black hexagons provide a grounding element that hides dirt and hair exceptionally well. I suggest using a 2 inch hexagon for a vintage yet updated feel. MSI Surfaces produces a beautiful Nero Marquina look in porcelain that is much more durable than real marble. This option is very affordable at roughly $5 per square foot. You should use a matching black grout to create a solid textured plane. In my experience, matte finishes are much safer in wet areas than glossy ones. Be sure to seal the grout twice to prevent soap scum from turning the black to a dull gray over time.
4. Recycled Glass Tile
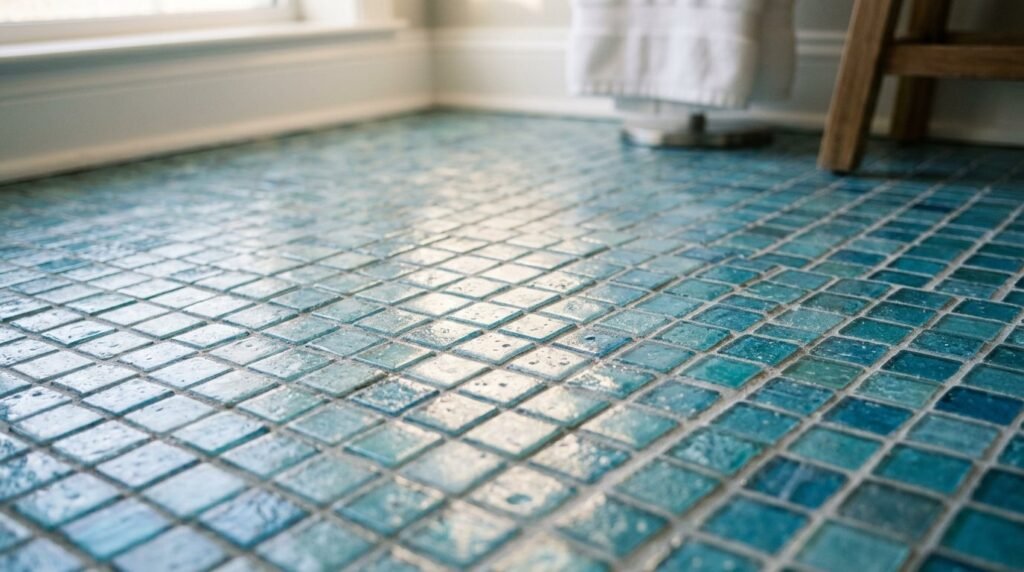
Using recycled glass tile is a sustainable way to bring light and depth into a dark bathroom. These tiles often come in mesh backed sheets which makes the installation process much faster for beginners. I love the frosted sea glass finishes from brands like Fireclay Tile for a soft modern aesthetic. These typically cost $15 to $25 per square foot but you only need a small amount for high impact. You must use a high bond thinset specifically rated for glass to prevent the tiles from popping off. A common mistake is using a sanded grout which can scratch the delicate glass surface during cleanup. Always opt for non sanded grout here.
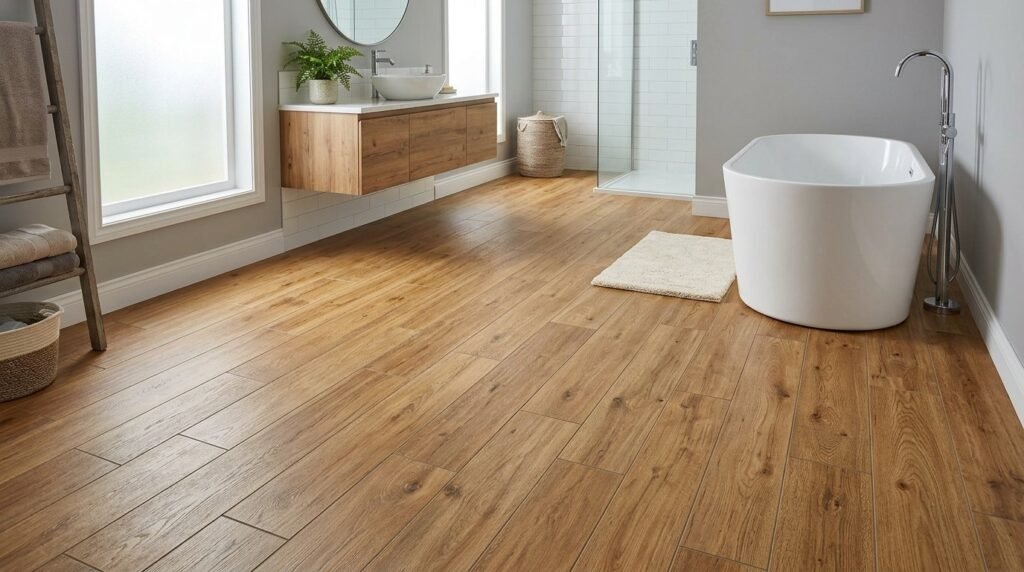
5. Faux Wood Porcelain
Modern tiles that look like hardwood offer the warmth of timber with the waterproof benefits of ceramic. I recommend choosing planks that are at least 36 inches long to avoid a “choppy” look on the floor. Brands like Mohawk provide realistic textures that even include fake knots and grain patterns. This material usually runs between $3 and $7 per square foot. You should stagger the joints by one third the length of the plank rather than half for the most natural appearance. I have seen these work beautifully when carried right into a curbless shower. Avoid using very wide grout lines as they ruin the illusion of real wood flooring.
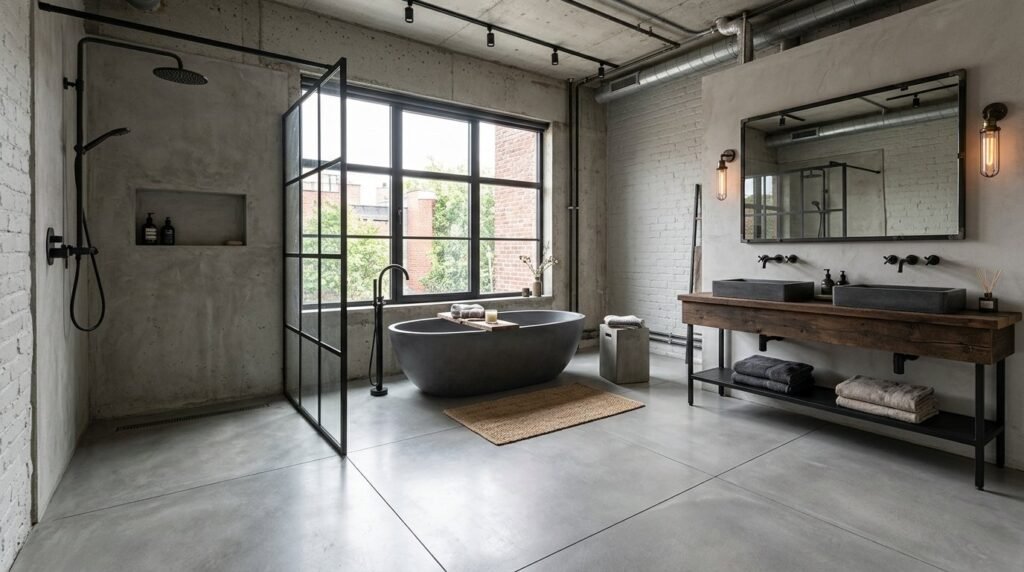
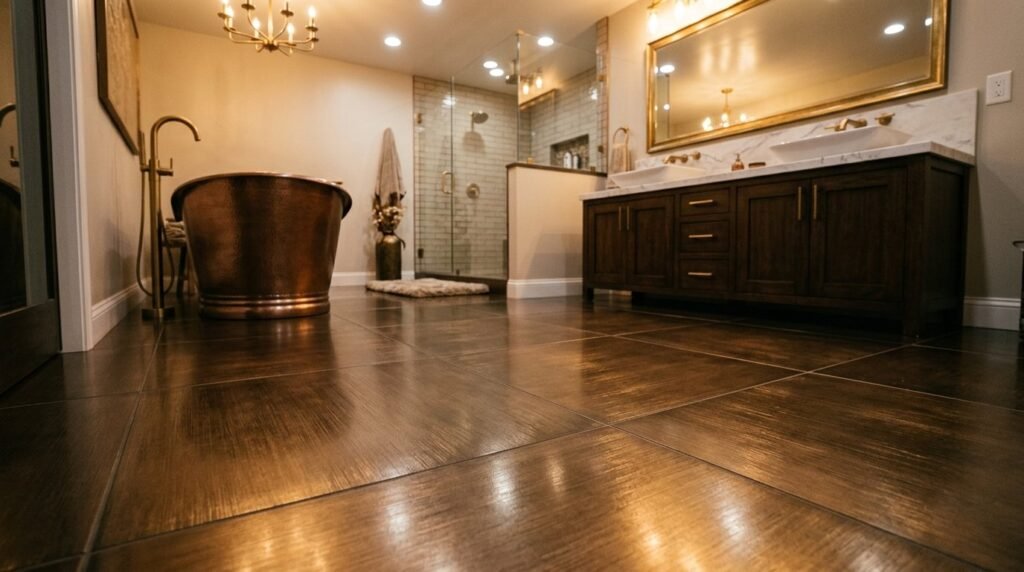
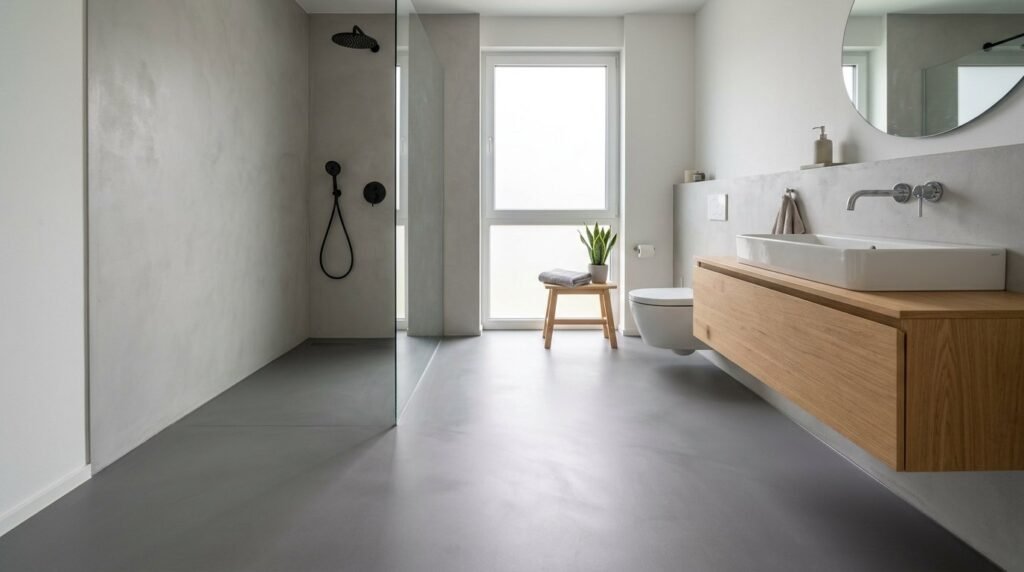
6. Polished Concrete Slabs
For an industrial or minimalist vibe, large concrete tiles offer a raw and honest aesthetic. These tiles are often thicker than standard porcelain so you must check your door clearances before buying. Real concrete is porous and requires a high quality penetrating sealer like those from Miracle Sealants. You can expect to pay $12 to $18 per square foot for authentic cement pieces. In my experience, these tiles develop a beautiful patina over time that adds character to a modern home. A common issue is the weight of the material which might require a reinforced subfloor in older houses. I suggest using a light gray grout that blends perfectly with the tile edge.
7. Terracotta Picket Tiles
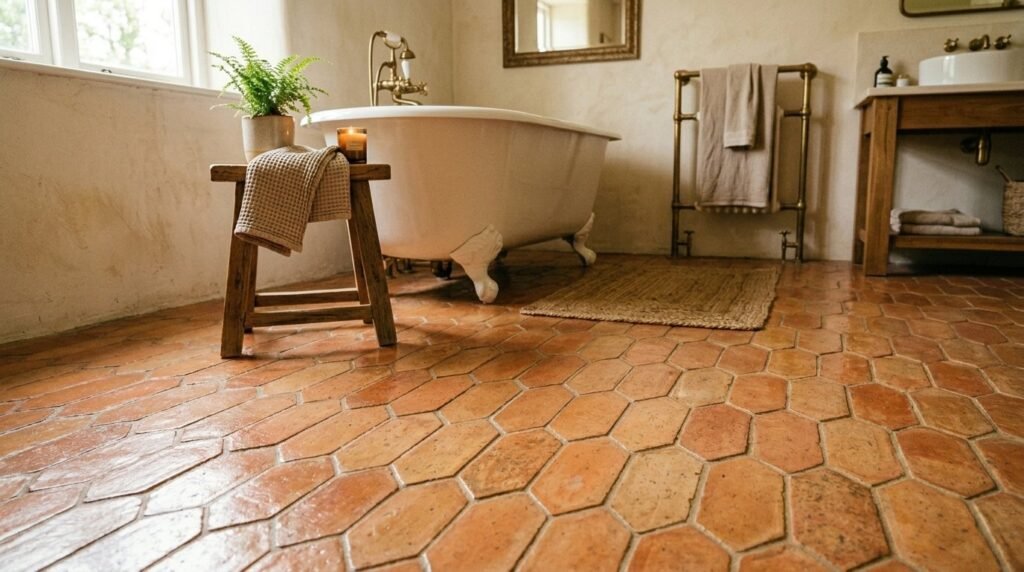
Traditional terracotta takes a modern turn when used in a picket or elongated hexagon shape. This earthy material brings a sense of history and warmth to an otherwise cold white bathroom. Brands like Cle Tile offer hand fired options that vary slightly in color for a custom look. These are mid range in price at about $12 per square foot. Because terracotta is very absorbent, you must seal the tiles before you apply any grout. If you skip this step, the grout pigment will permanently stain the face of the tile. I’ve noticed this look pairs perfectly with matte black plumbing fixtures.
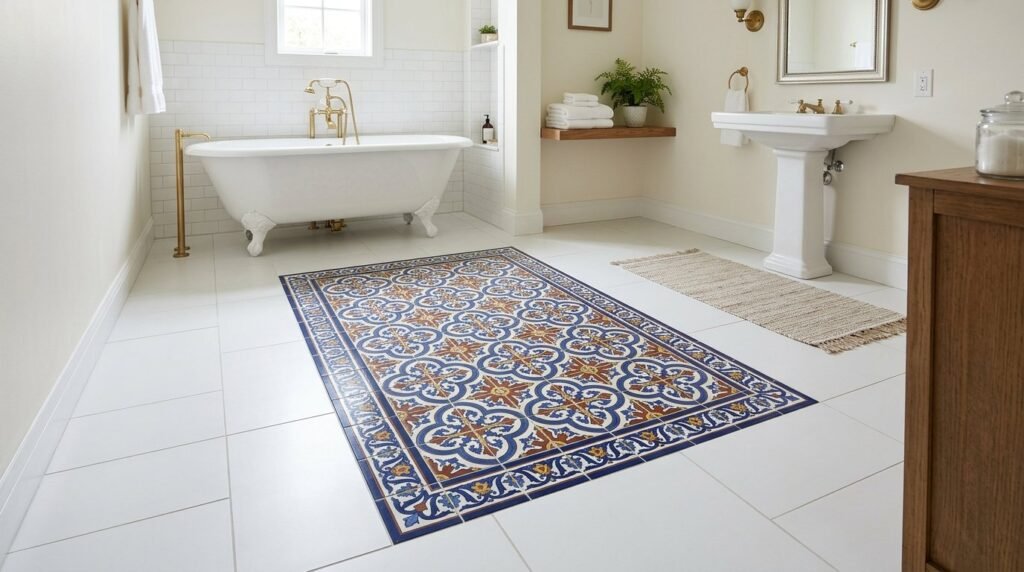
8. Geometric Cement Patterns
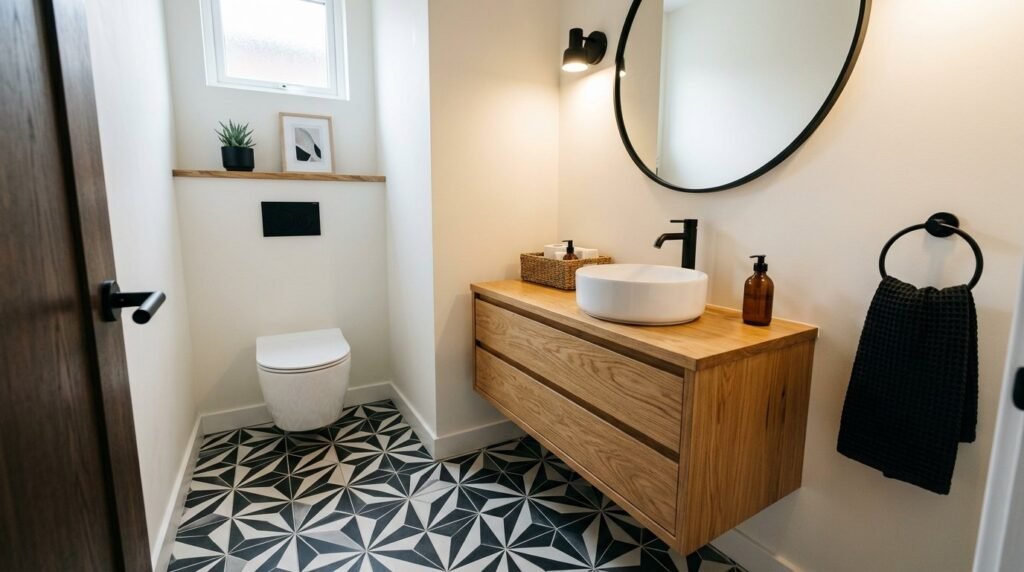
Bold geometric patterns in encaustic cement create a focal point that eliminates the need for expensive bathroom rugs. I often use these in small powder rooms where the floor can be the “star” of the design. You can find stunning patterns at Villa Lagoon Tile for roughly $15 per square foot. These tiles are handmade and offer a soft matte texture that feels great under bare feet. You should plan your layout carefully so the pattern is not cut off awkwardly at the vanity. A common mistake is using harsh chemical cleaners on cement which can eat away the natural pigments. Stick to pH neutral soaps for daily maintenance.
9. Penny Tile Borders
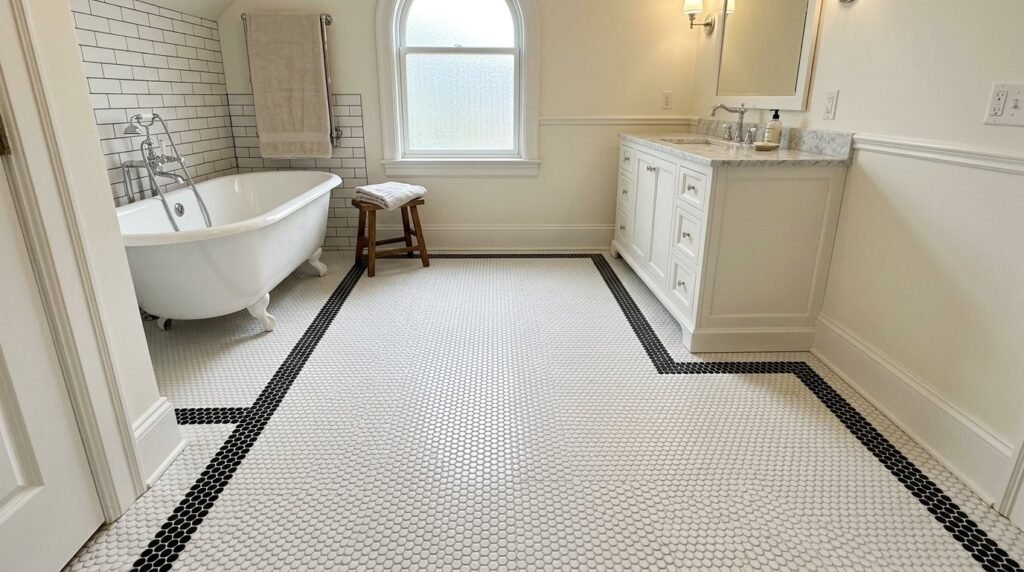
Creating a custom border with simple penny tiles is a low cost way to get a designer look. You can use white penny rounds for the main floor and a double row of black ones around the perimeter. This classic technique costs less than $4 per square foot but looks like a custom mosaic. I recommend using epoxy grout for penny tiles because there are so many grout lines to keep clean. In my experience, epoxy grout is much more resistant to stains and mold. Be aware that the mesh backing on penny tiles can sometimes be visible if the grout is too thin. Use a consistent trowel depth to keep the sheets level.
10. Stacked Vertical Subway
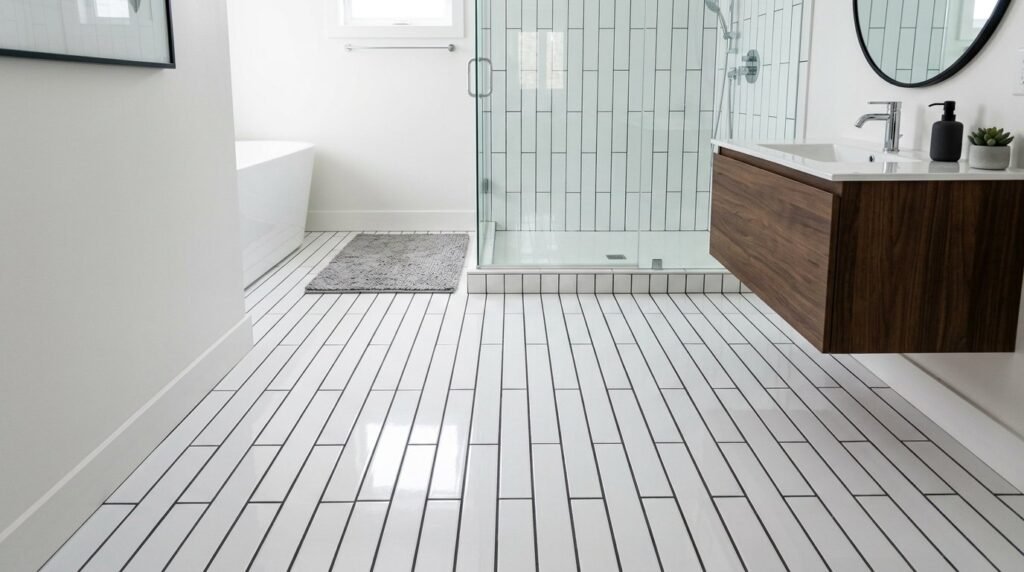
While subway tile is usually for walls, using it on the floor in a vertical stack creates a very modern linear look. I suggest a larger 4 by 12 inch subway tile to reduce the number of grout lines on the floor. This layout works best with a high contrast grout to highlight the straight lines. You can find quality ceramic floor rated subway tiles for under $3 per square foot. This is one of the most budget friendly ways to modernize a space. You must ensure the tile is rated for floor use as wall tiles are too thin and brittle. I have seen this work exceptionally well in narrow galley style bathrooms.
11. Natural Slate Scallops
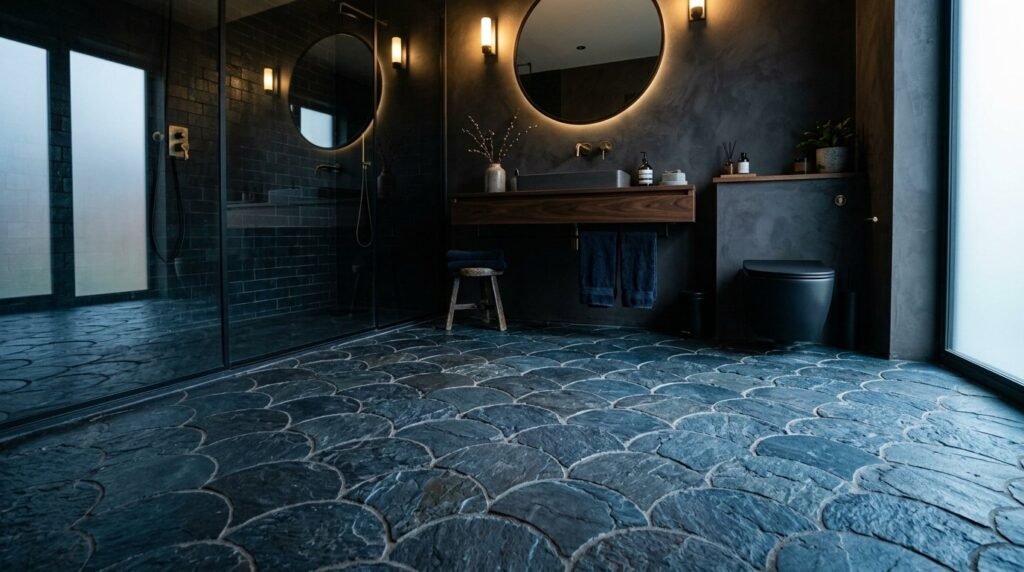
Slate in a fan or scallop shape offers a moody and textured floor that feels very high end. The natural cleft surface of slate provides excellent slip resistance for wet environments. MSI provides slate mosaics that are pre mounted on sheets for easier installation. These usually cost around $8 to $12 per square foot. You should expect some variation in thickness which gives the floor an organic handmade feel. I recommend using a color enhancing sealer to bring out the deep blues and greens in the stone. A common mistake is not cleaning the slate thoroughly before sealing which traps dust under the finish.
12. Basketweave Marble Inlay

A basketweave pattern using marble and small black dots is a timeless choice that fits perfectly in a modern traditional home. This look provides a lot of “grip” due to the frequent grout lines making it very safe. You can buy these pre assembled at Home Depot for about $12 per sheet. I have noticed this pattern hides uneven walls better than large tiles do. You should use a white or light silver grout to keep the look clean and bright. In my experience, this pattern works best when you have a simple vanity so the floor doesn’t compete with the furniture. Always check for consistent spacing between the sheets during the layout.
13. Checkerboard Terrazzo Mix
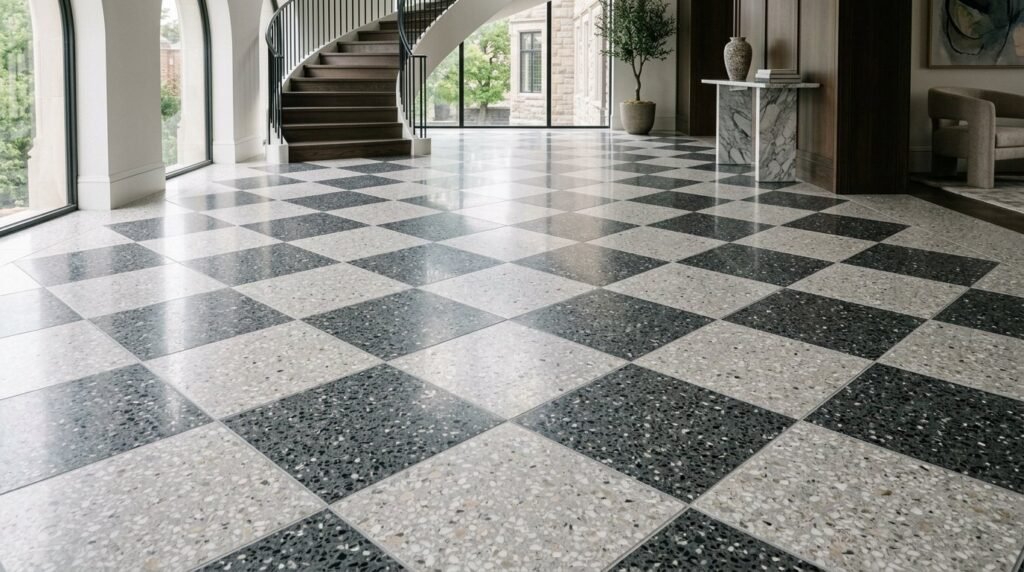
Updating the classic checkerboard with terrazzo tiles creates a playful yet sophisticated modern floor. I recommend using two different shades of gray terrazzo for a subtle tone on tone effect. Brands like Riad Tile offer cement based terrazzo that feels incredibly solid. This material costs about $15 per square foot. Terrazzo is great for bathrooms because the flecks of stone hide small debris and water spots. You must be careful with the tile thickness as terrazzo is often 5/8 of an inch thick. I suggest using a thin metal transition strip where the tile meets the hallway flooring for a clean finish.
14. Metallic Glaze Accents
Tiles with a subtle metallic glaze reflect light and add a touch of glamour to a windowless bathroom. I often use these as a “carpet” detail in the center of the room surrounded by plain porcelain. You can find metallic look tiles from Porcelanosa that look like brushed steel or copper. These are premium items at $20 per square foot but you only need a few boxes. You should avoid using these in high traffic areas as the metallic finish can wear down over many years. In my experience, pairing these with warm LED lighting makes the floor glow. Be sure to use a non abrasive grout to protect the shiny surface.
15. Pebblestone Shower Blending
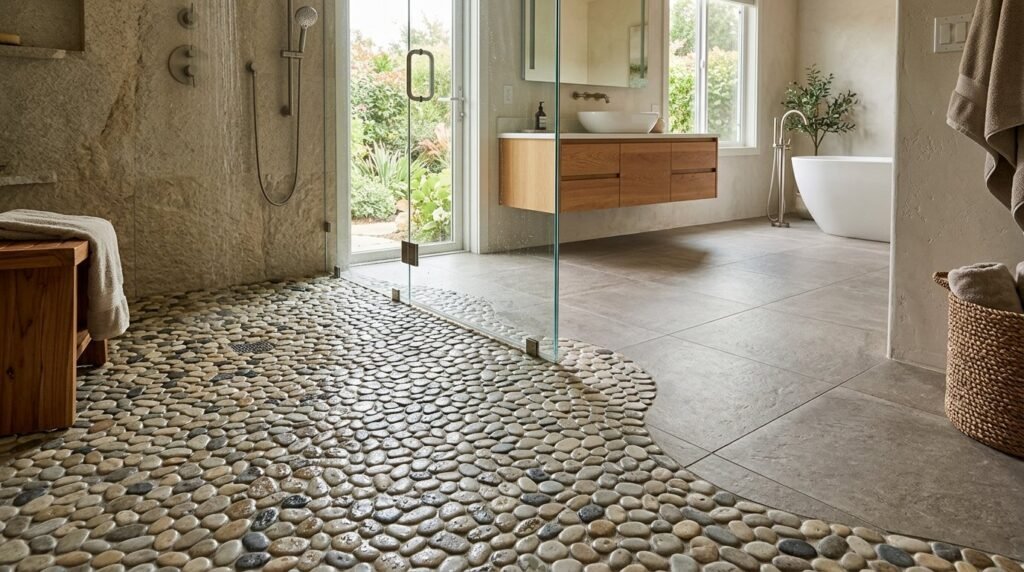
Running natural pebble tiles from the shower floor out into the main bathroom creates a spa like transition. I love how this feels like a foot massage every morning. These pebbles usually come on 12 by 12 inch sheets for around $10 each. You should choose “flat” pebbles rather than rounded ones to make the floor easier to walk on and clean. A common mistake is using too much grout which buries the beautiful stones. Use a damp sponge to pull back the grout until the tops of the stones are fully exposed. This look works best with organic wood vanities and greenery.
16. Large Scale Chevrons
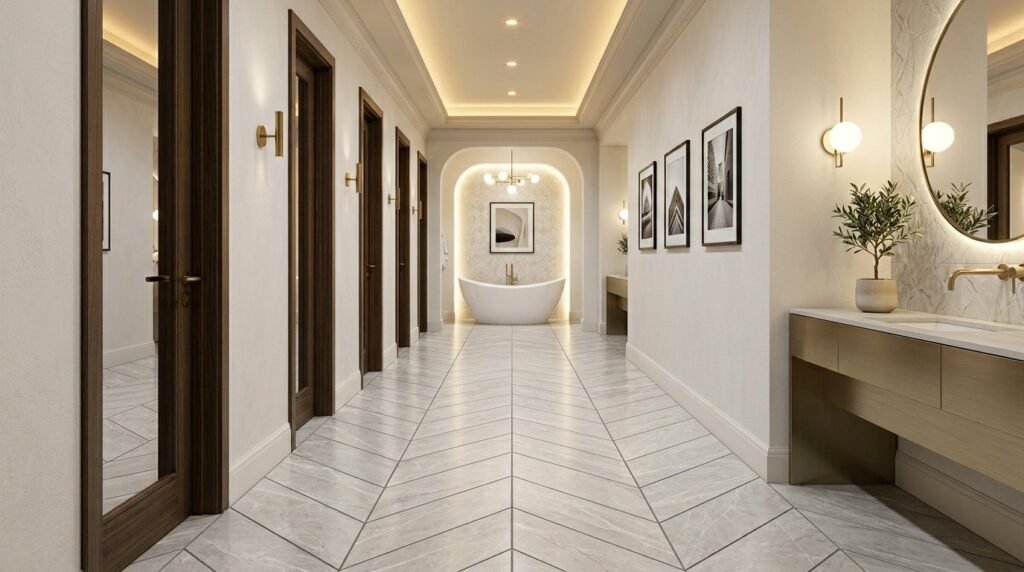
Chevron patterns using large porcelain planks provide a sense of movement and direction in the room. This is different from herringbone because the ends are cut at an angle to create a perfect “V” shape. Many manufacturers now sell “chevron kits” to make this complex layout easier for installers. Expect to pay a bit more for labor due to the precise alignment required. I have seen this work beautifully in long master bathrooms to lead the eye toward a freestanding tub. You should use a grout color that is one shade lighter than the tile for a soft look. Avoid this pattern in very small rooms where the “V” shape gets cut off too quickly.
17. Moroccan Encaustic Style
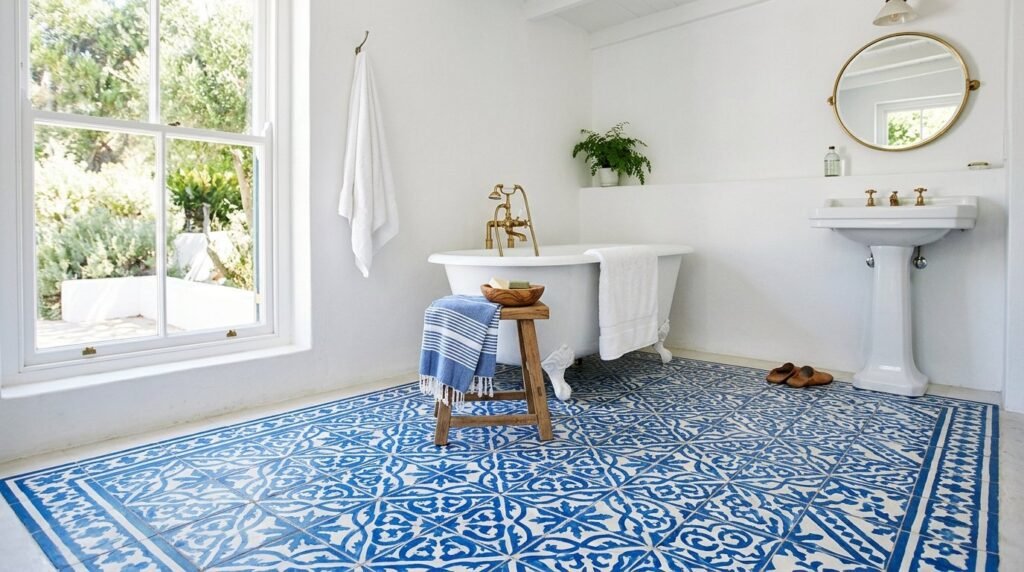
Hand painted Moroccan style tiles bring vibrant energy and pattern to a modern white bathroom. These tiles often feature intricate stars or floral motifs in blue and white. You can find authentic options at Zia Tile for $15 to $20 per square foot. In my experience, these tiles are the best way to hide a floor that isn’t perfectly level because the busy pattern masks imperfections. You should seal these tiles before and after grouting to protect the delicate pigments. A common mistake is using a dark grout that bleeds into the white parts of the pattern. Use a neutral light gray grout instead.
18. High Contrast Grout
One of the cheapest hacks for a modern refresh is using a high contrast grout with basic white tiles. For example, using a deep charcoal grout with a $1 per square foot white square tile looks intentional and architectural. This makes the grid pattern the main feature of the design. You can buy pre mixed grout from Mapei for about $30 a bucket. I have noticed this is much easier to keep looking “new” than white grout which yellows over time. You should make sure your tile lines are perfectly straight as the contrast will highlight any mistakes. This is a great weekend project for a DIYer on a tight budget.
19. Glossy Navy Rectangles
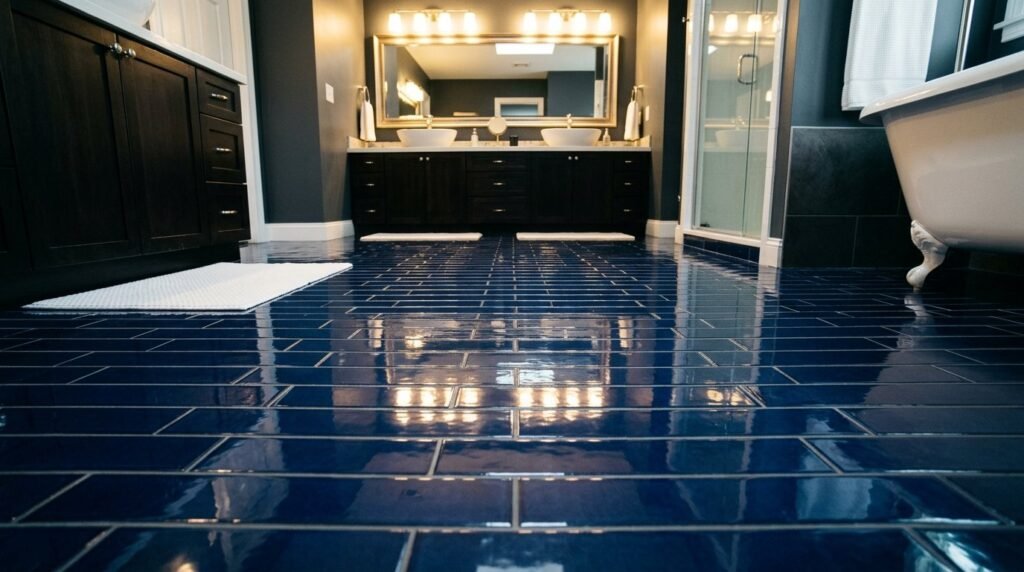
Using deep navy blue tiles with a high gloss finish adds a dramatic and moody feel to a modern bathroom. I suggest a 4 by 8 inch format laid in a brick pattern. The gloss reflects the vanity lights and makes a small room feel deeper. You can find beautiful navy options at Bedrosians Tile and Stone. These usually cost around $6 per square foot. You must be diligent about squeegeeing the floor after showers to prevent water spots from showing on the dark gloss. In my experience, pairing navy floors with gold or brass hardware creates a very luxurious aesthetic. Use a matching navy grout for a seamless look.
20. Limestone Luxury Planks
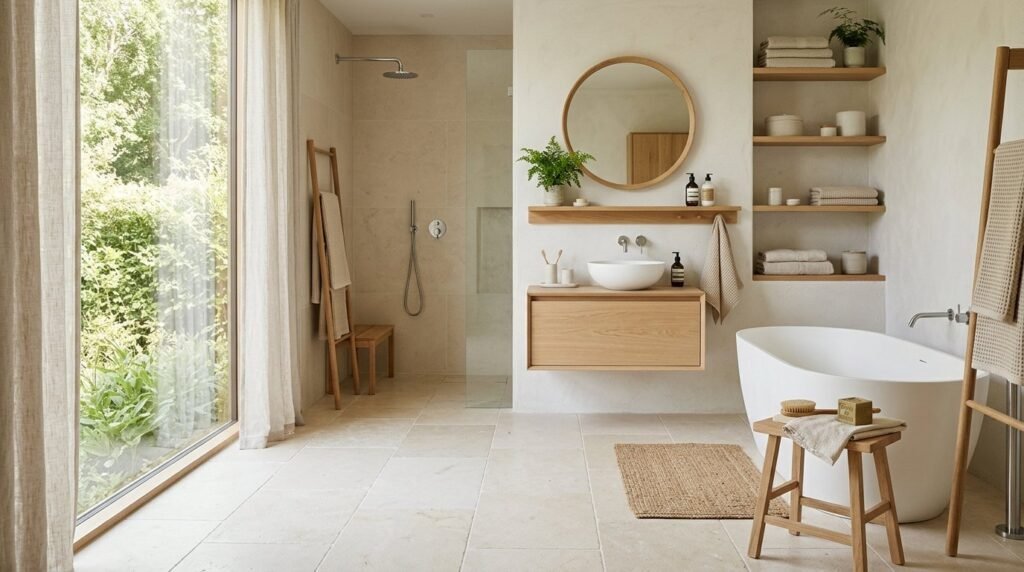
Limestone offers a soft and chalky texture that is perfect for a “California Modern” or “Scandi” style bathroom. I recommend using large 12 by 24 inch planks in a light beige or cream color. Limestone is a natural stone so it stays cool in the summer but works perfectly with radiant floor heating systems. You can expect to pay $10 to $15 per square foot for quality limestone. You must be aware that limestone is soft and can scratch if you drag heavy furniture across it. I suggest sealing it every year to maintain its stain resistance. A common mistake is using acidic cleaners like vinegar which will etch the stone surface.
21. Abstract Murals
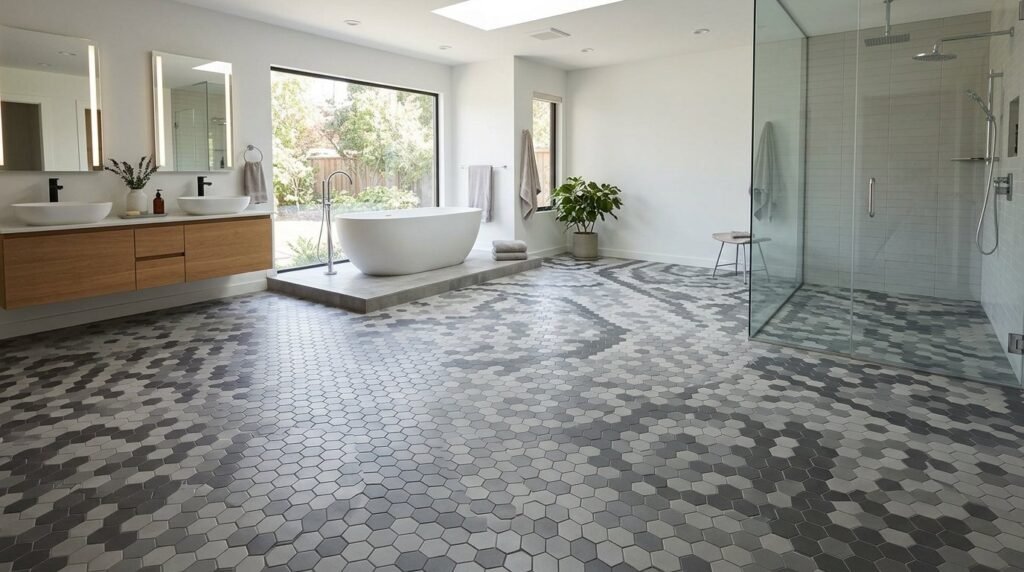
Creating an abstract shape on the floor using different colored tiles is a high end custom hack. You might use three shades of gray to create a “shadow” effect or a random “pixelated” look. This requires a very detailed plan and a patient installer. I recommend using the same tile series in different colors to ensure the thickness is identical. This allows for a perfectly flat floor despite the color changes. In my experience, this works best in large open bathrooms where the “art” can be seen from a distance. You should use a neutral grout that doesn’t distract from the tile colors.
22. Framed Rug Effects
You can use a decorative pattern tile in the center of the room and “frame” it with a solid border tile to mimic a rug. This defines the space and adds a layer of luxury without the tripping hazard of a real rug. I often use a 24 by 48 inch section of pattern tile directly in front of the vanity. You can find beautiful “deco” tiles that match solid porcelain series for a perfect fit. This hack saves money because you only buy a small amount of the expensive pattern tile. You should ensure the transition between the two tiles is perfectly flush. I have seen this work well to anchor a floating vanity.
23. Seamless Resin Overlays
For a truly ultra modern and grout free floor, a waterproof resin overlay can be applied directly over old tile. This creates a solid matte or gloss surface that is incredibly easy to clean. Brands like Semco provide professional grade systems for this. While the material is affordable, the labor is specialized and can be expensive. In my experience, this is the best solution for people who absolutely hate cleaning grout lines. You should be sure the existing tile is well bonded to the floor before applying the resin. A common mistake is not prepping the surface enough which leads to peeling later on.
24. Mixed Material Transitions
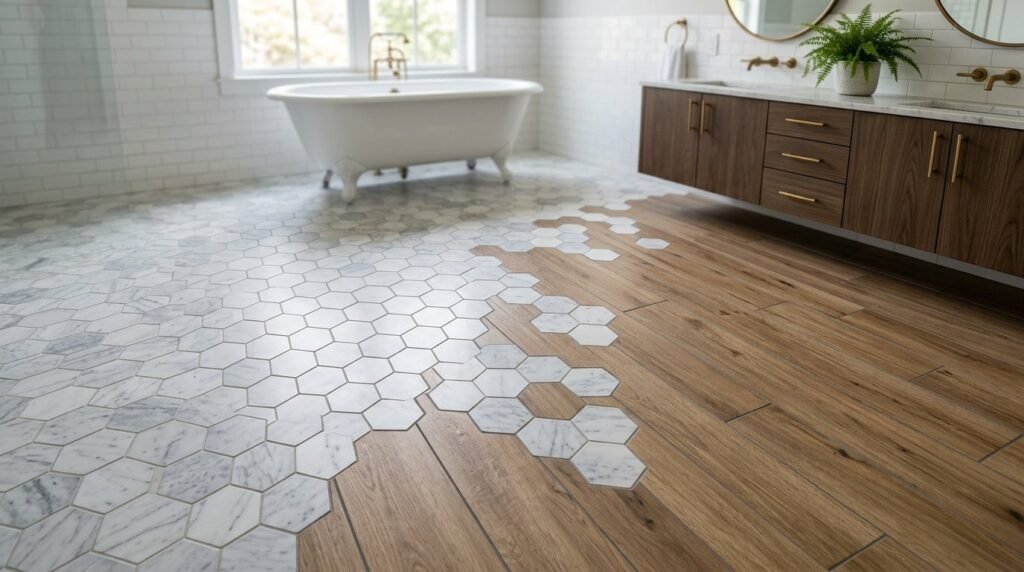
Mixing two different floor materials like wood look tile and hex tiles creates a custom designer transition. I love “bleeding” hex tiles into a wood look floor where the shower meets the main area. This requires precise cutting and a steady hand with the wet saw. You can find tutorials on how to notch the wood planks to fit the hexagonal shapes. This technique makes a bathroom feel like a high end hotel. You should use a flexible silicone caulk at the joint between different materials to allow for slight expansion. In my experience, this is the ultimate way to show off your design skills.
Frequently Asked Questions
What is the most durable tile for a high traffic bathroom floor?
Porcelain tile is widely considered the most durable option for bathrooms. It is fired at much higher temperatures than standard ceramic which makes it denser and less porous. I have seen porcelain withstand dropped heavy glass bottles and years of heavy foot traffic without scratching. In my experience, choosing a through body porcelain means that if the tile does chip the color goes all the way through so it is less noticeable. Brands like MSI and Daltile offer hundreds of styles that are rated for both residential and commercial use. You should look for a PEI rating of 4 or 5 for the best longevity.
How much does it cost to tile a small bathroom floor?
For a standard 50 square foot bathroom you can expect to spend between $500 and $1,500 for a professional installation. This includes about $200 to $400 for mid range tile and another $600 to $900 for labor and supplies like thinset and grout. If you choose a complex pattern like herringbone or chevron the labor costs will likely increase by 20 percent. In my experience, doing the demolition yourself can save you about $200 in labor costs. Always factor in an extra 10 to 15 percent for tile waste and cuts to ensure you don’t run out mid project.
Are wood look tiles actually waterproof for a bathroom?
Yes, wood look porcelain and ceramic tiles are 100 percent waterproof. Unlike real hardwood which will warp and rot when exposed to bathroom humidity and splashes, these tiles are impervious to water. I have installed these in many master suites where the client wanted the warmth of wood without the maintenance. They are also much more scratch resistant than real wood which is great if you have pets. One tip I always give is to use a grout color that matches the darkest grain in the tile to make the joints disappear.
How do I prevent my new bathroom tile floor from being slippery?
You should always check the DCOF rating of a tile before purchasing it for a bathroom floor. This stands for Dynamic Coefficient of Friction and you want a rating of 0.42 or higher for wet areas. I’ve noticed that smaller tiles like penny rounds or hexagons are naturally more slip resistant because they have more grout lines which act as “tread” for your feet. Matte and textured finishes are also much safer than high gloss polished tiles. If you love the look of a polished tile consider using a slip resistant treatment like SlipDoctors to increase the grip without changing the appearance.
Is it possible to tile over an existing tile floor to save time?
You can tile over old tile but only if the original floor is perfectly flat and very well bonded to the subfloor. I have done this successfully using a specialized primer like Eco Prim Grip which helps the new thinset stick to the old glossy surface. However, you must be careful about the added height as it can create a “lip” at the doorway and might require you to trim the bottom of your bathroom door. If the old tile is cracked or sounding “hollow” when you tap it you must remove it entirely. In my experience, a fresh start is usually worth the extra day of demolition work.
What grout color is best for hiding dirt on a bathroom floor?
Medium to dark gray grouts are the best for masking the inevitable dirt and grime that accumulates on a floor. I advise against white grout for flooring because it will inevitably turn a dingy yellow or brown within a year regardless of how much you scrub. If you have a white tile try a silver or “driftwood” color which provides a clean look without the high maintenance. In my experience, power grouts like Mapei Ultracolor Plus FA are excellent because they are color consistent and don’t require sealing. Always do a small test patch of grout to see the final dry color before doing the whole floor.
In my experience, a bathroom floor is the one place where you can truly experiment with bold design without overwhelming the rest of your home. Whether you choose the timeless appeal of marble or the modern edge of concrete slabs, these hacks show that a stunning refresh is within reach. I have seen how a simple change in tile layout can make a person fall in love with their home all over again. I encourage you to pick one of these ideas and start planning your project this weekend. Don’t forget to save this guide to your Pinterest board for easy reference when you head to the tile shop.

Sloane Whitaker is the Editor-in-Chief at Home Wall Trends, leading editorial direction with over a decade of experience in residential interior design and home styling. Her specialty is space planning and layout, the unglamorous fundamentals that make a beautiful room actually function. A graduate of the New York School of Interior Design, Sloane has styled over 200 client homes before turning her focus to digital publishing. Her editorial standard: “If a reader can’t picture themselves doing it on a Saturday afternoon, we haven’t explained it well enough.”